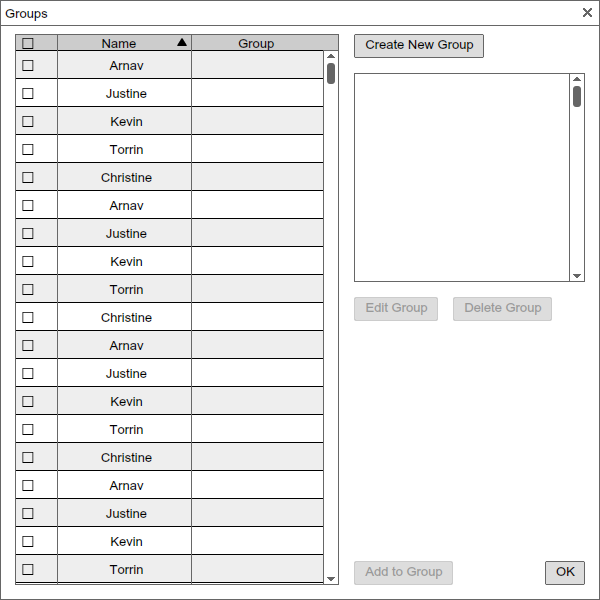
This scenario demonstrates a user creating a group. Groups are used to form teams among students for collaborative work, and the assignment of grades will be distributed among all members of a group.
To create a group, the user selects Add Group from the
Tools drop down menu, then the system displays the dialog shown in
Figure 1.

Figure 1: Adding a Group.
From here, the user can check students who wish to form a group then click on Create New Group to create a new group, and another dialog window pops up shown in Figure 2.
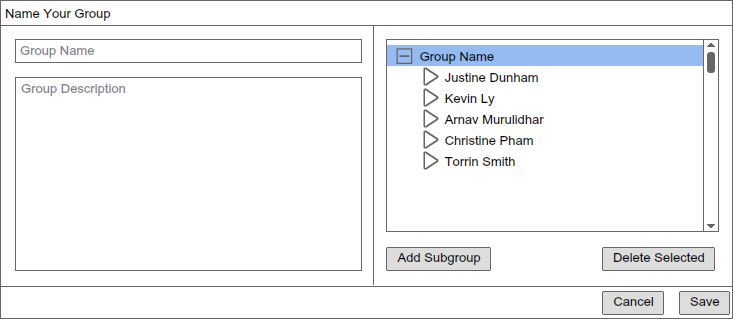
Figure 2: Naming a Group.
Subgroups are possible within student groups in order to provide an organization of groups. From the image above in Figure X, the user can decide to add subgroups by clicking Add Subgroup, then naming that subgroup. Below is an example of 2 subgroups that were made with names Girls and Guys in Figure 3.
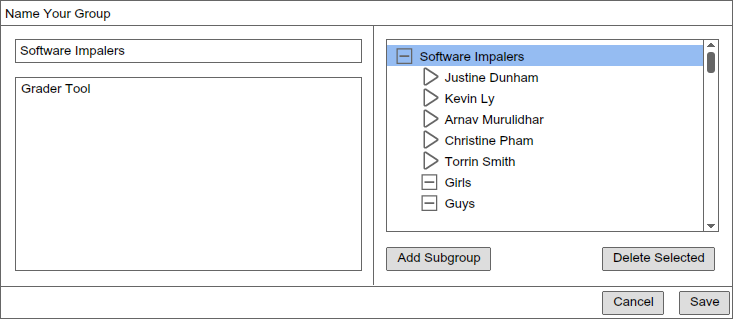
Figure 3: Adding Subgroups.
Similar to a file explorer, the user can drag members into the subgroups. The members are then a member of the subgroup. An example is shown in Figure 4 below.
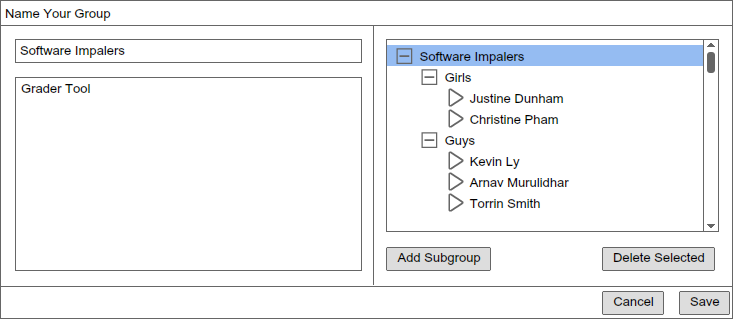
Figure 4 Assigning Subgroups.
Upon saving, the group is now reflected in Managing Groups. An example is given below following additional Group creations.
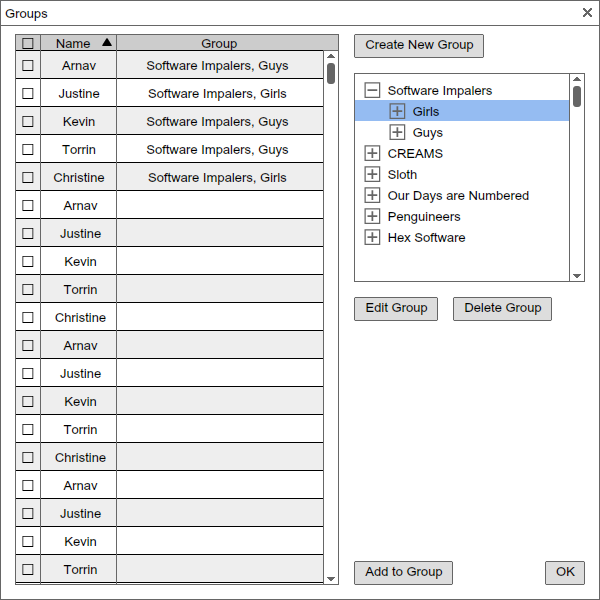
Figure 5: Saved Groups.

Figure 6: Group Names.