This scenario shows the user how to sort the columns of the spreadsheet to more easily access student fields and observe the range of scores a graded item received. To fully demonstrate sorting, the examples below will feature sample data that will illustrate sorting.
Anytime the user views the spreadsheet, the spreadsheet's rows are already
sorted to the last configuration the user set to. By default, the spreadsheet
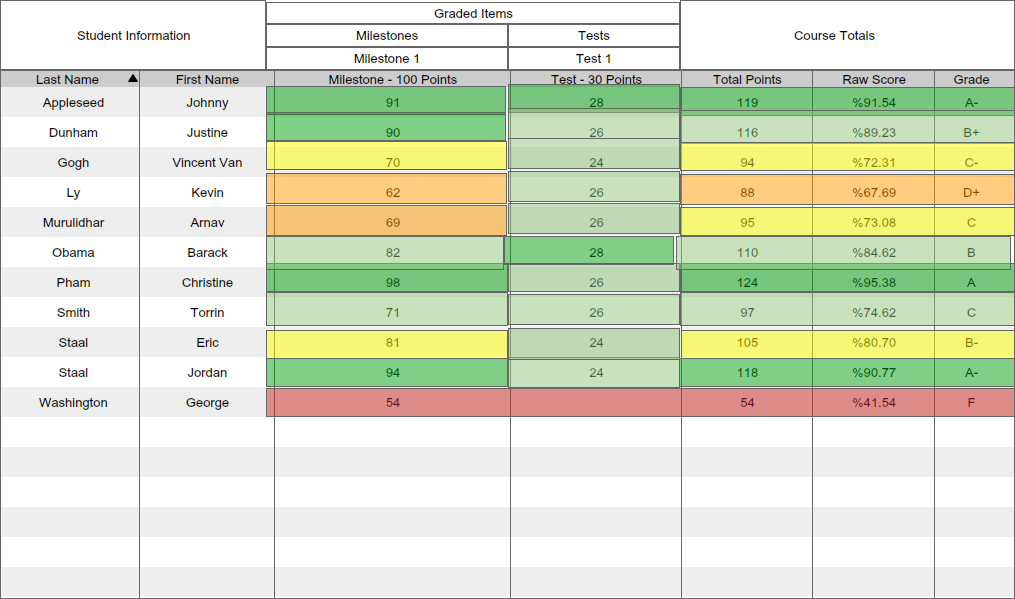
is ascendingly sorted alphabetically by last name as shown in Figure 1.
Figure 1: Ascending Sort by Last Name.
The top most row contains the student with the last name closest to "a", then each subsequent row contains another student who has the next last name closest to "a", and so forth. Students with the same last name are resolved by sorting their first name. Notice that next to Last Name in the column header, there is a black triangle pointed upwards. The upward triangle signifies an ascending sort. From here, the user can click on Last Name to change the ascending sort into a descending sort, and the triangle will point downwards shown in Figure 2.
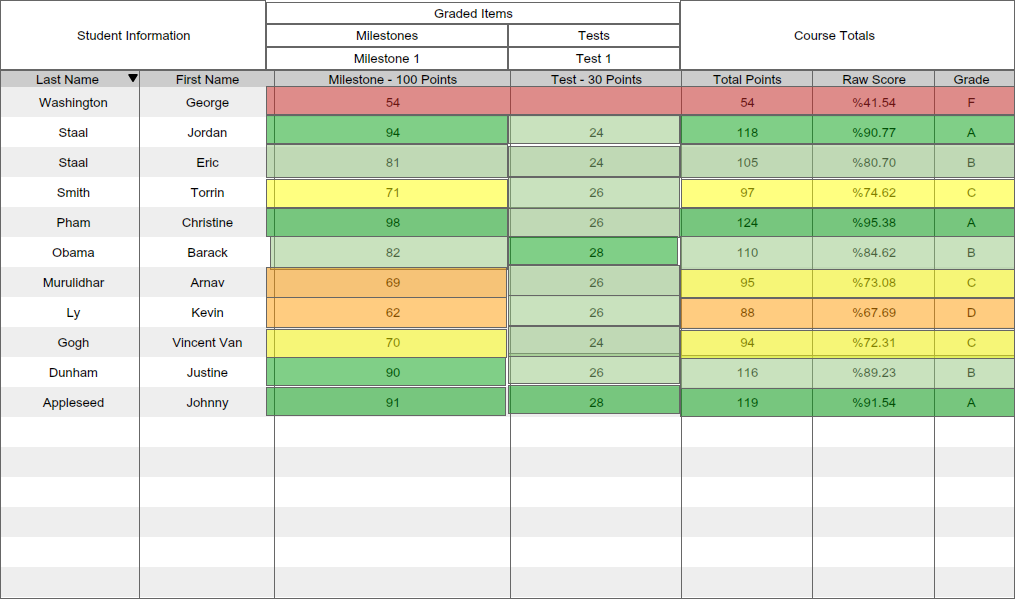
Figure 2: Descending Sort by Last Name.
Clicking the Last Name header again will retoggle the sort back to an ascending sort. Other columns can be toggled to be on sort, such as the Group column, and upon the first click, it will initially perform an ascending sort shown in Figure 3.

Figure 3: Ascending Sort by Group.
Graded item scores can also be sorted. Graded items without entries are treated as if the score assigned is a zero. An ascending sort on graded items is shown in Figure 4.
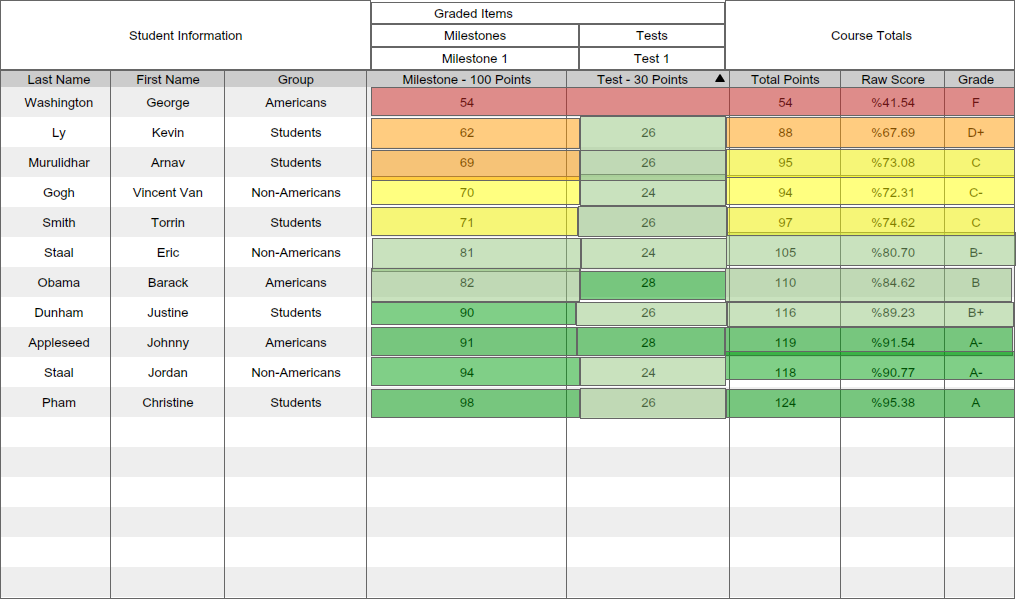
Figure 4: Ascending Sort by Graded Item.
Similarly, a sort on Grade will sort the students based on total class grades. A descending sort is shown in Figure 5.
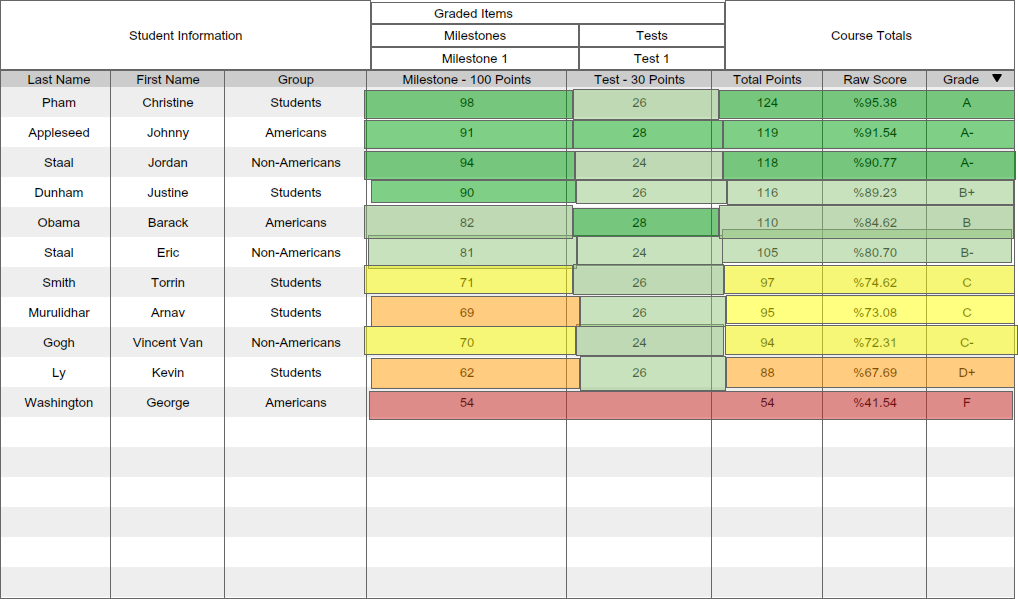
Figure 5: Descending Sort by Grade.
More columns can be toggled to be sorted by turning on view for a particular
column. Information on how to toggle column views can be found
here.