The scenario in this section illustrates the administrative function of adding an instructor record. An instructor record contains personal information about a instructor including Name, Title, Alias, Office Number, Phone Number, WTUs, EmplID, and Notes.
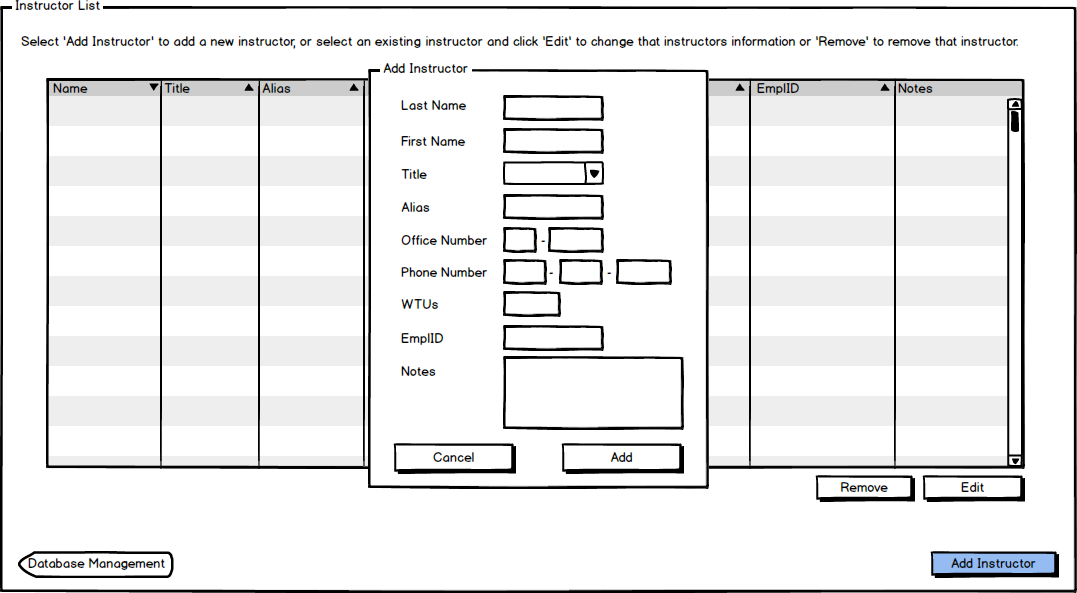
When the user selects Add Instructor, the dialogue in Figure 1 is shown.

Figure 1: Add instructor dialogue when empty.
The user fills in the necessary information, beginning with the Last Name and First Name which are one line strings with the instructor's last and first names. If the admin wants to enter a middle initial, they will input this after the instructor's first name.
The Title field is a text string that categorizes what level of teacher each instructor is. The options are professor, lecturer, and TA which mean:
The Alias is a one line string that contains the instructor's Cal Poly username, generally consisting of first initial and last name.
The Office Number consists of two integers. The first representing the building number and the second representing the office number.
The Phone Number field consists of three integers representing the area code, first three digits, and last three digits.
WTUs is an integer representing the "work time units" that an instructor teaches. For full time instructors this is generally 12 WTUs, with part time instructors having less. If an instructor is not currently teaching but the admin wants to leave them in the database, then their WTUs will be changed to 0.
The EmplID is an integer representing the instructor's Cal Poly Employee ID number.
Notes is an optional text field where the admin can input general information to assist informally in the scheduling process.
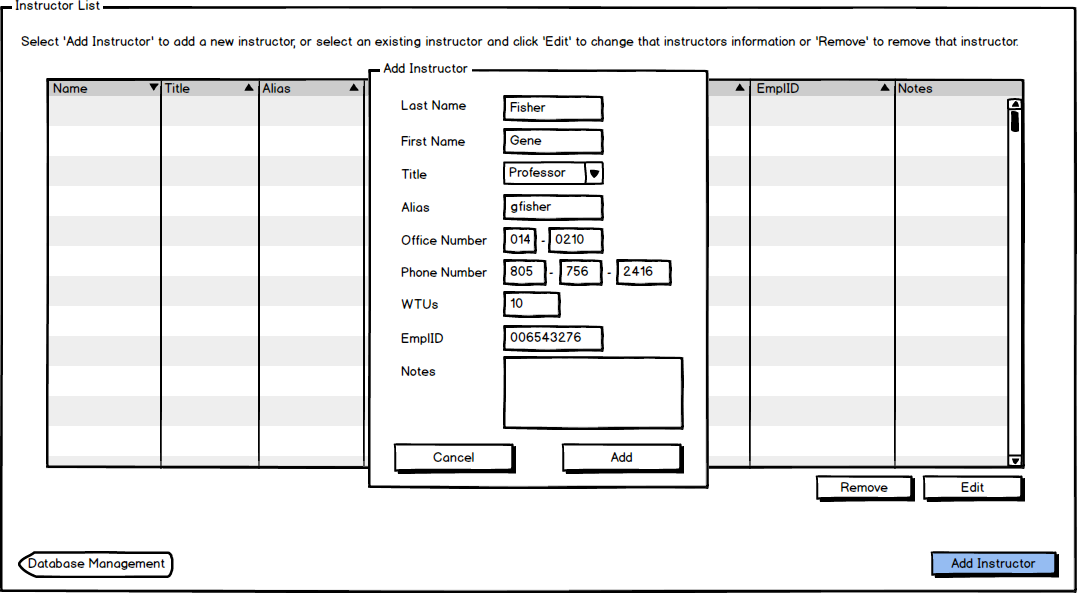
After the dialogue appears on the screen, the admin enters the information. Figure 2 shows the result of the admin having filled in information for a new instructor "Gene Fisher".

Figure 2: Add instructor dialogue with required fields filled in.
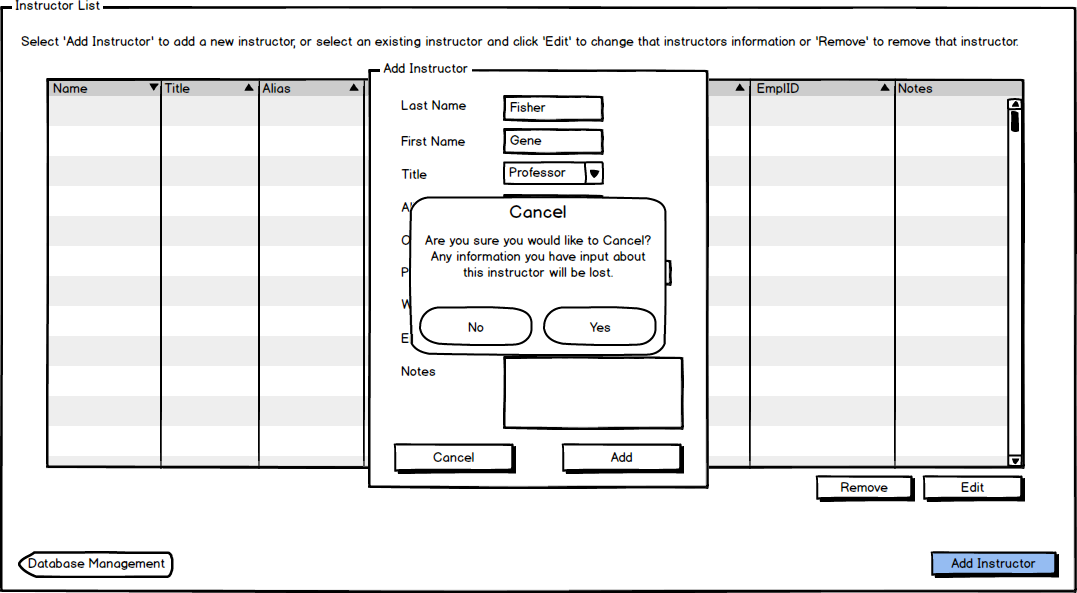
When the user clicks Cancel an alert appears as shown in Figure 3 below.

Figure 3: Clicking Cancel from the add instructor dialogue
When the user clicks No, the alert disappears and Figure 2 shows again. When the user clicks Yes the add instructor dialogue disappears and the screen appears as in Section 2.3.1 with no new instructors added.
When the user clicks Save from Figure 2 the add instructor dialogue disappears. The screen appears as in Section 2.3.1 with a new row in the table filled with information about the just added instructor.