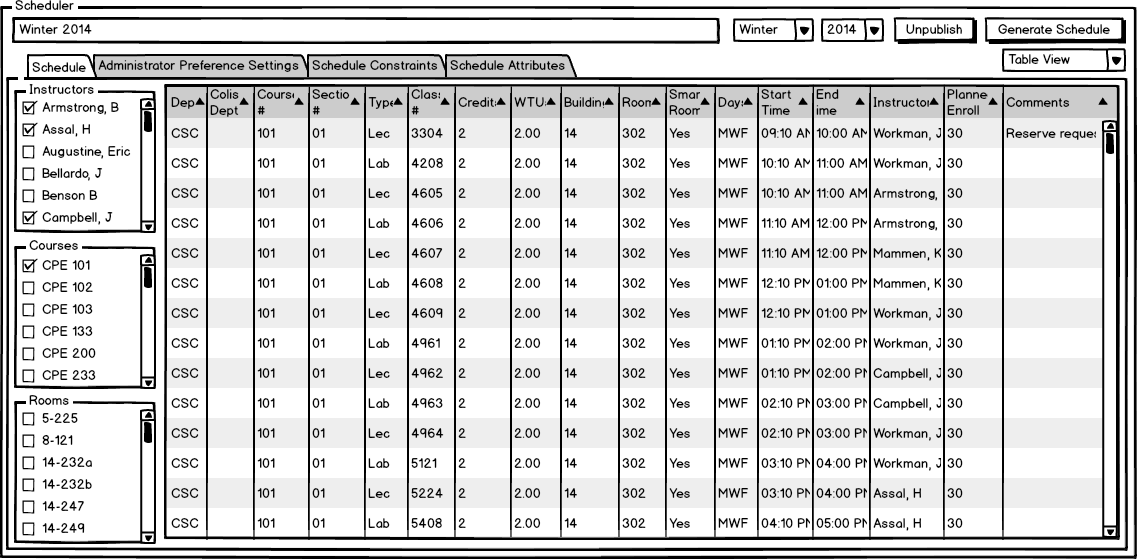
The scenario in this section illustrates the administrative function related to manually editing a schedule's title, quarter, year and any generated course fields.
To get to these screens, the user must select a schedule from Manage Schedules and click the Edit button.
Figure 1: Scheduler's Table View Winter 2014 Generated Schedule.
When the user inputs text into the top left input field, the title of this schedule changes.
When the user types in and/or selects between Fall, Winter, Spring, and Summer from the Winter dropdown, the quarter of this schedule changes.
Likewise, when the user types in a year in the combobox that says 2014, the year of this schedule changes.
Figure 2: Two combo boxes for quarter and year fields.
When the user selects on any row, that scheduled course changes to editable fields so that the user can attempt to make changes.
Figure 3: This view shows when a particular course is selected.
After the user selects on a row in the table view, the entire row becomes highlighed and these fields can be edited:
Figure 4: This view shows what the data looks like in editable form.
After the highlate fades, the fields change from text fields to editable fields:
Note: Class # is uneditable since it is a schedule-generated number
Figure 5: This prompt gives examples of certain column data that consists of a dropdown of possible values.
Some fields such as Dept, Colist Dept, Type, Building, Room, Smart Room, and Days have a limited amount of input values so the user can either type in or open the dropdown menu to see all possible values.
Figure 6: This view shows examples of how certain column data can be typed in and auto-completed to possible values.
All editable fields allow a user to enter any text but only valid data is saved. For example, the user can not enter "F" into the Days column since it is not one of the time patterns for this schedule.
For conflict resolution, see Conflict Resolution.