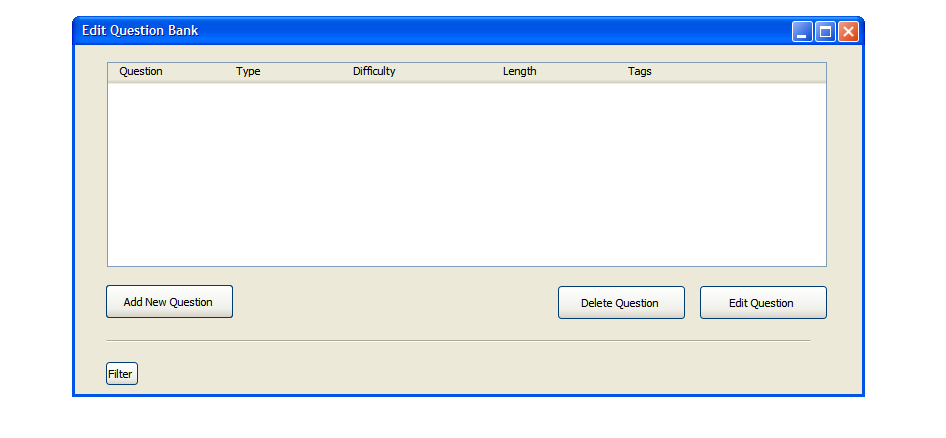
Figure XX: Menu for choosing to add or edit questions in the bank.
The scenario in this section illustrates a user adding a question to the test bank for use in a test.
When the user selects Manage Questions in the Main Menu, the
system displays the screen shown in Figure XX. To add a new question to the bank,
the user selects 'Add Question'. This will bring up the screen shown in the next section.
Figure XX: Menu for choosing to add or edit questions in the bank.

Figure XX: Filtering Questions to edit or delete
After selecting Add Question in the Question Menu, the screen in figure XX appears. There is a drop down menu for each of the question types. These include:
The difficulty can be set with the slider. Moving the slider left indicates an easier question. Moving the slider right indicates a more challenging question. The user can also enter an estimated time for the question. Any tags the user wants to add to the question should be entered in the box labeled 'Comma Separated Tags'.
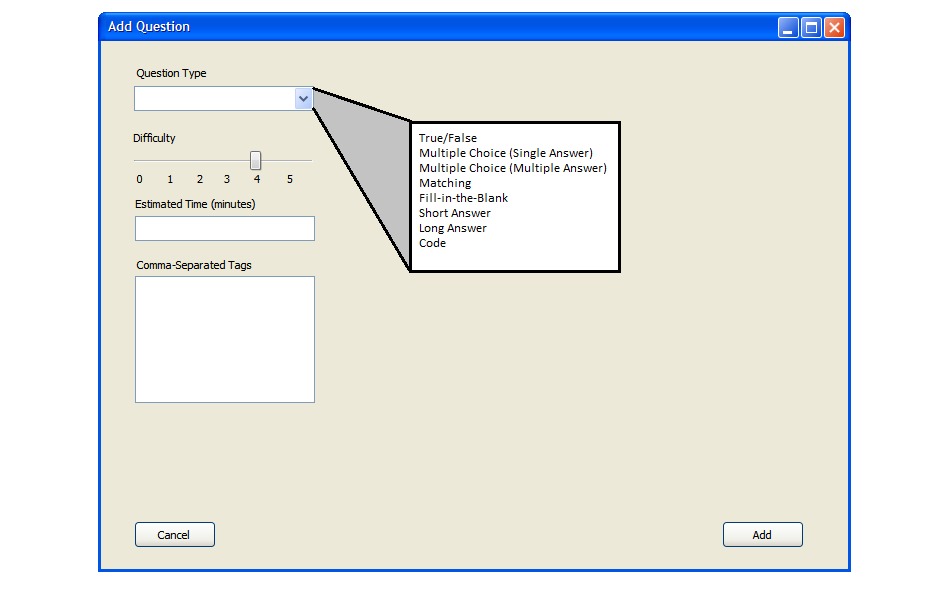
Figure XX: Default menu for adding questions. The drop-down menus are expanded superficially on the right.
After selecting True/False, a prompt appears on the right of the screen
which contains a space for entering the statement and a drop-down menu
for selecting whether it is true or false. Figure XX shows this.
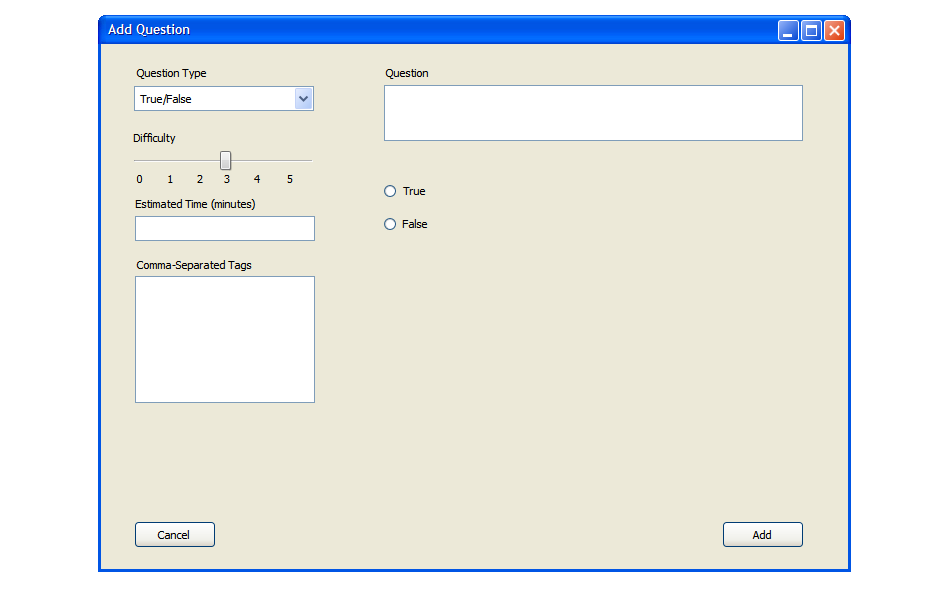
Figure XX: Screen showing how to enter a T/F question. The drop-down menu is expanded superficially.
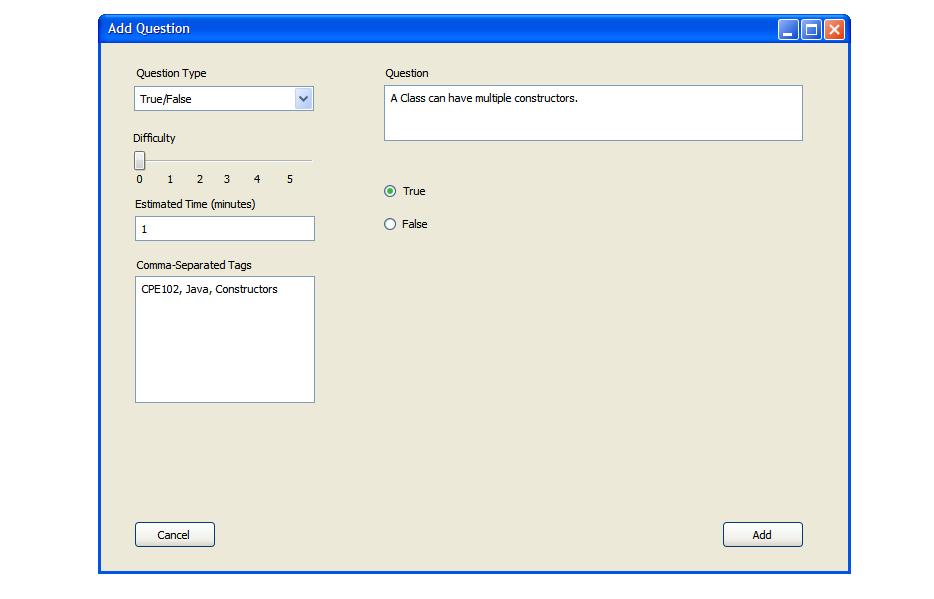
Figure XX: TODO
After choosing multiple choice (single answer), the display on the right will
change to show a question prompt and a form to enter answers (at least two must
exist for the question to be valid). As figure XX shows, answer text can be
edited under "Answers". To delete an answer, hit the 'X' to the right. To add a new
answer, click the "+" icon and a new blank answer box will appear. To designate an
answer as the correct answer, choose the circle to the right of the appropriate
answer text box (Figure XX).
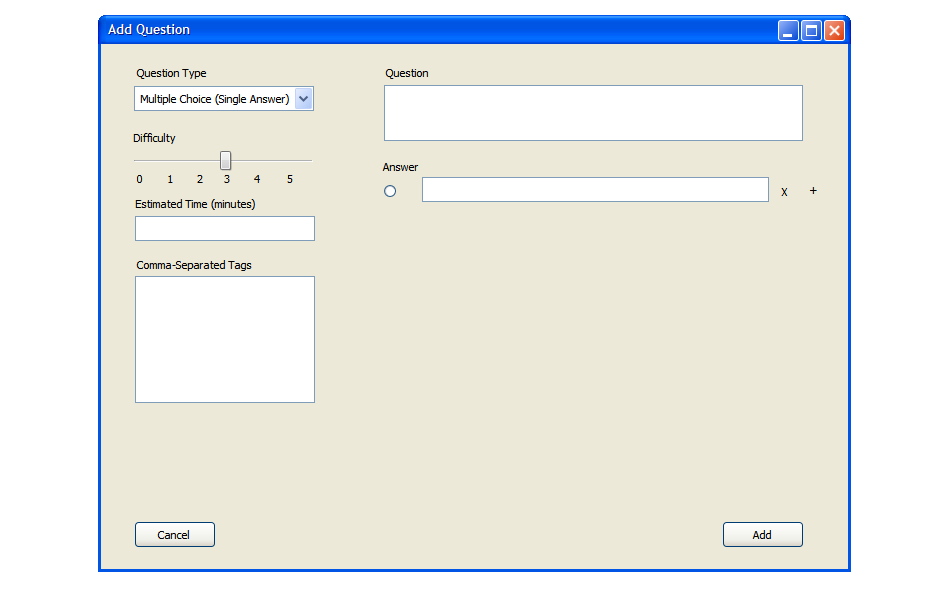
Figure XX: Screen showing how to Add a Multiple Choice Question.
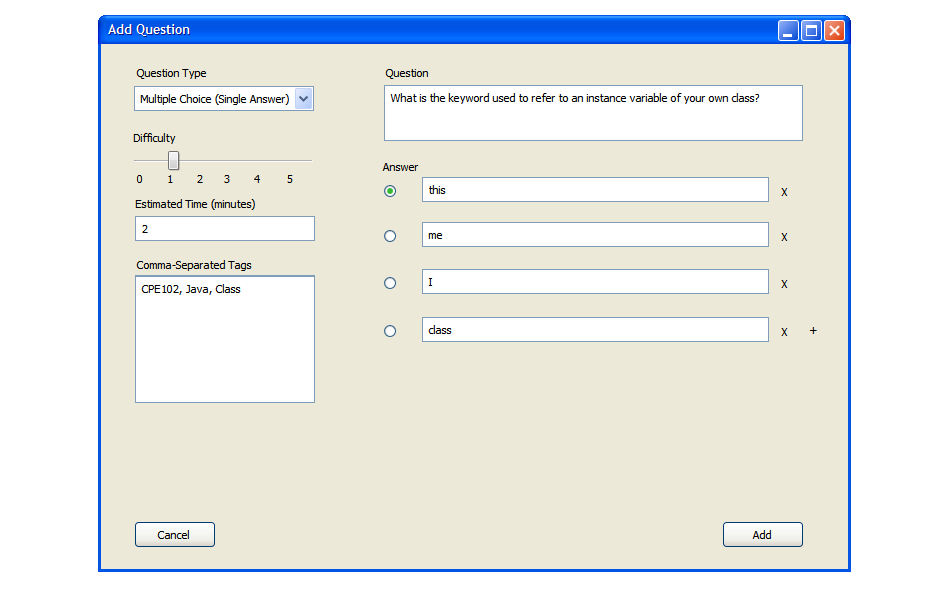
Figure XX: TODO
After selecting 'Multiple Choice (Multi Answer), the screen will be similar to the
"Multiple Choice (Single Answer)" page. The main difference is that this form allows
multiple answers to be selected from the available choices. This is designated by the
square radio buttons shown in figure XX.
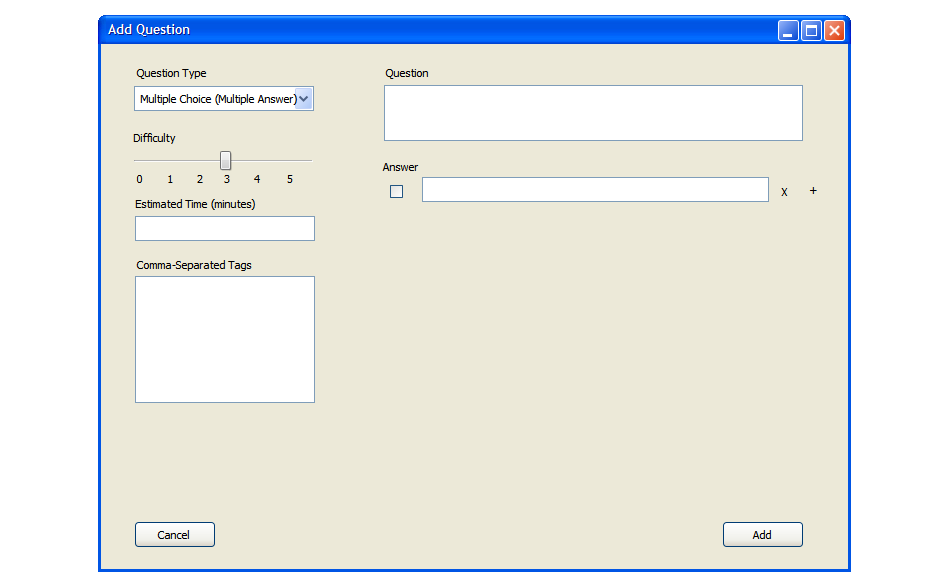
Figure XX: Screen showing Multi-Answer Multiple Choice Question addition. Each answer can be designated as an answer to the question.
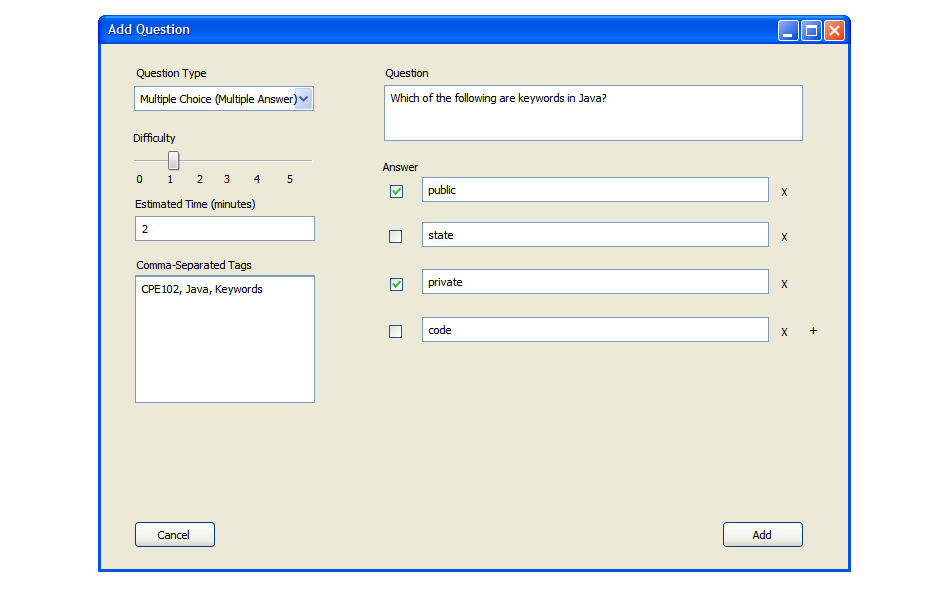
Figure XX: TODO
The user enters the question text in the "question" text box. At least two answer pairs must be given
to be a valid matching question. The pairs will be randomly shuffled for the test. The values on the left
will be left in the same order. Only the values on the right will be rearranged.
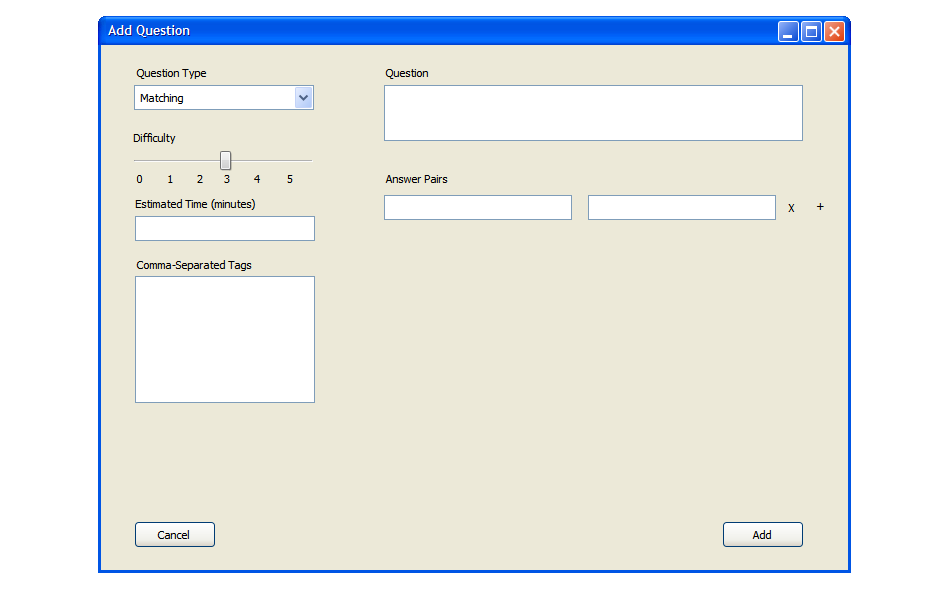
Figure XX: Screen showing matching question entry. The test making program will automatically and randomly shuffle the order of the answers on the right.
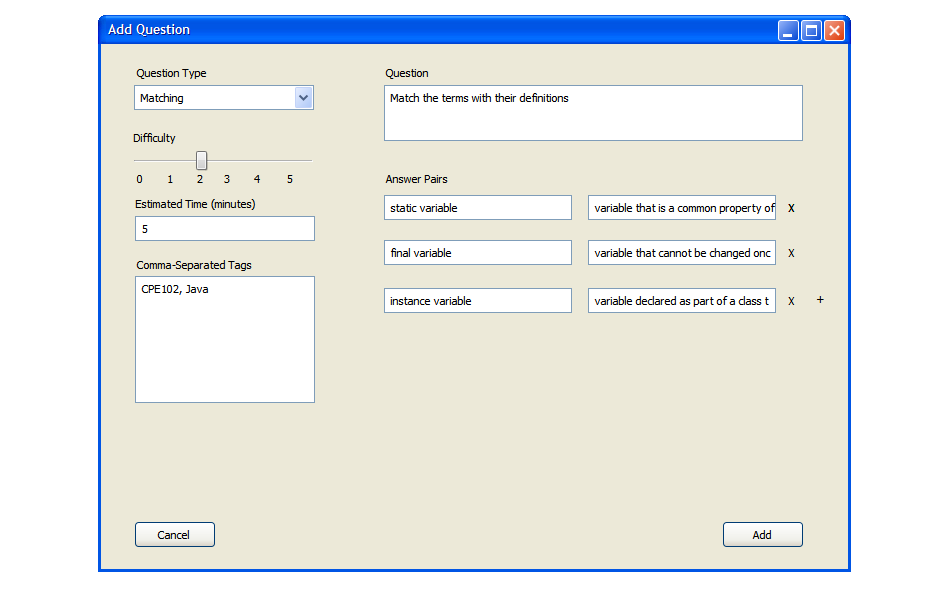
Figure XX: TODO
The user enters the question text in the "question" text box. At least one answer has to be
given, but many alternatives can be provided. The student will only have to match one of the
given answers.
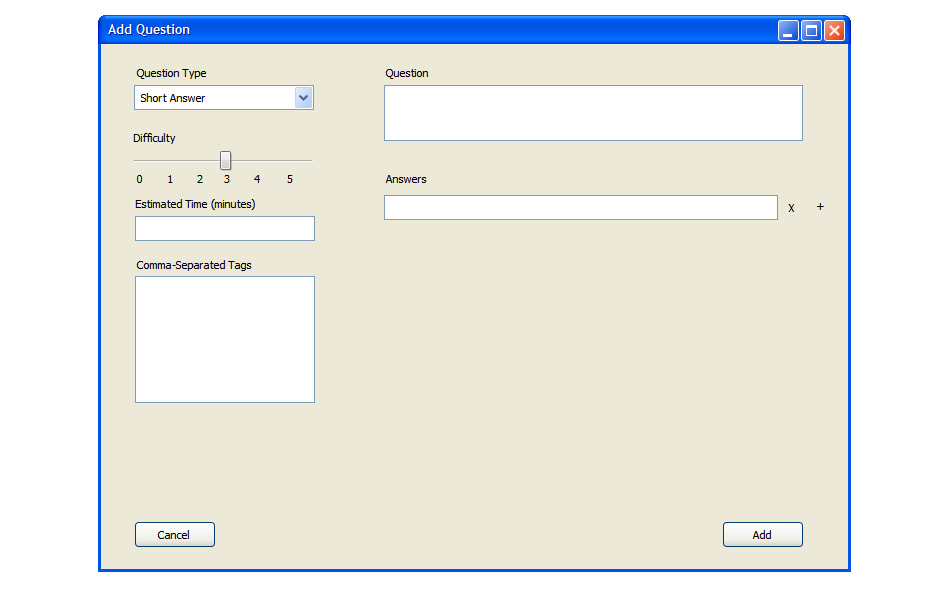
Figure XX: Screen showing short answer entry. Matching one answer provided will be considered full credit.
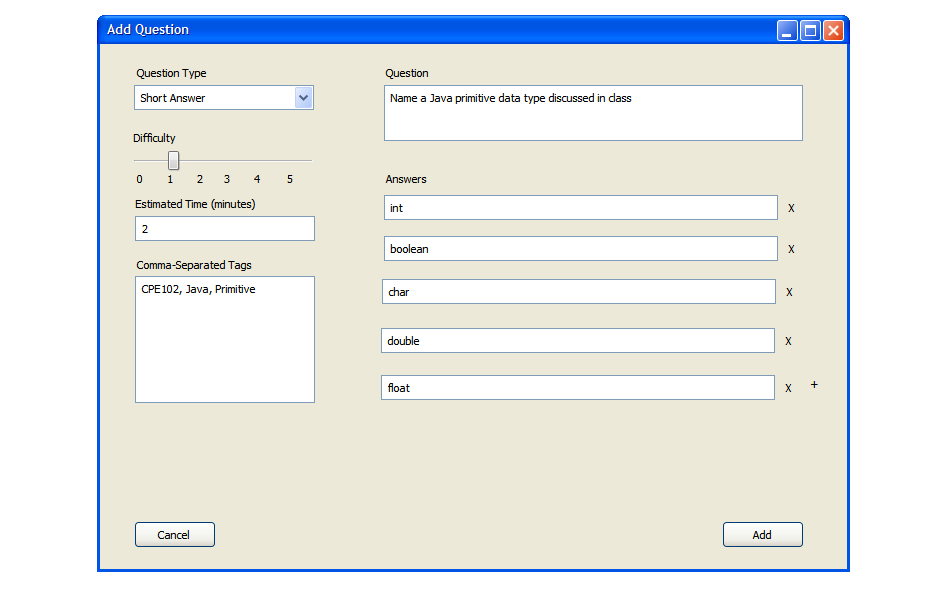
Figure XX: TODO
The user enters the question text in the "question" text box. The grading program will search
for any keywords entered here. If none are entered, the question will have to be graded
manually.
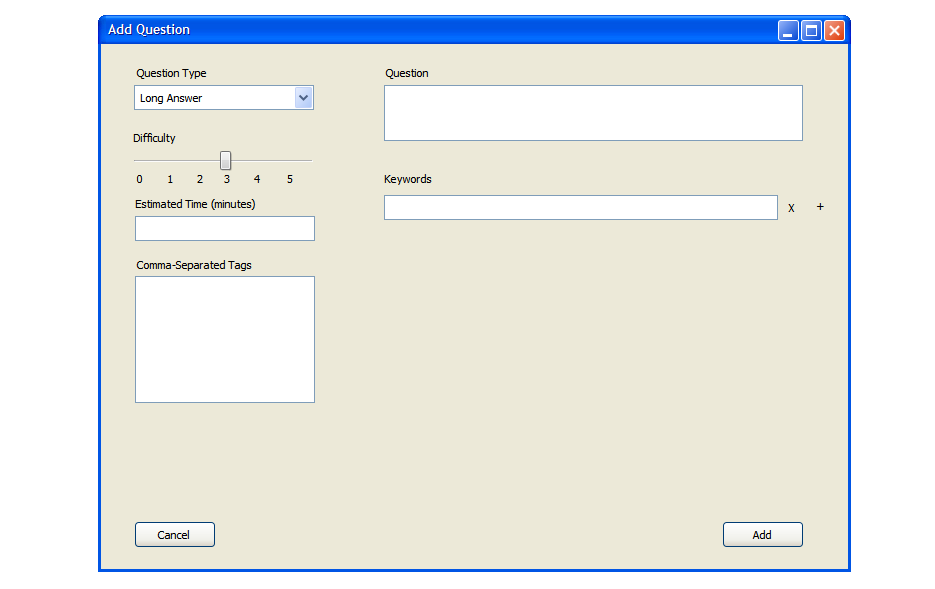
Figure XX: TODO
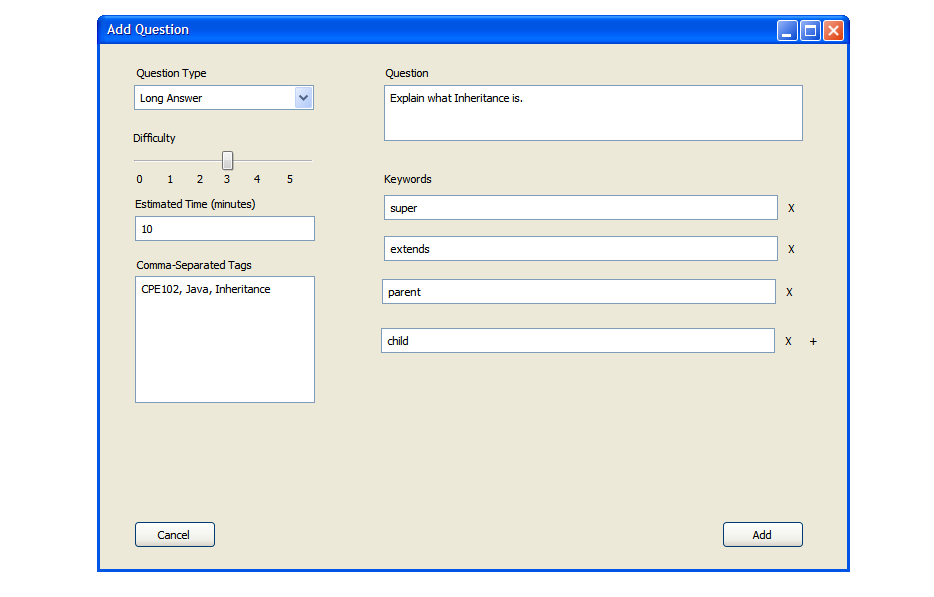
Figure XX: TODO
The user enters a prompt in the box at the top. Wherever they place the "(ANS)" tag, a fill-in box will
appear in the question on the test. Multiple "(ANS)" tags will correspond to the order listed in the
answers section. A question of this type will be rejected if the number of tags do not match the number
of provided answers. Omitting the tag will place a blank at the end of the question.
![]()
Figure XX: Screen showing how to add a fill in the blank answer. Special care must be taken to make sure the "(ANS)" tags match chronologically with the answers provided.
![]()
Figure XX: Screen showing how to add a fill in the blank answer. Special care must be taken to make sure the "(ANS)" tags match chronologically with the answers provided.
The user can enter a prompt for the coding question here. This can be a sentence, psuedo-code to be implemented, or even
class and variable definitions that can be copied to the student's answer box and filled in. If there is a test input, provide the both the input and the
expected test output.
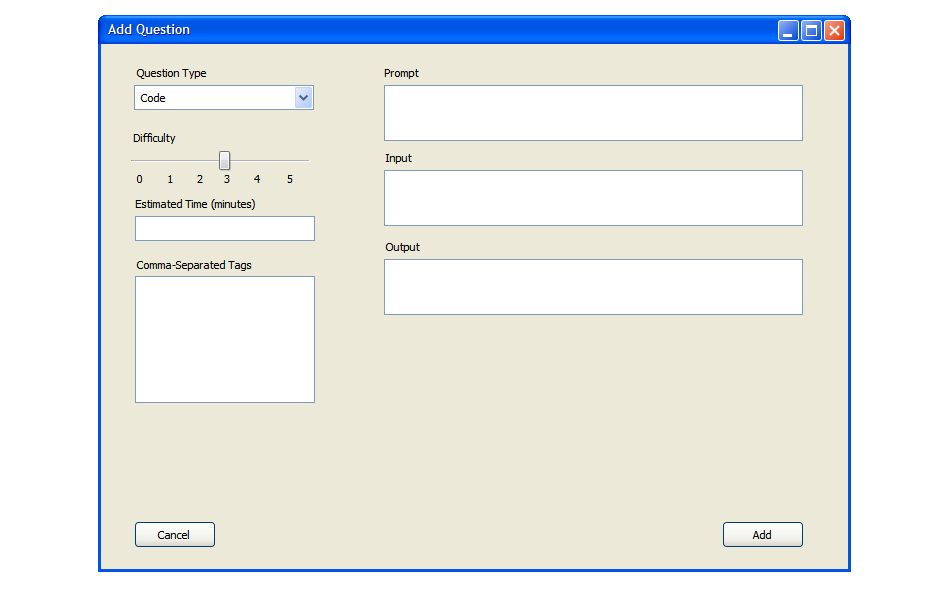
Figure XX: Screen showing code question setup.
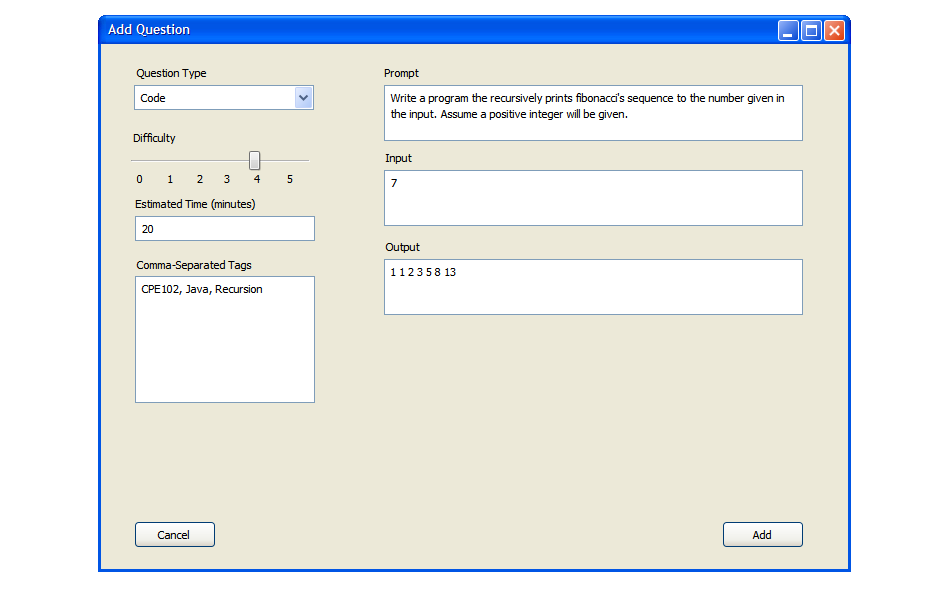
Figure XX: TODO