
Preceding sections of the requirements have described preferences for controlling various aspects of Test Tool operation. The scenarios in this section cover the complete details of all Test Tool preferences for instructors. Information on the preferences screen for students and instructors in located in Section 2.9.6, Student and Grader Preferences.
There are three preferences-setting dialogs -- two for the regular user of the Test Tool and one for the administrative user of the Test Tool Administration program. The regular user preferences are covered first, followed by preferences for the administrative user.
For both the regular and administration interfaces, the top group of items in
the 'Preferences' menu correspond one-for-one with tabs in an preferences
dialog. When the user selects one of the menu items, the system displays the
dialog with the corresponding tab selected. For example, when the regular user
selects the 'Times and Dates' item in the 'Preferences' menu, the
system displays the dialog shown in Figure 2.9.1.

Figure 2.9.1: Preferences dialog.
At the bottom of the preferences dialog is a row of buttons that is common to all of the tabs, and the effect of the buttons applies to all tabs simultaneously. The 'Apply' button is used to apply any option changes entered in any of the tabs. 'Apply' is initially disabled, becoming enabled when the user changes the preferences settings in one or more data-entry fields in one or more tabs. When the user presses 'Apply', the system applies the changed settings to the current test, updating all open display windows for the current test.
Since the command buttons apply across all dialog tabs, pressing 'Apply' has the affect of applying all changes made in any of the tabs, whether or not a changed tab is currently visible. Furthermore, switching between tabs does not automatically apply the changes in a tab that was previously displayed. All option changes remain unapplied until the user presses the 'Apply' button. As soon as the changed settings are applied, the 'Apply' button is reset to the disabled state. The 'Apply' button remains disabled until the user changes one or more settings.
The time and date preferences provide formating control for the times and dates
that appear in various Test Tool displays. When the user selects the
'Times and Dates' tab in the preferences dialog, the system updates the
display to that shown in
Figure 2.9.1. The user can choose whether or not to display the time in various displays across the Test Tool.
Time Format dropdown menu allows the user to select the preferred display format
of time, including whether to show the "AM" and/or "PM"
suffix. A checkbox to the right enables the user to select a 24-hour clock format.
The default values for these settings are: 12-hour time, show both
"AM" and "PM" suffixes, in hh:mm:ss format. When the user selects 24-hour clock, the
system disables the show AM and show PM fields in the dropdown menu. If the user subsequently unchecks the
24-hour clock, the AM/PM options reappear in the Time Format dropdown menu, and
retain the settings from when the 12-hour setting was last in effect. A preview of the selected format is
shown below the dropdown.
The fields available in the Time Format dropdown include, but are not limited to, the following:
The settings under 'Date Format' specify the format and
relative order of the components in the display of dates. A dropdown menu contains numerous possible combinations
of the date, month, and year. The default values for these settings are: Month, date, and year, with the month displayed
in its text form. A preview of the selected format is shown below the dropdown.
Date strings appear in a number of test contexts, but not always with all
four components. Table 11 indicates in which contexts dates are displayed and
which date components appear in those contexts.
The fields available in the Date Format dropdown include, but are not limited to, the following:
Figure 2.9.2 shows the user having changed the time and date option settings.
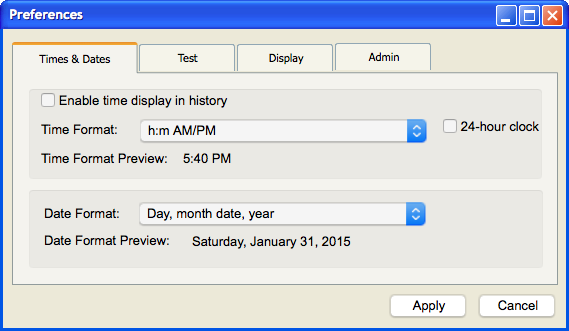
Figure 2.9.2: Changes to time and date preferences.

Figure 2.9.3: Effects of time and date option change on the Overview window.
When the user selects the 'Test' tab, the system updates the
preferences dialog as shown in Figure 2.9.4.
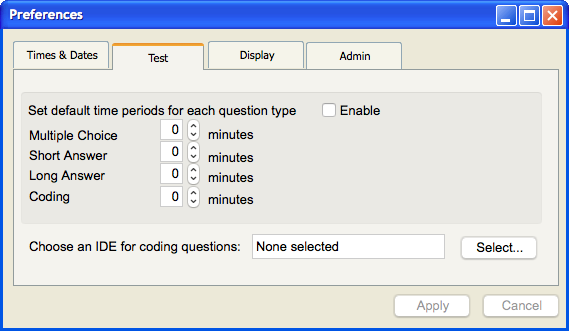
Figure 2.9.4: View Test Preferences.

Figure 2.9.5: Editing Test Preferences.
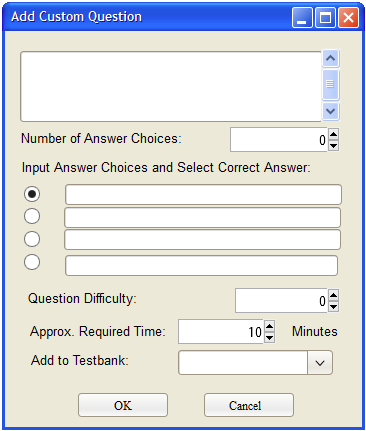
Figure 2.9.6: Adding a custom question after enabling automatic time constraints.
The display preferences provide control over how certain elements within the Test Tool appear to the user,
as demonstrated in Figure 2.9.7.
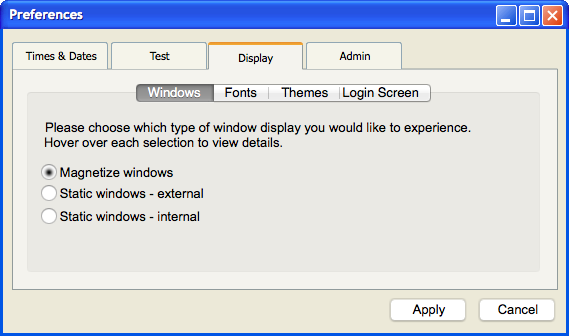
Figure 2.9.7: Display preferences tab.
As shown in Figure 2.9.7, the dialog provides Windows modification options. From here, the user can select how the windows should be displayed when viewing the program. A blurb near the top of the dialog directs the user to hover over each option to understand how each option works. The tooltips for each selection is described below. The 'Magnetize windows' option allows windows to snap to a pre-specified grid, similar to the GUI setup in the program Eclipse.
The 'Static windows-internal' option allows screens to open inside the single window, similar to the GUI setup in the program Qt.
The 'Static windows-external' allows windows to open externally, with each successive window stacked on top of the previous window,
per the placement policy of the window manager.
The fonts preferences provide control over the text fonts used in all Test Tool
windows. When the user selects the 'Fonts' tab in the preferences dialog,
the system updates the display as shown in Figure 2.9.8.
Figure 2.9.8: Fonts preferences tab.
2.9.3.2. Viewing Display - Fonts Preferences
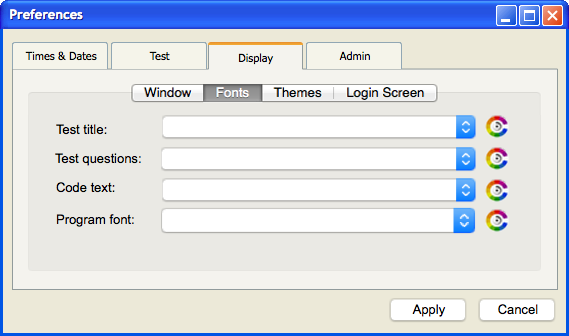
The user can set font preferences for four forms of text: test title, test questions, code question text, and
the overarching program font. The font settings under 'Test title' apply to the
text of all tests viewed by instructors, graders, and students. The
settings under 'Test questions' apply to all text viewable by students, instructors, and
graders. 'Code text' applies to all coding questions to differentiate code from the rest
of the text. Finally, 'Program font appears in the Test Tool display windows,
including user-entered text as well as permanent system-generated text.
To the right of each text field is a color selector, where the user can select the color of the text corresponding to the field. In addition, the system performs some resizing of display window components when the user changes font sizes. The normal, boldface, or italic style of text is controlled entirely by the system. This functionality is modeled in Figure 2.9.9.
The font preferences settings do not apply to the text in the banners of display windows. The format of banner text is considered to be under the control of the underlying operating environment, and is therefore not adjustable from within the Test Tool.
Figure 2.9.10 shows the user having changed font option settings, and Figure 2.9.11 the result of applying these
changes.

Figure 2.9.9: Selecting a new color in font preferences.
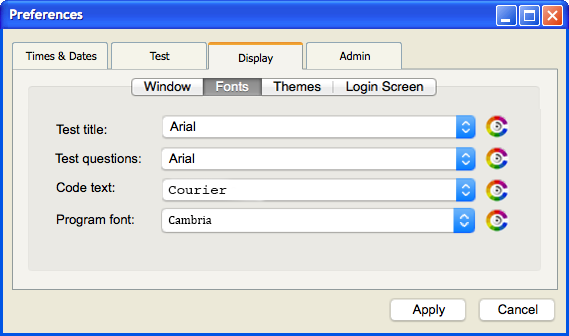
Figure 2.9.10: Changes to font preferences.
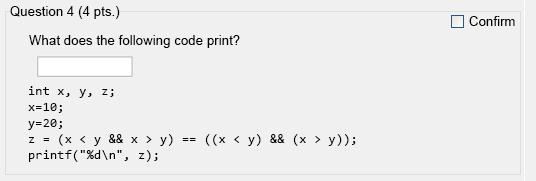
Figure 2.9.11: Visible changes after adjusting font preferences.
When the user selects the 'Themes' tab, the system updates the
preferences dialog as shown in Figure 2.9.12.
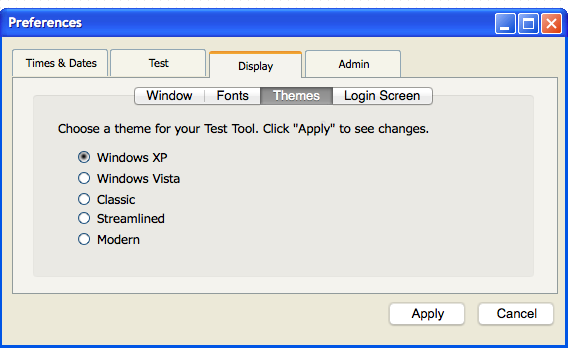
Figure 2.9.12: View Display - Themes Preferences.
The user can choose to override the default theme here. The theme selection will stay even after the user has exited the program, and can only change through another edit or a reset to default settings. Like all elements in this prototype, themes (including the feature itself) are subject to change.
Figures 2.9.13 and 2.9.14 show various windows after the theme has been changed.

Figure 2.9.13: A changed theme.
Figure 2.9.14: A changed theme.
When the user selects the 'Login Screen' tab, the system updates the
preferences dialog as shown in Figure 2.9.15.
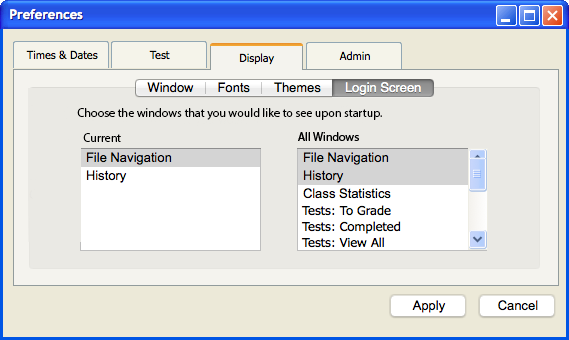
Figure 2.9.15: View Display - Login Screen Preferences.
By default, only the 'File Navigation' window and 'History' window show up for the user. Through the 'Login Screen' preferences dialog,
the user can select more or fewer windows to appear upon login.
2.9.4. Viewing Admin Preferences
When the user selects the 'Admin' tab, the system updates the
preferences dialog as shown in Figure 2.9.16.

Figure 2.9.16: View Admin Preferences.
The instructor can enable notifications or test statistics from here. Checking "Enable Test Statistics" allows access to the statistical
analysis of a class as described
in Section 2.7, Test Statistics. Checking "Notify me when history is updated" will enable direct updates to the user's email, in the case
that the user is away from the program and wishes to stay updated with Test Tool events.
From this window, the user can also modify his/her account preferences, such as changing the email or password. The user's login not changeable
since it provides a form of unique identification in the user database.
2.9.5. Restoring Built-In Default Settings
When the Test Tool and Test Tool Administration program are initially installed, they have built-in default settings for all preferences. The values for these built-in defaults are those that appear in each of the preceding figures that show the initial state of the option tabs, and the global preferences dialog.
The built-in settings are overridden by any applied changes in the preferences
dialogs. The user (regular or administrator) can restore the built-in defaults
with the 'Restore Defaults' command at the bottom of the
'Admin' tab in the 'Preferences'menu (both regular-user and administrative). When the user
executes this command, the system restores all preferences to their built-in
settings and applies the changes.
Restored defaults are not automatically saved. To do so, the user must execute
a save command.
2.9.6. Student and Grader Preferences
Students and Graders will see all of the above preferences with the exception of the 'Test' tab. Additionally,
the "Enable Test Statistics" checkbox
will only appear if the instructor has enabled it for all accounts.