2.2.4. Lesson Properties Editing
The Lesson properties allows the user to edit the information found in the Lessons. The Author, Date Made, Lesson Title, the mode (Fixed or Free), and the section the lesson should be belong all can be manipulated.
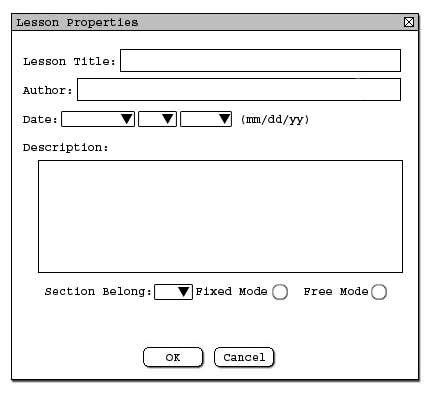
The following scenario explains how the user runs through the commands found in Authoring->Lesson Properties. After clicking Lesson Properties, the following screen will show up to allow the user to create a new Lesson Properties. See Figure 1 below.
Figure 1: Initial Screen
The user moves the mouse to the "Lesson Title" text field. Here the user can fill out the necessary information about the lesson to describe this lesson , then click the next field. The author field will default to the current user logged on, but the user can still change the author field to the name he or she wants to get credit for this lesson.. The date has pull down menus for the user to fill out. The date will have the date the lesson was modified. The user also has the ability to change the date by the pull down menus. The description is filled out by moving the cursor to that text field and clicking once. In the description field, the user can type a brief summary about the lesson. Finally the user can use the pull down menu to pick the section, and whether this lesson is Fixed mode or Free mode. See Figure 2 below. Fixed mode locks the lesson plan into a set path. In Fixed mode, whom ever uses the lesson must complete each lesson before he or she can take the quiz at the end of the section lessons. In Free mode, the person taking the lesson can skip around each section, and he or she can immediately take the quiz without looking at the lessons.

Figure 2: Filled out Screen
By clicking the "OK" button, the lesson properties will be applied, but if the user presses "Cancel," the lesson properties will not be applied.
This is the Lesson Properties screen.