This scenario walks the user through viewing and navigating a tutorial page after it has been opened (for information on navigating to, and opening a tutorial, see Section 2.4.1). In this scenario the user is assumed to be a student, specifically a beginning computer science student learning to implement if-statements in Java code. After logging in (as described in Section 2.1) and selecting the correct tutorial from the Lesson Navigator window (see section 2.4.1 for information on the Lesson Navigator), the main tutorial window opens.

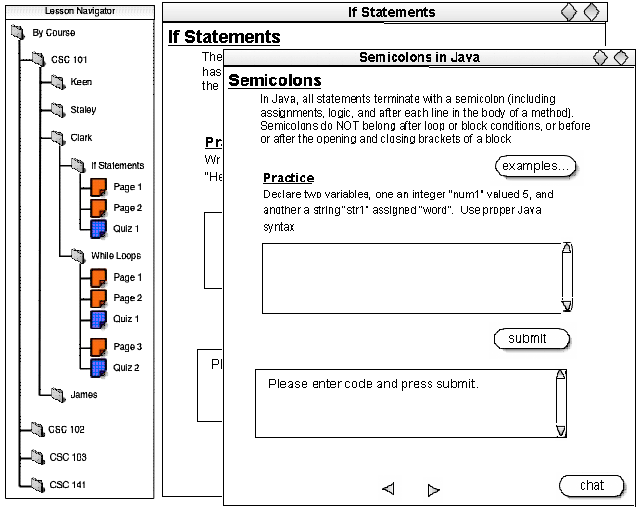
Upon opening the tutorial program the Lesson Navigator window opens as well, making mobility within the program as well as referencing between tutorials, fast and easy. The first open tutorial fills the main window of the application. Once in the tutorial, the student uses the Lesson Navigator to open additional tutorials, which pop up in separate windows, leaving all other tutorials open. This allows the student to view information in other tutorials, while at the same time taking one.

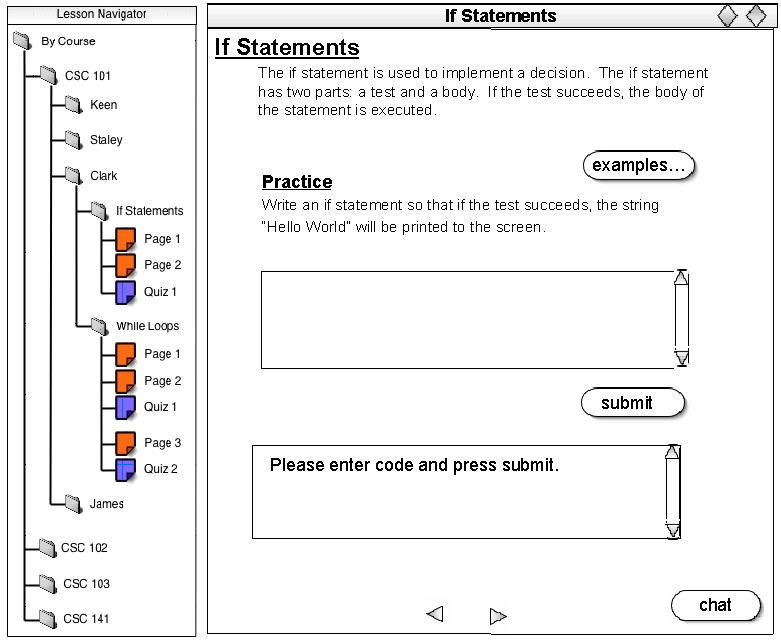
The arrows at the bottom of the screen provide a way for the student to move forward or backward a page within the tutorial without opening a new window. To move forward to the next page, the student clicks on the arrow pointing to the right at the bottom of the tutorial window. Likewise, to move back to the previous page, the student clicks the leftward facing arrow.

Once in the tutorial, a title at the top of every window displays the tutorial name. The tutorial name also appears at the top of all screens and popup windows within the lesson.
Below the lesson name is the tutorial content. The content of the tutorial is left to the instructor. In this scenario, the student views a previously built tutorial on implementing if-statements in Java code (For information on building tutorials, see Section 2.3). A description of how to write if-statements is written in the paragraph just below the tutorial name. When the student wishes to view examples of if-statements properly implemented, he clicks on the button labeled "examples". The button, when pressed, opens a popup window containing example segments of code, or possibly whole programs, provided by the instructor.

When the student is done viewing the examples of code he presses the "Back to Lesson" button, which closes the "Examples" window and returns the student to the tutorial. Providing the examples in a seperate window allows the student to view the code easily no matter where he is on the tutorial page. The Examples popup window is independent of the main tutorial window, and at the student's desire opens and closes without affecting the content or state of the tutorial.
The student is now given a chance to practice, and immediately apply the his newfound knowledge of programming. In the paragraph following the "Practice" header, the instructor provides instruction to write a piece of code asking the student to apply what he is learning in the tutorial. The student then attempts the directive in the first text box, as seen below. The student enters his written code in the text box just as he might in a normal text editor. After entering the code, the student presses the button labeled “Submit”, located just below the input text box. The code segment is compiled, and if it is without mistakes, is executed. The results of the compile/execution or its failure are displayed in the second text box, located directly below the first. Figure 5 shows the results of a student entering code that does not compile.

If the code compiles it is then executed and the result, again, is displayed in the second (output) text box, located below the submit button.

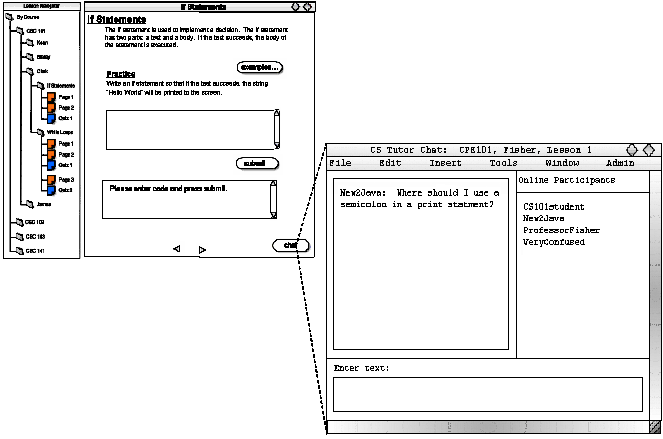
The chat feature of the CSTutor is also available to the student at all times throughout a tutorial session. To open a chat session, the student presses the button labeled “chat” in the lower right hand corner of the main window (refer to Figure 7). A separate window pops up and opens the chat feature as seen in Figure 7. For further information on the CSTutor chat feature, see section 2.6.

After an instructor-defined number of tutorial pages, the instructor provides a quiz to further test the student's knowledge and understanding of tutorial material.