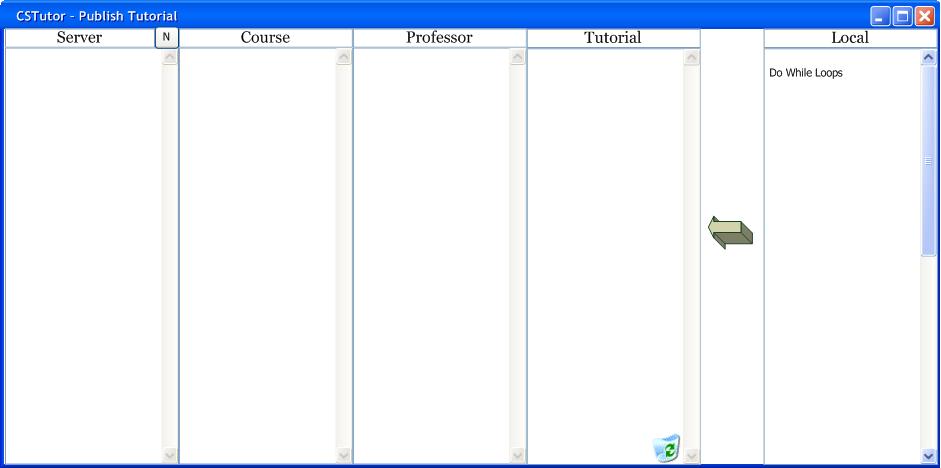
After selecting to publish a tutorial, the user will be brought to the 'Publish Server Window', as seen in Figure 2.3.5.2.a.
Figure 2.3.5.2.a: Initial Publish Tutorial Window.
The left section of the screen is the online file system. Information about navigation through the file system can be found in detail in section Setting up a File System as an Administrator. The right section of the screen is the local machine, which contains the current tutorial so that it can be dragged onto the desired location. The first time the user publishes a tutorial, the 'Server' list will be empty. To add a new server to the list, the user hits the 'New Server' button. This will bring up the 'Add Server' window, as seen in Figure 2.3.5.2.b.
![]()
Figure 2.3.5.2.b: Blank Add Server Window.
To connect to a new server on which an account has already been created for the user, the user enters either the ip or web address of the server into the 'Address' field. The user then enters their id as a string into the 'ID' field. Finally, the user enters their password as a string of alphanumeric characters into the 'Password' field, resulting in Figure 2.3.5.2.c.
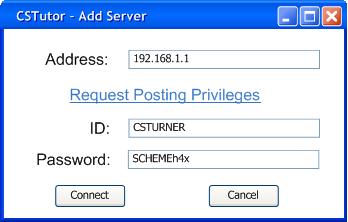
Figure 2.3.5.2.c: Complete Add Server Window.
If the user is not already approved to post tutorials on the server, the user can contact the server administrator and request to be added to the posting list. The user clicks the 'Request Posting Privileges' link, causing the window in Figure 2.3.5.2.d to appear.
![]()
Figure 2.3.5.2.d: Blank Request Posting Privileges Form.
The user enters the address of the server that they want to post tutorials on in the 'Address' field. They then enter the course title that they would like to post their tutorials under as a string of alphanumeric characters in the 'Desired Course' field. The user then provides the user id that they would like to use for that server as a string of characters in the 'Desired ID' field. Lastly, the user provides the password that they would like to use for verification on that server as a string of alphanumeric characters in both the 'Desired Password' and 'Confirm Password' fields, resulting in Figure 2.3.5.2.e.
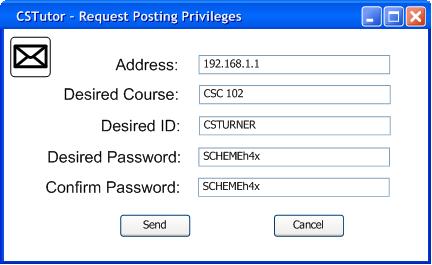
Figure 2.3.5.2.e: Complete Request Posting Privileges Form.
Once the user has completed the form, they submit the request to the server's administrator by hitting the 'Send' button. The user then repeats the proccess for each server they want to publish tutorials to. Once the user is ready to publish to a specific server, they navigate the online file system as in section Setting up a File System as an Administrator. Lastly, the user drags the new tutorial from the 'Local' section of the screen to the desired location, as in Figure 2.3.5.2.f.
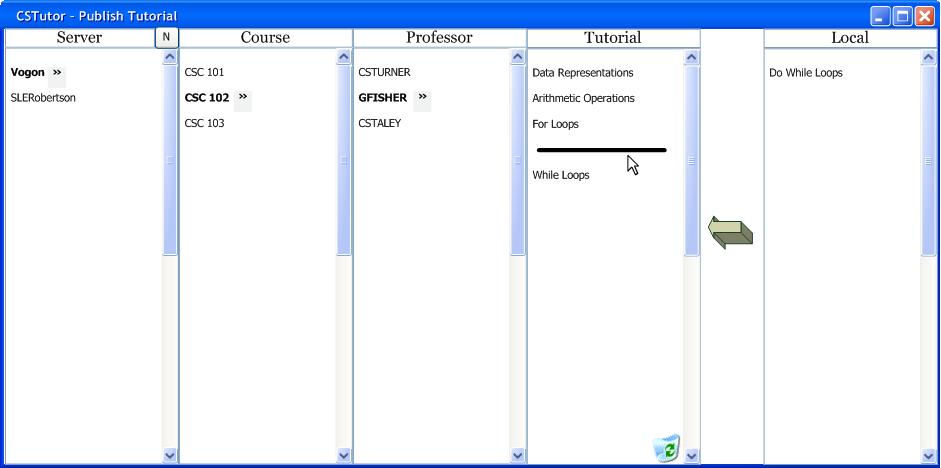
Figure 2.3.5.2.f: Selecting Tutorial Location.
Once the user releases the tutorial in the desired position, the file will be hosted on the server as in Figure 2.3.5.2.g. It is important to note that publishing the new tutorial will overwrite any existing tutorial of the same name hosted in the same location without prompting the user for any input.
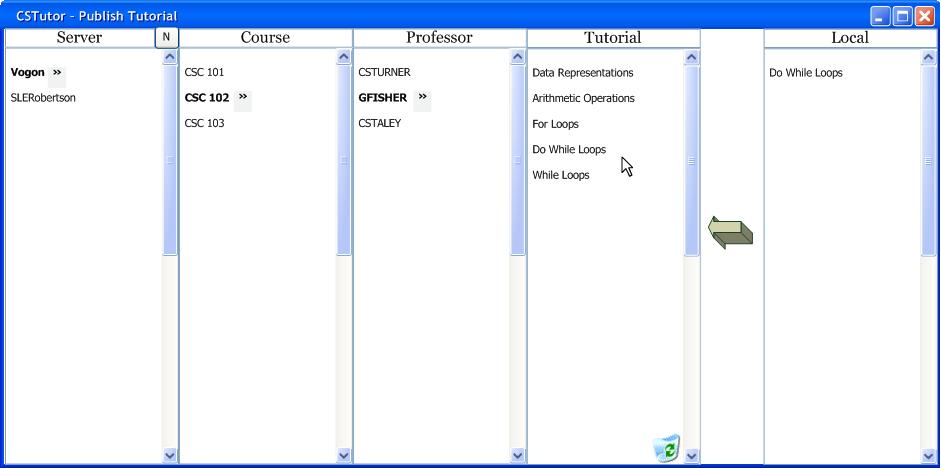
Figure 2.3.5.2.g: Tutorial Published Successfully.