The chat interface is the set of tools that allow the different eClass
users to communicate with each other. With the chat interface the users
can create private conversations, hold conferences, and exchange slide
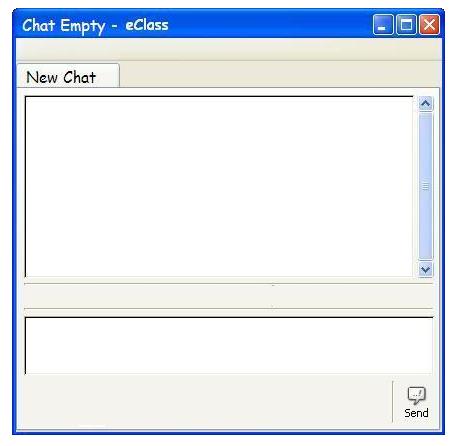
modifications. In Figure 1 we are able to see the main chat window
which is always present from the moment the user starts his/her eClass
session. In this empty window we can observe the two different text fields
(white spaces). The bottom text field is editable, and this is where the
user writes the messages he wants to send, while the upper text field is
where the current conversation is displayed. In the bottom right corner is
the "Send" icon used to send the messages, and above the upper text field
is the "New Chat" tab used to create new conversations.
|
|
If the user wants to start a conversation, he/she only needs to use the roster to click on the name of the user with whom he/she wishes to communicate. Immediately after click on the name, a new conversation tab will show up, as seen on Figure 2. This tab will contain the name of the other participant in the conversation. Also, it will be highlighted, given its status as the current active conversation.
 |
Another way to create a conversation is by clicking on the "New Chat" tab. After clicking on it, a new empty conversation will shown up, as seen in the upper half of Figure 3. After this conversation has been created, the user can add a conversation participant by simply clicking on his/her name in the roster. The conversation tab will change from displaying "empty", to display the name of the new participant in the conversation, as seen in the bottom half of Figure 3. Once there are multiple conversations, the user can switch between them by clicking on the tabs associated with each conversation.
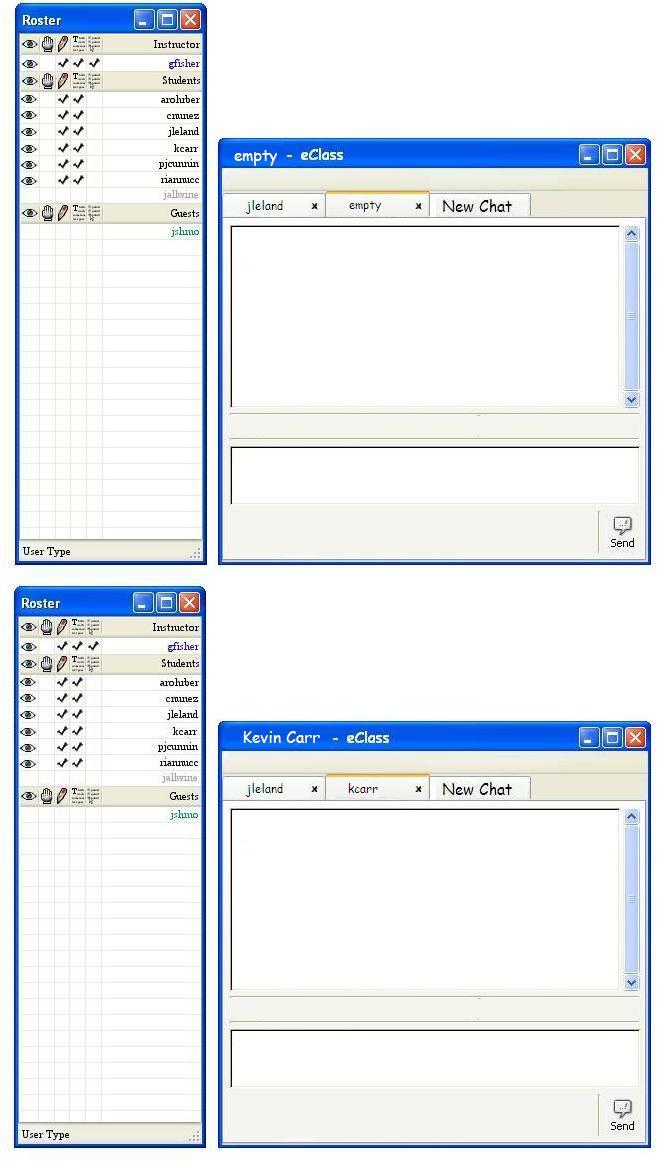
Figure 3
In order to create a conference (a conversation with multiple users), the user only needs to keep clicking on the names of the other users he/she wants to add to the conversation. In Figure 4, the user "cnunez" started a conversation with only "kcarr" in it, shortly after, he added "jleland" and "gfisher". Once a conversation turns into a conference, the name displayed in the tab changes to indicate so. In Figure 4, the new name adopted is "Conference1". Also, if the user hovers the mouse cursor over the tab, a yellow box will show up displaying the name of all the participants in the conversation. These names will be sorted in the reverse order from the one in which they were added.
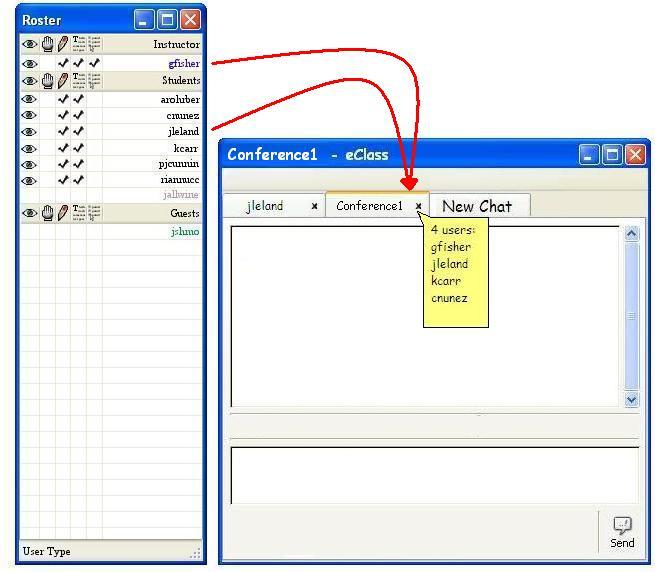
Figure 4
In order to send a message, the user simply needs to type the message in the bottom text field and then click on the "Send" icon or press the "Enter" key. The message will automatically appear in the conversation display (upper text field). In Figure 5, the user Carlos Nunez "cnunez" is sending a message to the user Jeremy Leland "jleland". Since "jleland" had no active conversation going on, a new conversation will automatically show up in his chat window as he receives the message. In case that a conversation between these two users had been previously started, the message would have been received in this conversation.
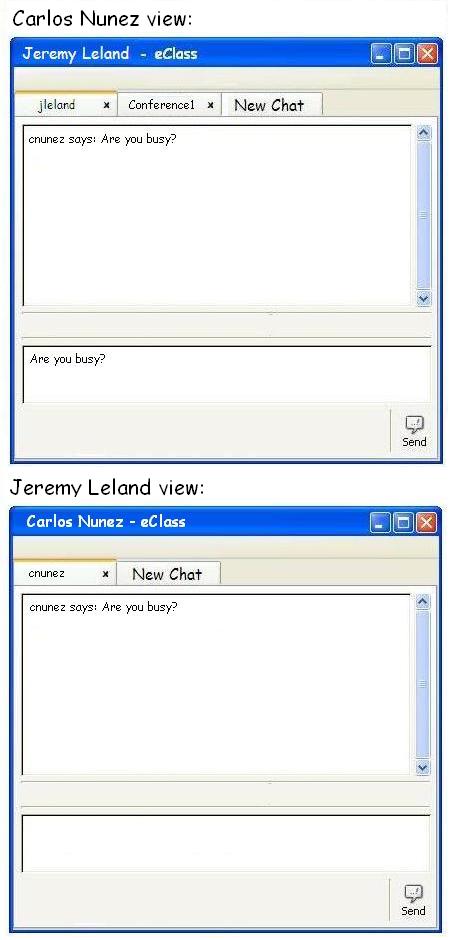
Figure 5
The method to send a message to multiple users does not vary from the one employed to send a message to a single user. All the members of the conference will receive the same message, as seen in Figure 6. However, it is important to point out that as soon as an user receives a message, he/she will not be automatically translated to this conversation. If a conversation which is not the current one receives a message, its tab will be highlighted in green, as seen in the user Kevin Carr's view in Figure 6. This method allows the user to continue any conversation he/she pleases while at the same time be informed of new messages in non-active conversations. Another important point to notice is that a conference won't be named the same in all user's screens. The Chat will assign a name to the conference for each individual user according to the order in which the user joined such conference. In Figure 6, the user Gene Fisher was participant in a previous conference before joining the conference started by the user Carlos Nunez. Therefore, Gene Fisher will see this conference as "Conference2" as opposed to "Conference1" in the case he had not have another active conference.
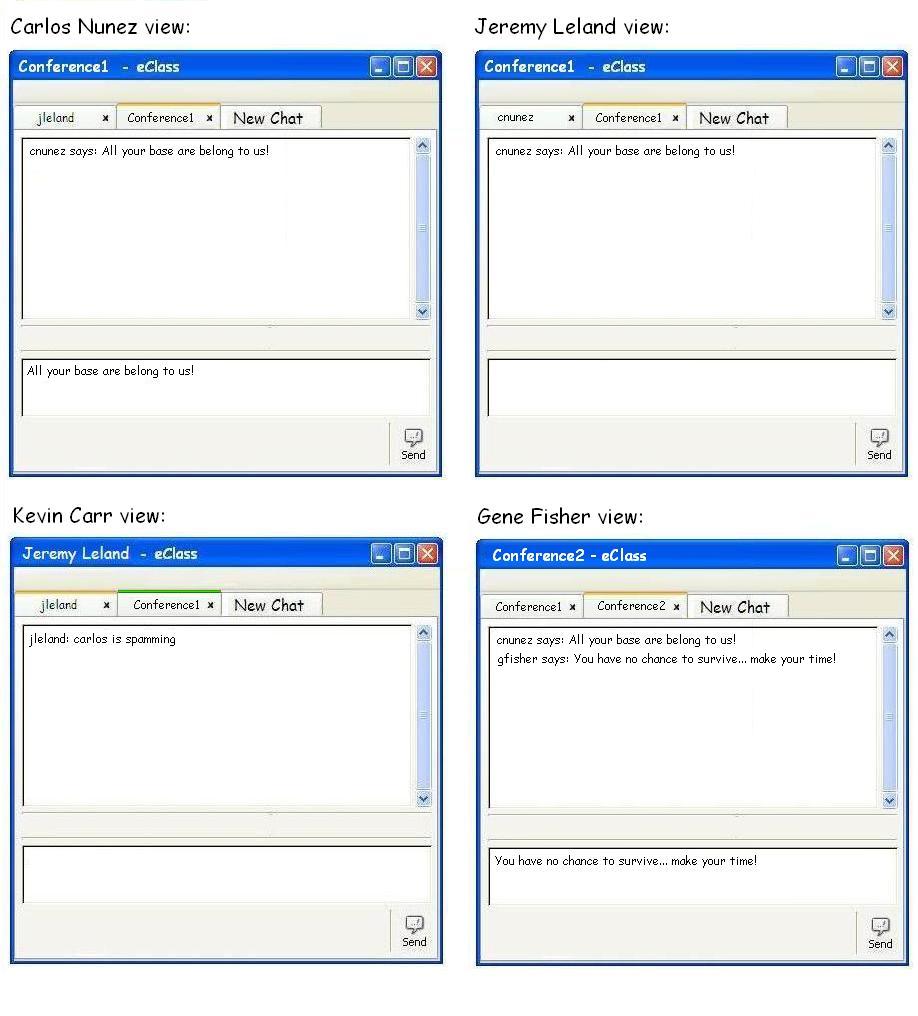
Figure 6
The user can delete himself/herself from the conversation by clicking on the "X" inside the tab to the right of the name of the conversation. In Figure 7, the user Kevin Carr deletes himself from "Conference1". This conference will no longer show in his Chat window. Also, a yellow box will indicate to other users when another user leaves the conversation, as seen in the user Carlos Nunez's view in Figure 7. If a conversation has zero users, then this conversation ceases to exist.
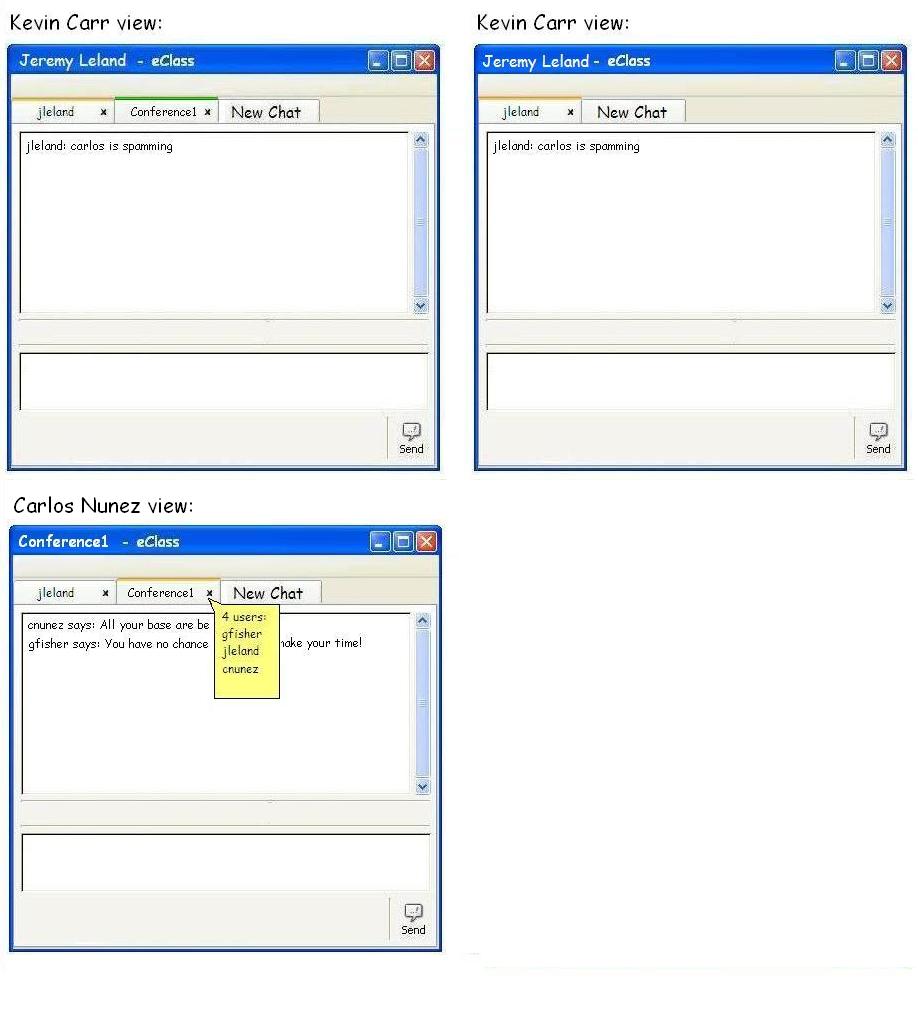
Figure 7
Associated with each conversation, is a copy of the lecture in progress. To view this copy of the lecture, the user needs to click on the "Chat" tab in the main view window. Thanks to this, all the users in a conversation can view and modify the slides of a lecture without actually interfeering with the real lecture displayed int the "Public" tab. Only the particpants of the conversation associated with the lecture can view the changes made to it. In Figure 8, only the members of "Conference1" would be able to see the drawings (in red) applied to the slide.
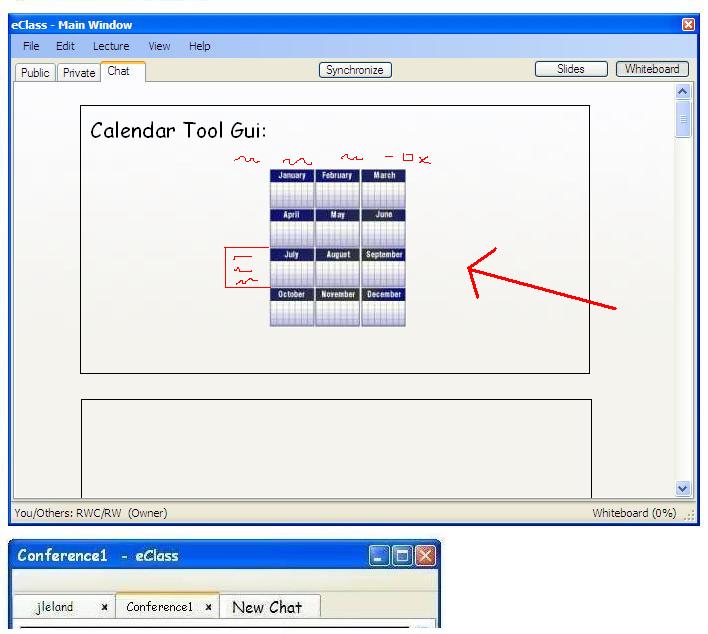
Figure 8
Also, since each conversation has an individual copy of the lecture, whenever the user changes active conversations, the lecture displayed in main view will be the one associated with the current conversation. In Figure 8, the user selects "Conference1", thus, he is able to see the modified Slide associated with "Conference1", while in Figure 9, the user selects the conversation with he is having with "jleland", therefore, he sees the slide associated to this conversation, which lacks all the modifications done in "Conference1".
Figure 9