2.6 Drawing on an Overlay

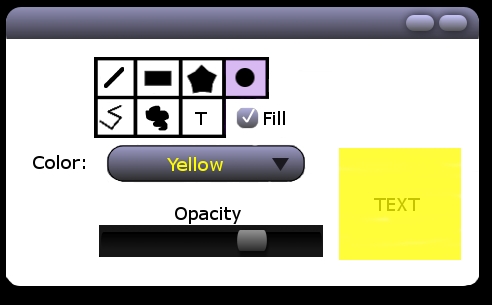
One of the most interactive tools in the eClassroom program is the drawing tool. This allows both students and teachers to draw on an overlay that goes on top of a slide. The overlays are shown to the class, or students use them as personal notes. The drawing tool is controlled by the pane shown below in Figure #1


Figure #1: Drawing Pane.


This pane is opened by selecting Drawing Tools from the View menu.

At the top of the window is the shape selector. The user selects a shape, which becomes highlighted when clicked, then customizes other options. The different shapes are:
  • Line
  • Rectangle or Square
  • Straight Line Polygon
  • Oval or Circle
  • Continuous Line
  • Curved Line Polygon
  • Text
    The user can choose to fill in shapes or use an outline by checking or unchecking the Fill checkbox.

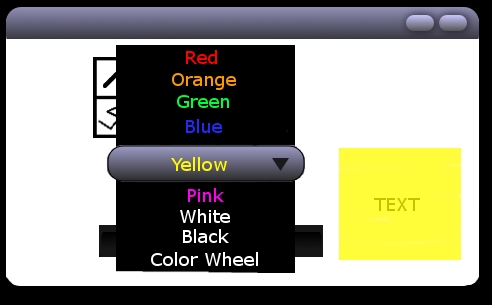
    Below the size control is the color control. The user selects the color by choosing from the available options in the selection menu, or by choosing a specific color from a color wheel, as shown below in Figures #2 and #3.

    Note: The color selection window is platform dependant and the image shown below(in Figure #3) may not match exactly what the user sees.


    Figure #2: Drawing Pane with the Color Selection Menu.
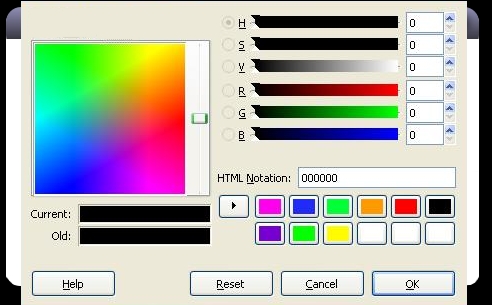


    Figure #3: Selecting a Color from the Color Selection Window.


    After choosing the color of the shape, the user selects the opacity of the shape by dragging the slide bar left or right. If the user moves the bar completely to the left, the shape is drawn completely transparent and not visible. If the user moves the bar completely to the right, the shape is drawn completely opaque. The window to the right of the slide bar shows the user how visible text is when covered by a shape with the currently selected opacity.

    How a shape is drawn depends on what shape is selected. Below is a list of each selectable shape, and how the user draws each shape, after the shape is selected from the shape selector

  • Line: The user draws a line by clicking where the line starts, dragging the mouse to the end of the line, and releasing the mouse button. This is show below in Figure #4.


    Figure #4: Drawing a Line.


  • Rectangle or Square: The user draws a rectangle by clicking on the slide where one of the corners of the rectangle is located, dragging the mouse to where the opposite corner of the rectangle is located, and releasing the mouse button. To draw a square, the user performs the same motions while holding the shift key.


    Figure #5: Drawing a Rectangle or Square.



  • Straight Line Polygon: The user draws a straight line polygon by clicking on the slide where one of the corners is to be located, then continues clicking where is subsequent corner is located, and finishes the polygon by clicking at the original point, or double clicking at the last corner. If the user double clicks the polygon will close from that point to the original point. This is shown below in Figure #6.


    Figure #6: Drawing a Straight Line Polygon.
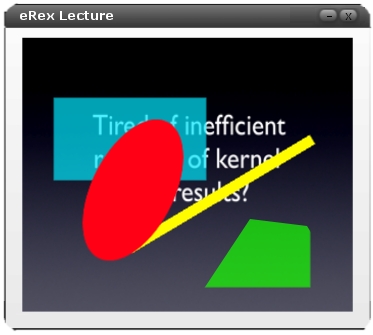


  • Oval or Circle: The user draws a circle by holding down the shift key, and drawing a line as described above. The line will be the diameter of the circle. To draw an oval, the user first draws a line as described above, then an oval appears between the two points. The user moves the mouse until the oval is the desired shape, and clicks the mouse. This is shown below in Figure #7.


    Figure #7: Drawing an Oval or Circle.
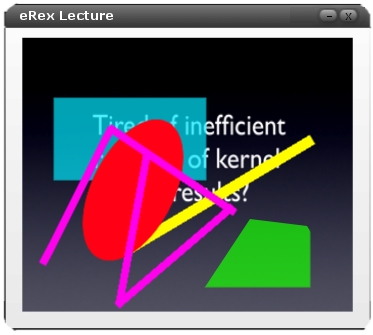


  • Continuous Line: The user draws a continuous line by clicking on the slide where the first line segment starts, and clicking where the line segment ends. Another line segment will automatically start to be drawn from that point. To end the line, the user double clicks at the end of the last line segment. This is shown below in Figure #8.


    Figure #8: Drawing a Continuous Line.
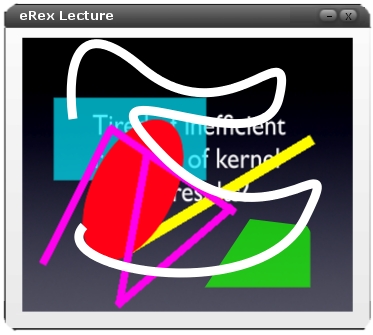


    Figure #9: Drawing a Curved Line Polygon.


    Prev: Navigating Overlays | Next: Using the Roster | Up: Functional Requirements | Top: index