 |
|
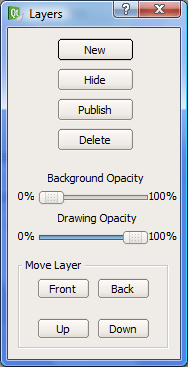
| Figure 1: Layer toolbar |
Layers are transparent, note taking devices used to write or draw on top of a slide without affecting the slide itself. A user can have many private, public, and group layers. Private layers are those that only the creating user can view. Public layers are private layers that a user wishes to share with multiple users. Group layers are shared layers in which all users in the group can draw or write on the layer. Every layer is associated with a corresponding slide and can only be viewed when a slide is selected.
The default layers for a student and a instructor are different. The tabs at the top of the 'presentation viewer' show the available layers the user can view. If the teacher is the user, he sees one private layer. The student sees by default her own layer and the instructor's layer.
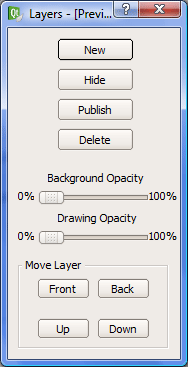
The layers toolbar is located in the lower right hand corner and provides layer management options. The layers toolbar has eight buttons (shown in Figure 1).
The 'new' button allows the user to create another private layer. The new layer tab appears at the end of the user's private layer tabs. New layers have the highest priority and will override any drawings on the other layers.
The 'hide' button allows the user to quickly hide the selected layer without having to adjust its opacity. When the layer is hidden, the 'hide' button turns into a 'show' button so that the hidden layer can be seen again just as easily.
The 'publish' button allows a student to commit the current layer to the public layers with the teacher's permission. The 'publish' button in the instructor's interface allows him to share the student's layer with the class.
The 'background opacity' control bar allows the user to control the opacity of the background of the active layer.
The 'drawing opacity' control bar allows the user to control the active layer's drawing opacity.
There are four buttons that allow the user to reorder their layers. The 'front' button promotes the active layer to the top of all other layers while the 'back' button demotes the layer to the very back. The 'up' button moves the layer up one layer and the 'down' button pushes the layer one layer down. These four move buttons reorder the tabs at the top of the 'presentation viewer' to show any layer adjustments.
 |
|
| Figure 1: Layer toolbar |
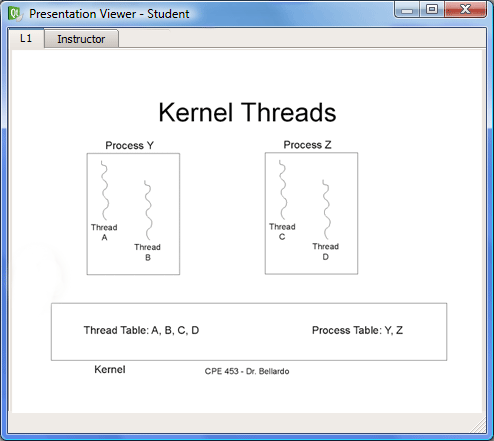
This scenario demonstrates layer display and operation for the student user. The default layer setup for the student after a presentation has been loaded is displayed in Figure 2. The active layer is the student's personal layer and is titled 'L1'. The other layer displayed is the 'Instructor' layer, which shows the instructor's layer.
 |
|
| Figure 2: Student's default layer view |
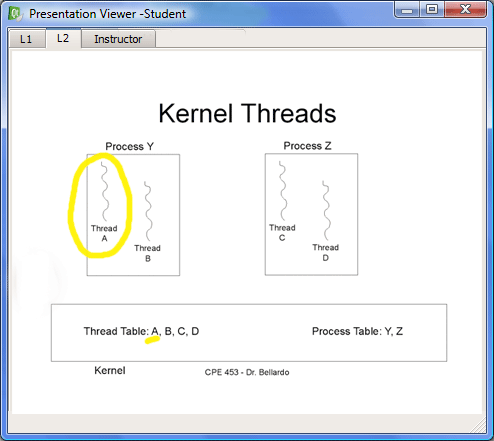
The student uses the layers toolbar to add another personal layer by clicking on the 'new' button. This layer is automatically labeled 'L2' and shows at the top of the 'presentation viewer' behind the student's other private layer 'L1'. The student draws on layer 2 in yellow using the brush drawing tool. She draws a circle around 'Thread A' and underlines the letter 'A'.
 |
|
| Figure 3: Student's drawing on layer 2 |
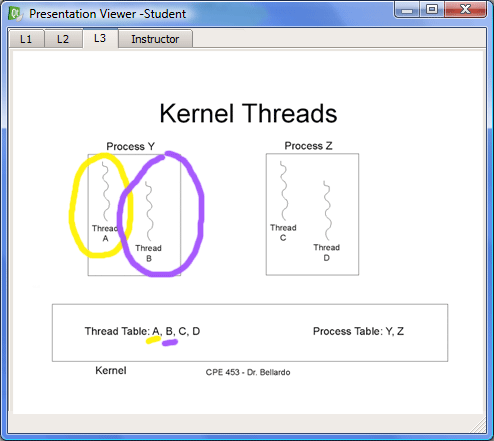
The student adds another layer, labeled 'L3', and it becomes the active layer. She uses the drawing tools again to draw a purple circle around 'Thread B' and underlines the letter 'B'. Notice how this drawing is on top of the other yellow circle, this is because layer 3 is on top of layer 2 as shown in Figure 4.
 |
|
| Figure 4: Student's drawing on layer 3 |
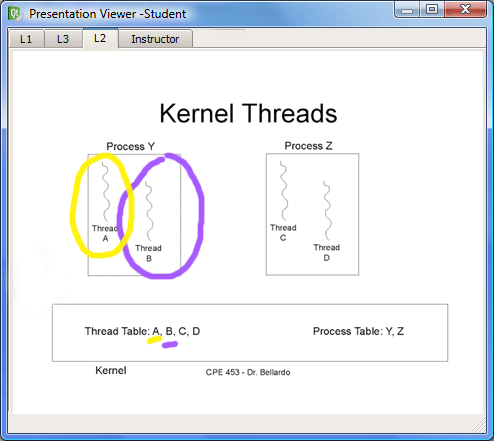
The student decides she did not want layer 3 to be on top of layer 2, so with layer 3 still active, she clicks the 'down' button in the layers toolbar window. This re-arranges her layer tabs so that now layer 3 comes after layer 1 and layer 2 comes after layer 3 making it so layer 2 is on the top and the drawing on layer 2 shows over layer 3. The yellow circle on layer 2 now shows over the purple circle on layer 3. (Figure 5)
 |
|
| Figure 5: Student re-arranges layers |
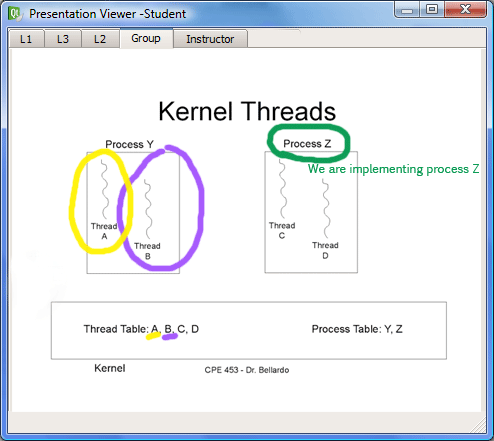
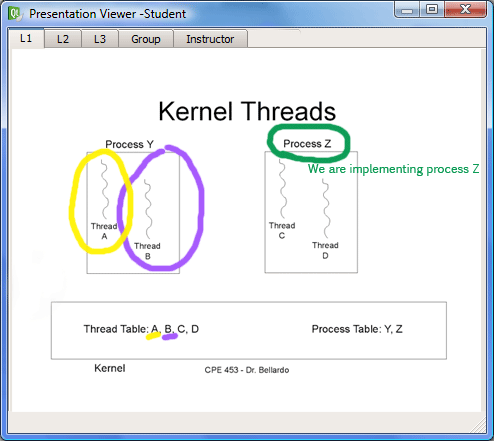
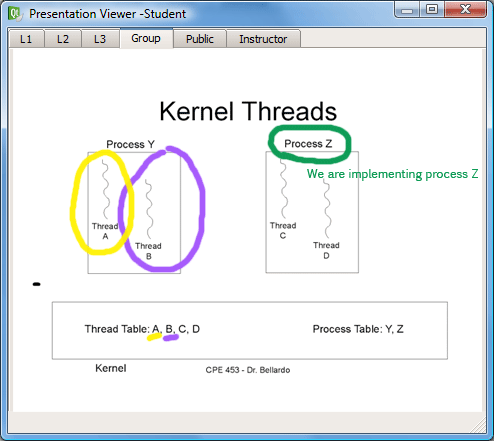
The student creates a group using the roster and each student in the group gets a 'Group' layer tab displayed at the top of their 'presentation viewer'. Each student in the group can draw on this layer and create new group layers. The student draws a circle around 'Process Z' and uses the text drawing tool to type in "We are implementing process Z". (Figure 6) The rest of the users in the group will also view this change.
 |
|
| Figure 6: Student's view of group layer |
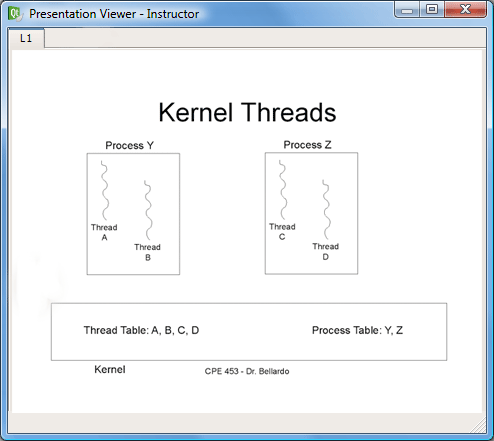
The instructor's default 'presentation viewer' layers are a little different than the student's. The instructor gets his own private layer to start with. (Figure 7)
 |
|
| Figure 7: Instructor's default presentation viewer |
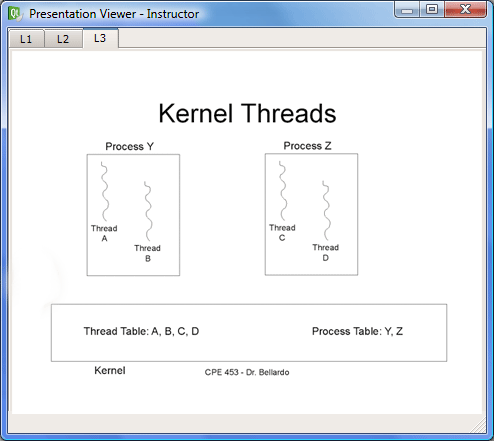
The instructor adds private layers the same way the student does, he clicks on the 'new' button in the layers toolbar twice to add two new layers. (Figure 8)
 |
|
| Figure 8: Instructor adds two private layers |
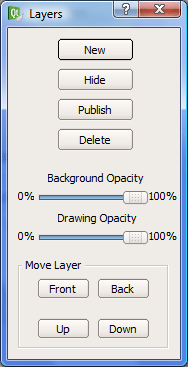
The 'new' button creates a layer with transparent background and writing opacity at 100% which allows the teacher to draw with the slide text still visible. The instructor decides he needs a blank area to take personal notes on so he clicks and drags the 'background opacity' slider to 100% so that the slide text is no longer visible. (Figures 9 and 10)
 |
 |
||
| Figure 9: Instructor layer background opacity at 100% | Figure 10: Layers toolbar with background opacity at 100% |
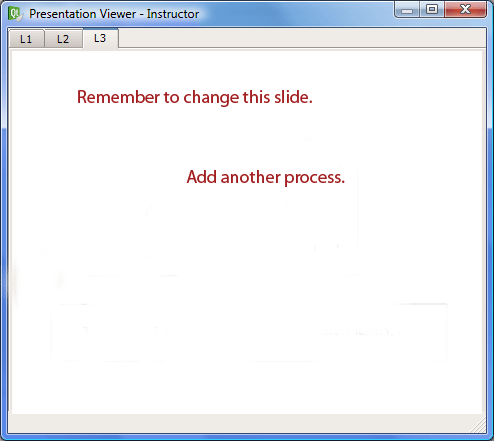
He uses the text drawing tool to write on the layer. (Figure 11)
 |
|
| Figure 11: Instructor writes a note |
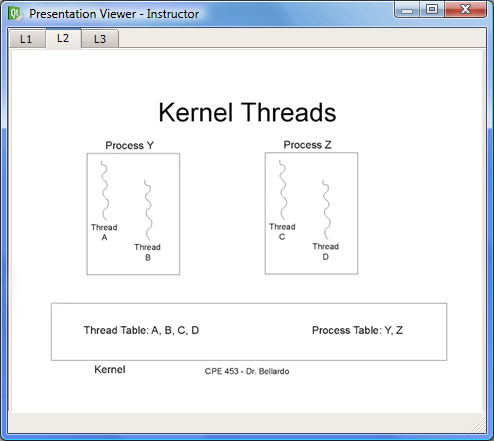
To view the slide without the current layer, the instructor clicks the 'hide' button which hides current layer. 'L2' is now the active layer. (Figure 12)
 |
|
| Figure 12: Instructor view with tabs and drawing |
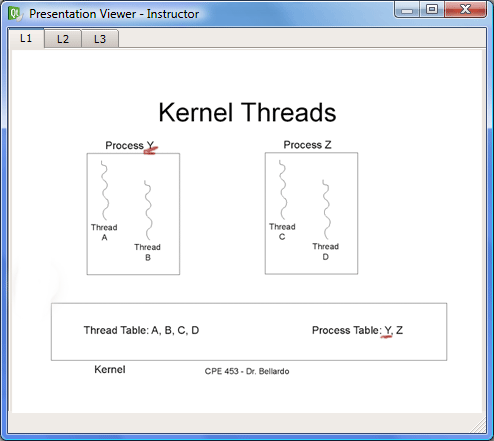
He then clicks on the 'L1' tab and draws on the current slide using the drawing tools. He underlines the letter 'Y' in two places in the slide. (Figure 13)
 |
|
| Figure 13: Instructor view with tabs and drawing |
If the student wants to share their active layer with another student, a group of students, the instructor, the class, or any combination of these, they can by clicking the 'publish' button.
In the first scenario, the student will demonstrate sharing layers with the class. The student clicks on the 'L1' tab in the 'presentation viewer'. (Figure 15)
 |
|
| Figure 15: Student selects 'L1' |
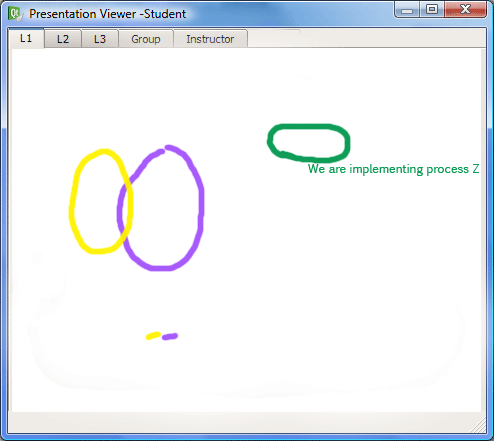
She then changes the background opacity to 100% as shown in Figure 16 which changes her 'presentation viewer' so the slide cannot be seen anymore as shown in Figure 17.
 |
 |
||
| Figure 16: Backgound opacity set to 100% | Figure 17: Only drawings are viewable |
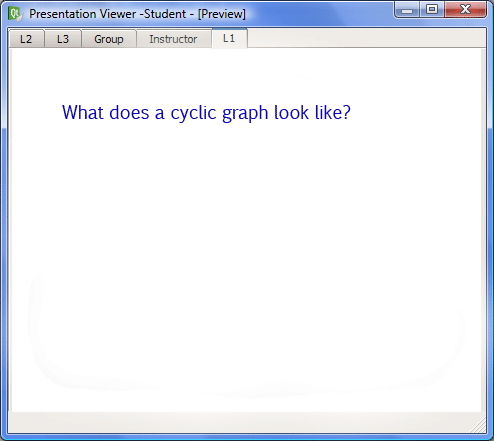
All of the drawings on every layer still show because 'L1' has the lowest precedence of her layers. Because everything she sees in the 'presentation viewer' will not be published, and she wants to view exactly what will be, she clicks on the 'front' button in the layers toolbar to promote this layer to top precedence. (Figure 18) Now she will only see this layer and knows exactly what she is publishing to the class. She types out a question in blue using the drawing tools. (Figure 19)
 |
 |
||
| Figure 18: 'Front' button used to promote layer to highest precedence | Figure 19: Student question to be shared with class |
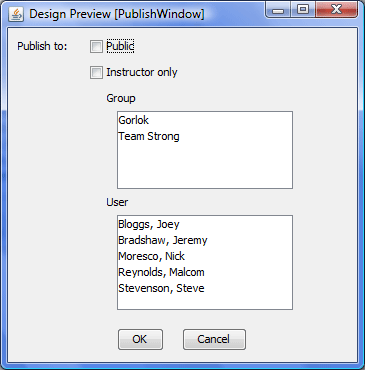
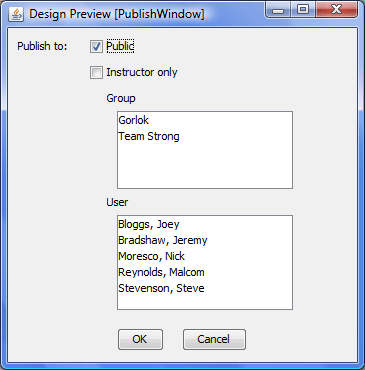
Then she clicks the 'publish' button in the layers toolbar. When the student clicks the 'publish' botton, a window pops up in which she can specify who she wants to publish to. (Figure 20) The user checks the box next to 'public' so that her active layer can be shared with the whole class. (Figure 21)
 |
 |
||
| Figure 20: Default 'Publish Window' | Figure 21: Student's selection in 'Publish Window' |
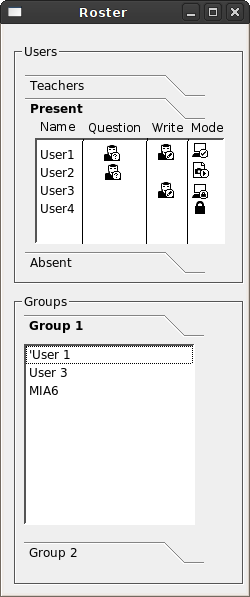
After that, the teacher receives a question mark symbol next to the student's name in the 'roster'. In this case, the student is 'user 2'. (Figure 22)
 |
|
| Figure 22: 'User 2' in the roster has a question |
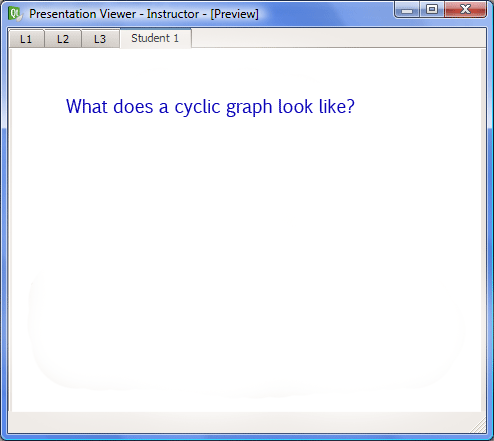
The teacher clicks on the question mark to view the layer the student wishes to display. This brings up a new tab in the instructor's presentation viewer with the student's name on it. (Figure 23)
 |
|
| Figure 23: Instructor views student's layer to be published |
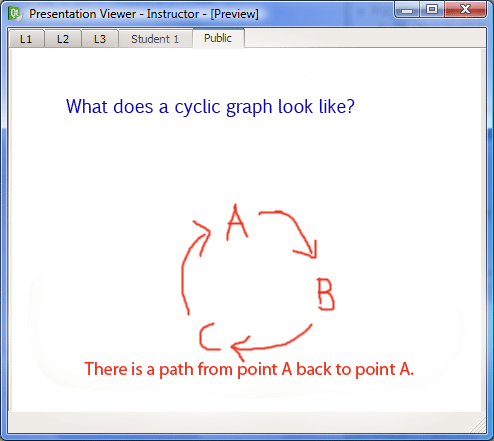
If the instructor chooses to display the layer, he also clicks on the 'publish' button in the layers toolbar and a new 'public' layer is created for all users and displays the selected student's layer. The teacher and student are allowed to draw on this layer. The instructor answers the question. (Figure 24)
 |
|
| Figure 24: Student and instructor interact |
Now the student team wants to share their group layer with the class. They click the 'publish' button in the layers toolbar while the 'group' layer is active. (Figure 25)
 |
|
| Figure 25: Student's view of group layer |
The teacher receives a question mark symbol on his roster under the group's name for his permission to display the layer, and he accepts. A new tab for the group pops up in his presentation viewer which becomes the active layer on his computer and he clicks 'publish' in the layers toolbar so that the layer is displayed in a new 'public' tab for the class.
This example shows how to use other buttons not previously explained. The student user starts with the configuration shown in Figure 26.
 |
|
| Figure 26: Student's current configuration |
She decides she does not want to view the 'group' layer anymore, but instead of using the hide button, she uses the 'drawing opacity' slider. First she clicks on the 'group' layer, then she clicks and drags the 'drawing opacity' to 0%. (Figures 27 and 28)
 |
 |
||
| Figure 27: Layers Toolbar for 'group' layer with 'drawing opacity' at 0% | Figure 28: Student's 'group' layer drawings are no longer visible |
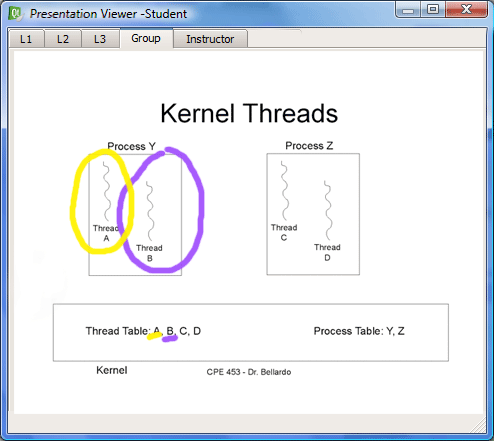
Now the user wants to get rid of 'L3' because it isn't useful. She clicks on the tab labeled 'L3' and then clicks on the 'delete' button in the layers toolbar. The layer and the tab are gone.
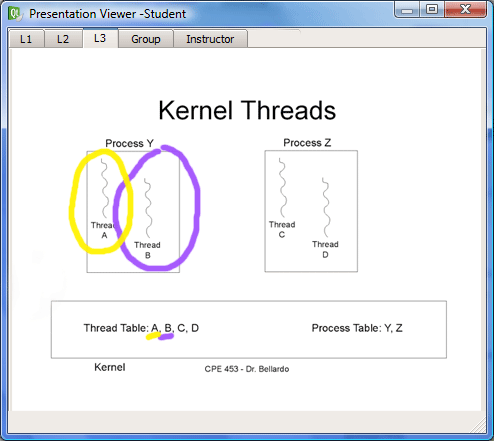 |
 |
||
| Figure 29: Student selects 'L3' | Figure 30: 'L3' has been deleted |
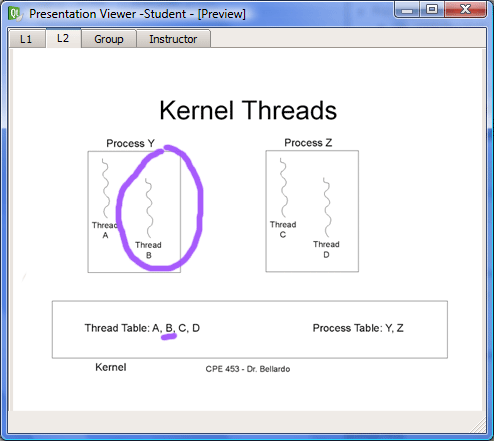
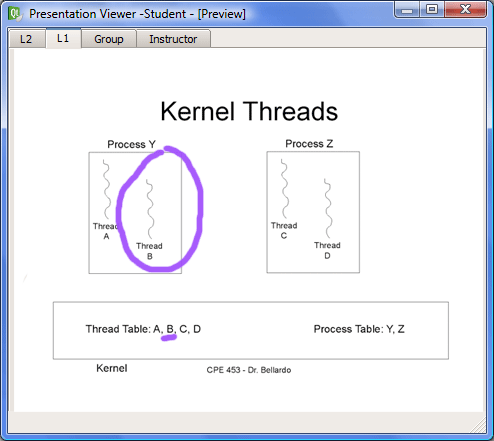
Layer 'L2' is now the active layer but she decides she wants this layer to have the lowest precedence, so she clicks the 'back' button in the layers toolbar sending 'L2' to the front of the tabs. (Figure 31)
 |
|
| Figure 31: 'L1' is at the lowest priority at the front of the layer tabs |
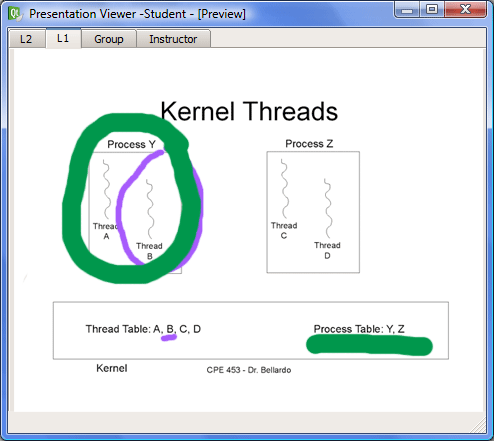
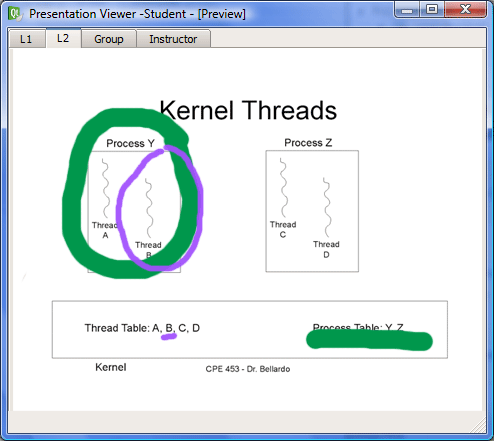
She draws on 'L1' with a thick, green brush. (Figure 32) She then decides she wants to restore 'L2' back to where it was and because this position is only one layer away in the direction of increasing precedence, she uses the 'up' button. (Figure 33)
 |
 |
||
| Figure 32: Student draws on 'L1' which has a higher precedence than 'L2' | Figure 33: 'L2' is moved 'up' in precedence |