Figure 2.7.2.3.1: "Group Students by" Submenu
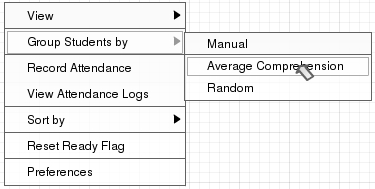
Figure 2.7.2.3.1 shows the roster menu with the "Group Students by" submenu open.
Figure 2.7.2.3.1: "Group Students by" Submenu
To organize students into groups, the instructor clicks the Roster menu and then clicks the "Group Students by" option. This opens a submenu, as shown in figure 2.7.2.3.1,
containing several grouping options.
Manual: The instructor puts students in to groups manually. Selecting this option opens a dialog for grouping the students, shown below in figure 2.7.2.3.2.
Average Comprehension: Students are automatically put into groups selected by the students' average comprehension in the class. It is designed to create balanced groups.
Random: Students are assigned into groups completely randomly. The instructor will be presented with the generated groups to approve before they are applied, offering the
ability to 're-roll' groups if they are skewed, shown below in figure 2.7.2.3.7.
Figure 2.7.2.3.2 shows the Group Students dialog.
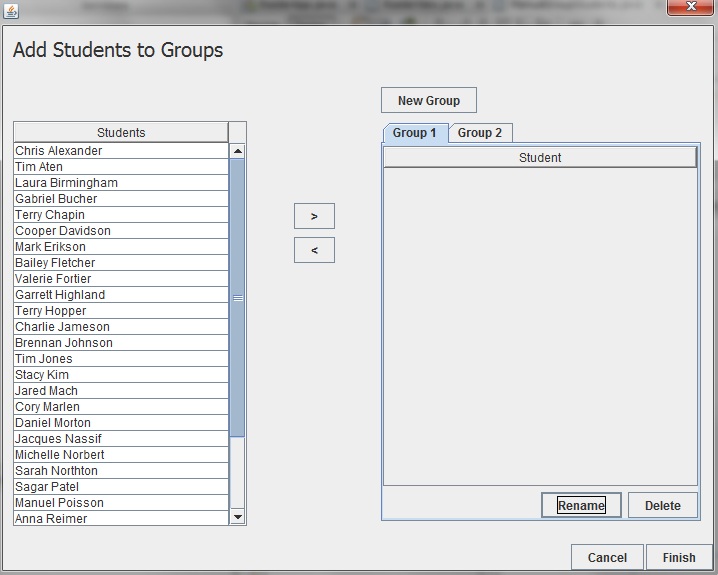
Figure 2.7.2.3.2: Group Students Dialog
In its initial state, shown above, the entire list of students is shown in the lefthand table. By default there are two groups created in the right side of the window, since if groups are being made there will most likely be at least two. The user can select students from the left table and click the '>' button to add them to the currently selected group on the right.
Figure 2.7.2.3.3 shows students added to Group 1.

Figure 2.7.2.3.3: Adding Students to Groups I
After clicking the '>' icon with three students selected, they have been moved from the left list over to the list in the tab "Group 1".
A single student cannot be added to more then one group, as they are no longer listed in the class list once they have been put into
a group.
The user can alternate between groups by clicking on the group's tab along the top of the right hand panel.
Figure 2.7.2.3.4 shows the instructor selecting Group 2 and adding a student.
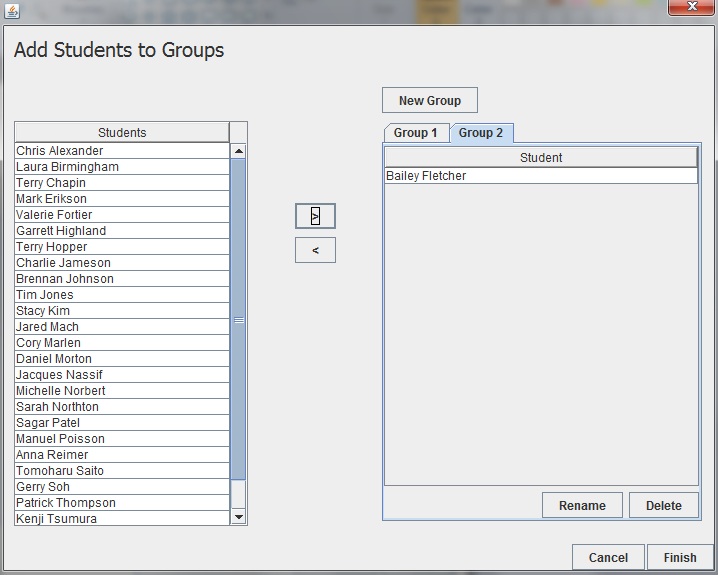
Figure 2.7.2.3.4: Adding Students to Groups II
The instructor can add new groups by clicking on the "New Group" button above the group tabs.
Figure 2.7.2.3.5 a new group created.
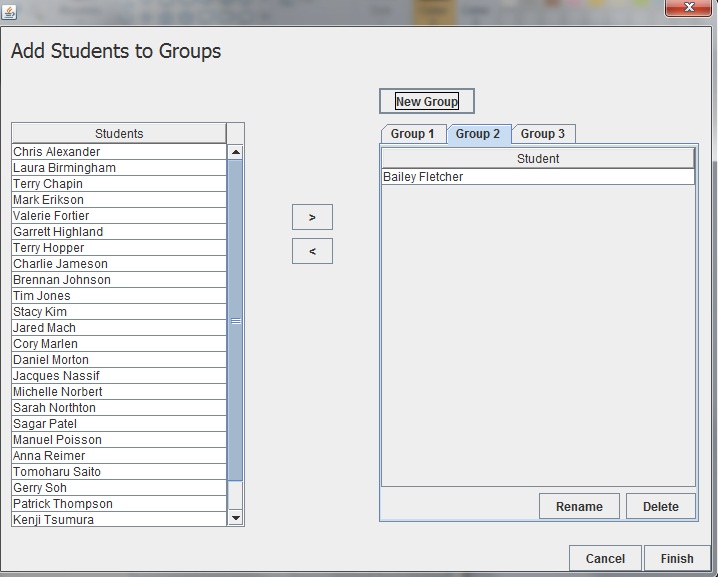
Figure 2.7.2.3.5: Adding a New Group
The instructor can delete a group by clicking on the "Delete" button on the bottom side of the group's tab. If there are students in the group to be deleted, they will be readded to the class list on the left side.
Figure 2.7.2.3.6 shows group 2 being deleted.
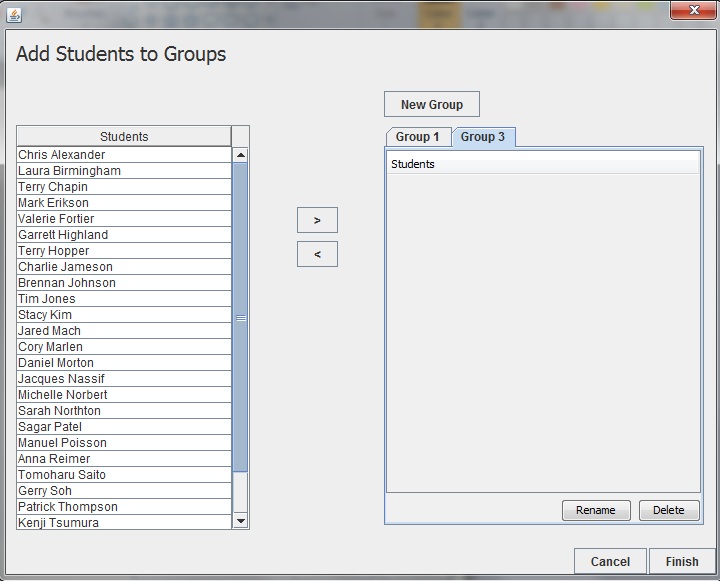
Figure 2.7.2.3.6: Deleting Groups
The instructor can choose to rename groups by clicking the 'Rename' button next to the 'Delete' button.
This will turn the text in the tab at the top into an editable text box, allowing the instructor to
change its contents and press the 'Enter' key to save it.
Clicking on the 'Cancel' button in the bottom right closes the dialog without creating any groups
or changing the roster in any way. Clicking the 'Done' button commits all the groups the instructor
has created to the roster and saves them.
Figure 2.7.2.3.7 shows the group students randomly prompt.
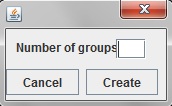
Figure 2.7.2.3.7: Group Students Randomly Prompt
If the instructor chooses to group students randomly, the prompt shown in figure 2.7.2.3.7 appears first, asking how many groups to make.
Figure 2.7.2.3.8 shows the prompt filled in.
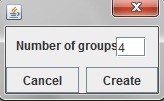
Figure 2.7.2.3.8: Group Students Randomly Prompt
Clicking the button 'Cancel' closes the prompt and creates no groups. Clicking the button 'Create' will create the groups at random, and present them to the instructor for approval.
Figure 2.7.2.3.9 shows the Created Groups window
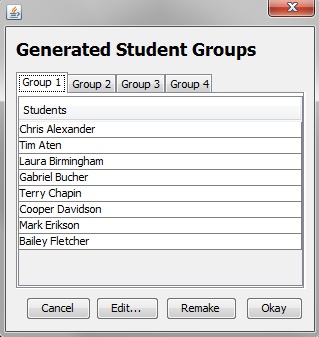
Figure 2.7.2.3.9: Created Groups window
The window shown in figure 2.7.2.3.9 is the window that appears after groups have been randomly created. The
instructor can click the different tabs to view the groups. Along the bottom appear four buttons:
Cancel: Clicking this button will close the window without creating any groups or modifying the roster in any way.
Edit...: Clicking this button will open the Manual Group Students window, but with the random groups
already filled in. From here the prefessor can make whatever tweaks and edits they think the groups need.
Remake: Clicking this button will rerandomize the groups and present them once again in this window.
Okay: Clicking this button will commit the groups to the roster and save it.