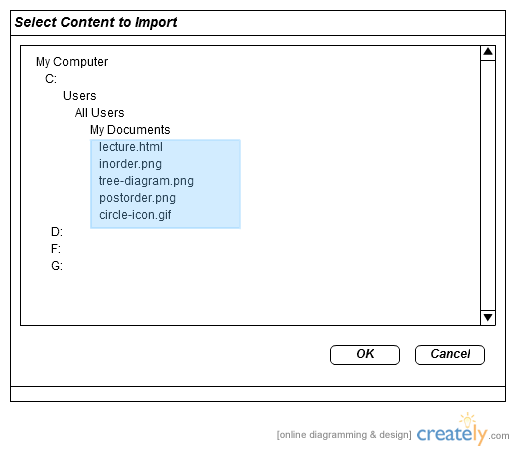
Figure 2.2.2.2: The user in the process of browsing his filesystem and selecting a set of images as the content to be imported.
Along with the ability to create slides from within the tool, the user may also create HTML adhering to the slide file specification and import it directly into the application. The application then parses the HTML and allows it to be edited using the Lecture Editor as any other lecture. The user performs this operation by clicking the "Import" button from the Lecture Manager. Upon clicking this button, an operating system-specific window will pop up, allowing selection of one or more files or directories containing the content to be imported. There are two different styles of content that can be imported:
The user has the option of converting a set of images into the slideshow aspect of a lecture. During the file selection process while importing, if the user selects only images without an HTML file, the application knows that these images should be formed into a lecture where each image is a slide. This absence of an HTML file is how the application determines whether it needs to be created. In the case where an HTML file is absent, the application creates one automatically and references the images in it. This style of importing is termed "simple" because it does not require the user to create an HTML file beforehand. In addition, the slides created from this method are themselves images, and thus, cannot contain dynamic content such as expandable/collapsible topic trees. In this way, the resulting lecture is also "simple" in its capabilities during runtime.
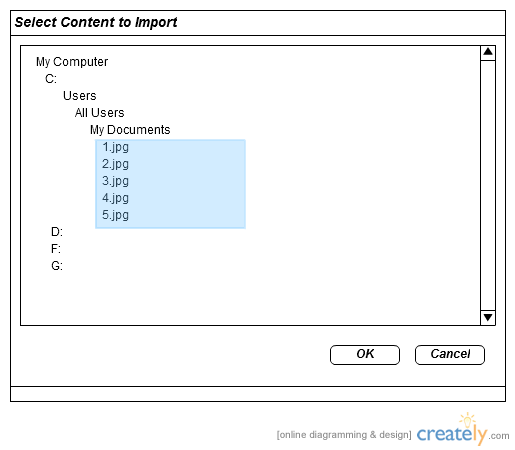
The naming of the images is not important, but the user is encouraged to name them with successive numbering because the application will attempt to order them numerically. For example, the first slide should be called 1.jpg, the second slide should be 2.jpg, and the third slide should be 3.jpg. This allows the application to determine the correct order and minimizes the post-process work required by the user. If the attempt at ordering the images fails, the images are delegated as slides in no particular order, and the user must re-arrange the slides in the Lecture Editor, defined in 2.2.1. The images must have a file extension of .jpg, .png, .gif, or .bmp. Mixing of file types is okay.
After the user clicks "OK", the images, 1.jpg - 5.jpg are uploaded and used as the slides in the lecture. So, the resulting lecture contains 5 slides. Since the only imported content are the images, the application has no way of knowing other properties of the lecture such as title, description, or date. A newly imported lecture will appear in the Lecture Manager with the default title "Imported Lecture" and today's date. The user must edit the lecture after it is imported to customize these properties.

A user also has the option of creating an HTML file outside of the application and then importing it later to convert it to a lecture. The HTML must adhere to proper formatting. For example, the user must understand that ordered (ol) and unordered (ul) list elements are converted to topic trees and that horizontal rules (hr) are converted to slide breaks. By following these conventions, the user can create an entire lecture in one HTML file and import it in a single step. This process is considered "advanced" because it is more involved than simply selecting a set of images. It requires knowledge of HTML and how the application parses certain elements. If the user uses this import method, they must understand the formatting conventions, defined in 2.2.3.