2.3.2 Editing items
In this walkthrough, a user is editing an already existing item. It is assumed the user has just created a new spreadsheet and added the item from the previous walkthrough.
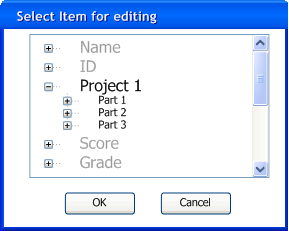
To edit a column, select the “Edit” option from the “Item” menu. In response, the system shows the dialog in Figure 2.3.2.1 where the user selects which item to edit.

Figure 2.3.2.1
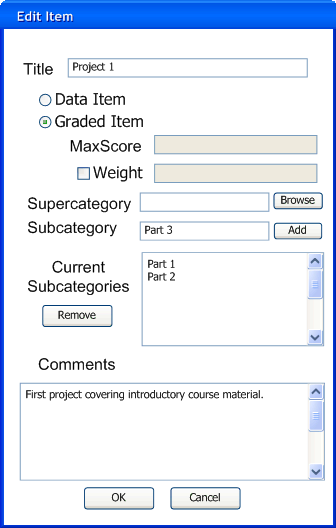
The name, ID, score, and grade columns are grayed out because they are required for the grade sheet to run properly. As such, they can not be edited or removed from the grade sheet. When the user selects an item and clicks “Ok”, the dialog shown in Figure 2.3.2.2 is shown.

Figure 2.3.2.2
This dialog is identical to the dialog used to add an item in section 2.3.1. The data entries are automatically filled to match the current state of the item. All functions, with one exception, work exactly the same way as in Section 2.3.1. The only functional difference is that removing a subcategory does not delete it, it removes the connection between the subcategory and the edited item.
When the user pushes “Ok”, the system closes this dialog and makes the changes to this item appear on the grade sheet. When the user pushes “Cancel”, the system closes this dialog and the grade sheet remains unchanged. In order for the changes to the item to be permanently saved to the grade sheet, the user must invoke the “File” >> “Save” command.
Prev: Adding Items
| Next: Deleting items
| Up: Managing Graded Items
| Top: index

