2.5.2 Creating a Pie Chart
To create a pie chart, first the user selects the Visualization tab and then a new window displays how to create visualization as shown in Figure 2.5.23.
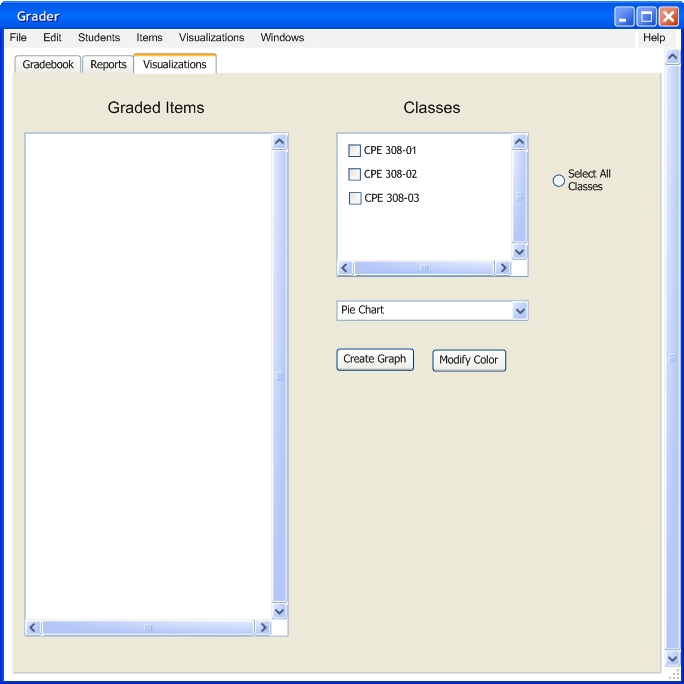
FIGURE 2.5.23
In the figure above the user has selected the Pie Chart graph in the dialog box. Now in figure 2.5.24 the user has selected the class CPE 308-01 and the Graded Items has come up.

FIGURE 2.5.24
Now in figure 2.5.25 the user opens up the Graded Items, then Homework, then Ch1 to bring up the selectable graded items.
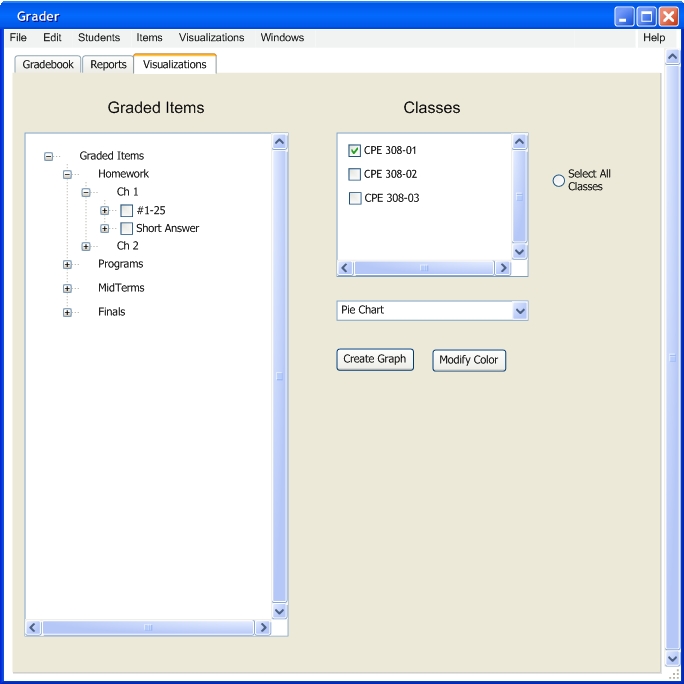
FIGURE 2.5.25
Now in figure 2.5.26, the user selects graded item #1-25.

FIGURE 2.5.26
The user clicked the Create Graph button to create the Pie Chart shown by figure 2.5.27.
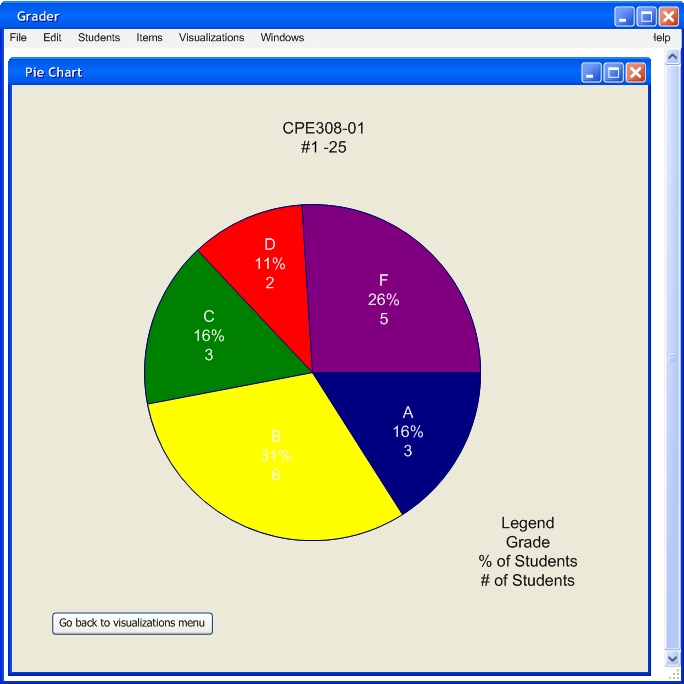
FIGURE 2.5.27
To modify the Pie Chart, the user needs to put the mouse over a line that becomes highlighted white as shown in figure 5.2.28.
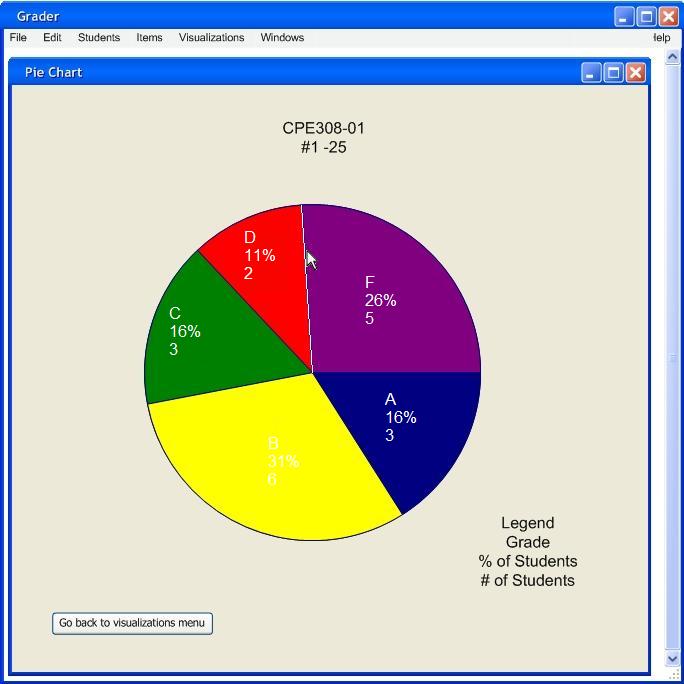
FIGURE 5.2.28
The user moves the line to the right until D has 4 students and F has 3 students as shown in figure 5.2.29
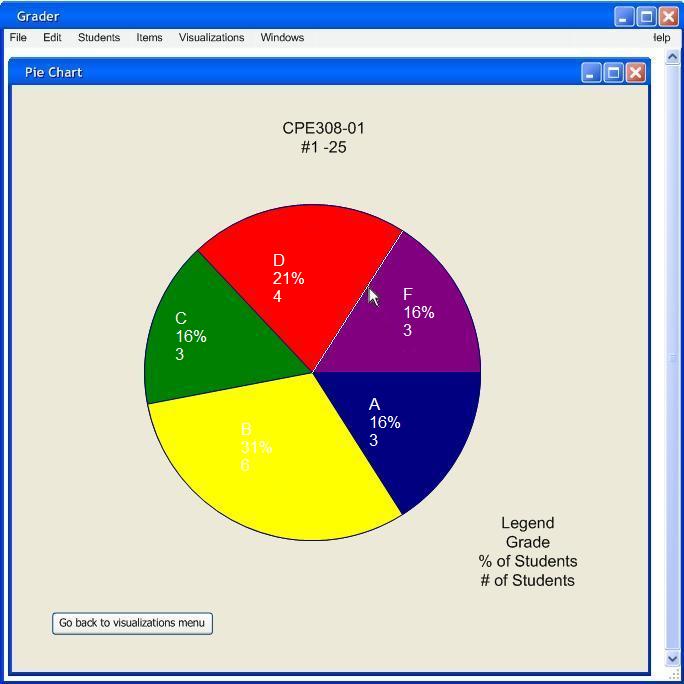
FIGURE 5.2.29
This is what the gradebook looks like when you modify the grades as shown in figure 5.2.30
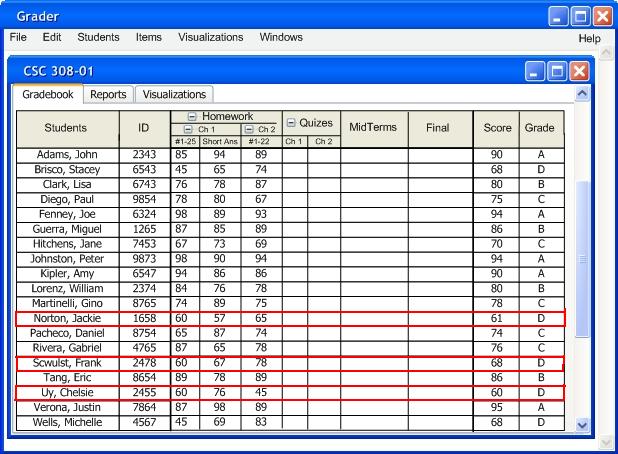
FIGURE 5.2.30
Now this is what the pie chart would look like by the user if he used the grade scale with the +/- as shown in figure 5.2.31
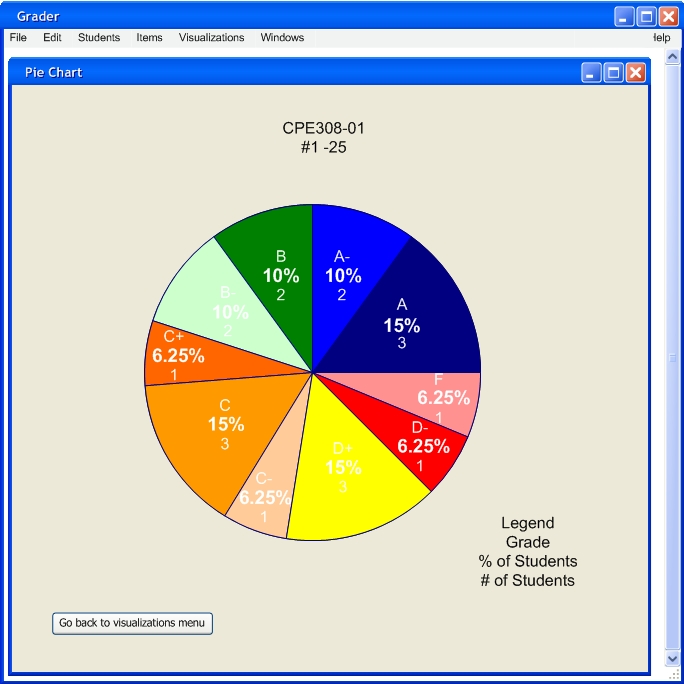
FIGURE 5.2.31
Prev: 2.5.1 Create a Histogram | Next: 2.5.3 Create a dot plot| Up: Functional | Top: Index