Section 2.4.1 - Adding/Editing a Graded Item
This section covers how to add graded item. This enables the user to enter or edit a graded item into a particular group, or create a category of items. To add a graded item the user selects:
Items -> Edit
The grader will display:
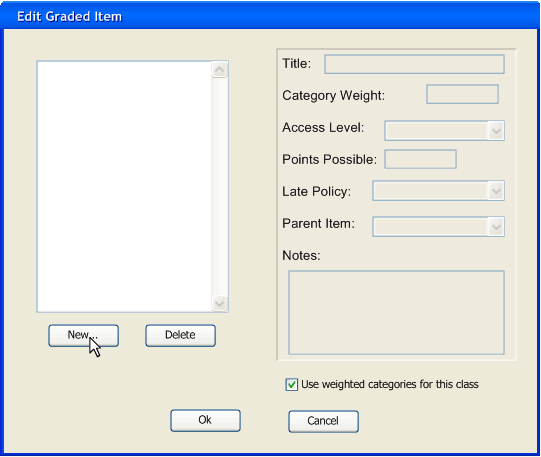
Figure 2.4.1.1
This window is the GradedItem editor. The left, explorer window contains a list of the Graded Items in the current class, which display as the middle section in the user interface. The right section displays the fields of the Graded Item selected in the explorer window. Each Graded Item contains a Title, which is it's unique identifier (a string), a weight from 0 to 1, an access level that determines who can edit it (section 2.4.4), a number of total points possible, a late policy (section 2.4.2), and a possible parent item. The check box at the bottom determines whether the current class is using weighting, or raw points scores. By default weighting for a class is turned on, to disable this f unction, the user un-checks the "Use weighted categories for this class" field.
To add a new graded item, the user clicks the "New" button on the left side of the screen. An item named "Default" will be added.
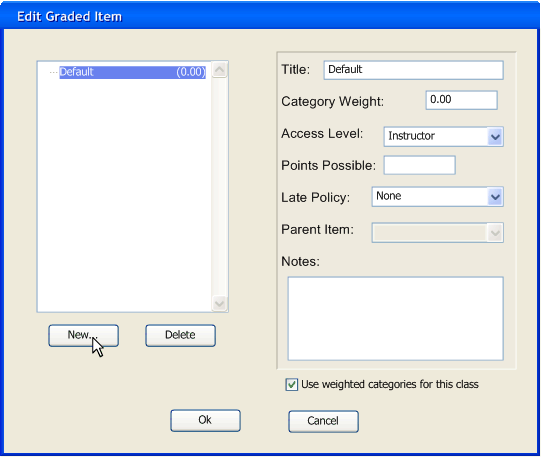
Figure 2.4.1.2
The user must edit the fields for the graded item as appropriate. The title will automatically change in the left column once updated in the right. If category weighting is turned on, select a weight on a scale from 0 - 1. To create the appropriate restrictions, the user selects an access level for the assignment from the dropdown menu; by default the level is "Instructor." For specifics on access levels, see section 2.4.4. Select a Late Policy if needed. By default, late assignments are not accepted. For more on the Late Policies option, see section 2.4.2. If there are no other graded items, the Parent Item field will not be enabled. If the current graded item is to be a category of items, the weight is the sum of its sub item's weights. If an item has children, the Points field will be disabled. The access level and late policy are the default in it's sub items, but each item can be reconfigured independently.
A typical item may look something like this:
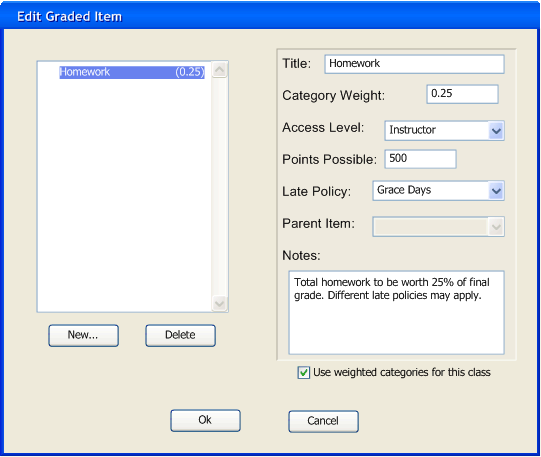
Figure2.4.1.3
If the user selects "Ok" they will be returned to the Gradebook Overview. It will be updated to display:
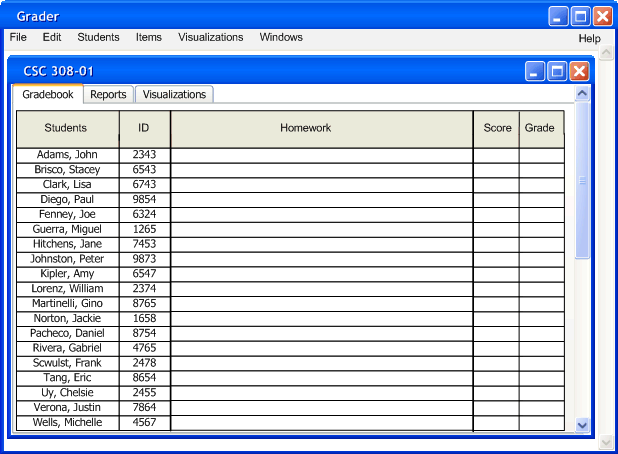
Figure 2.4.1.4
To add a sub item, the user returns to the Edit items screen, then selects the category that will be the items parent and selects "New," or after adding a new item selects the correct parent item field:
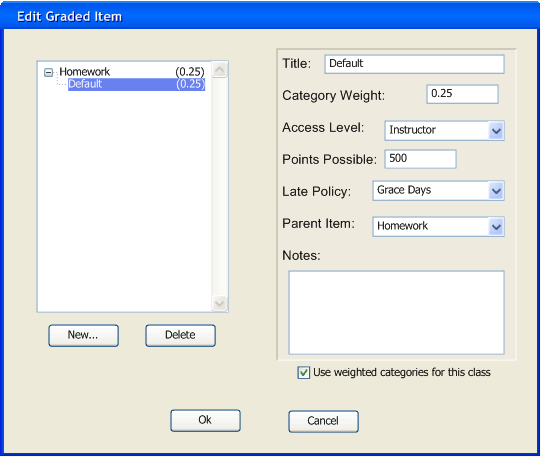
Figure 2.4.1.5
Some of the details will already be filled in. The weight field will contain the remaining unaccounted for value left in the parent category. In the case that this is the first sub-item being added to a category, it will have the categories entire weight. This field may be re-configured, but only to a value which sums up with the other sub-items to create equal to or less than the total weight available in the parent category. The access level and late policy will be defaulted to the parent categories values. Again, these fields may be reconfigured.
A typical sub item will look similar to this:
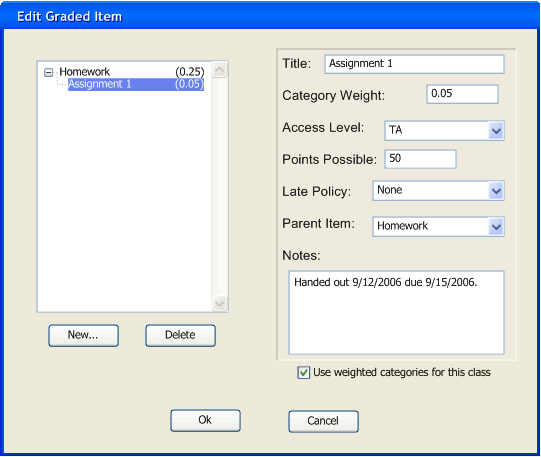
Figure 2.4.1.6
If the user then selects "Ok" they will be returned again to the overview screen It will be updated to display:
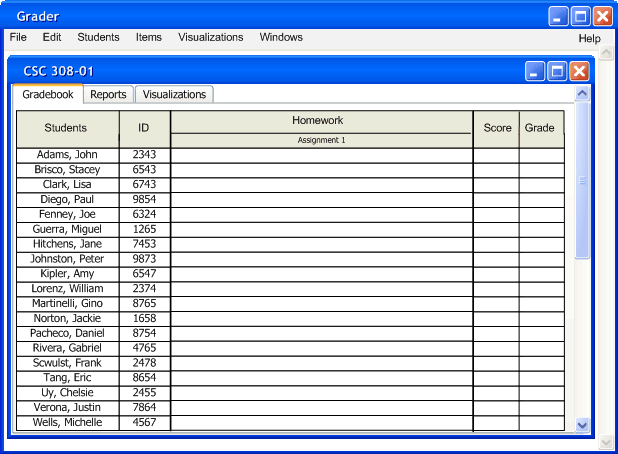
Figure 2.4.1.7
To remove an item, the user returns to the Edit Item screen, then selects the desired item in the left hand column and press the "Delete" button. If the item had children, they will be moved up to their parent's parent category. If the user were to delete the category "Homework" in this example, the program would display:
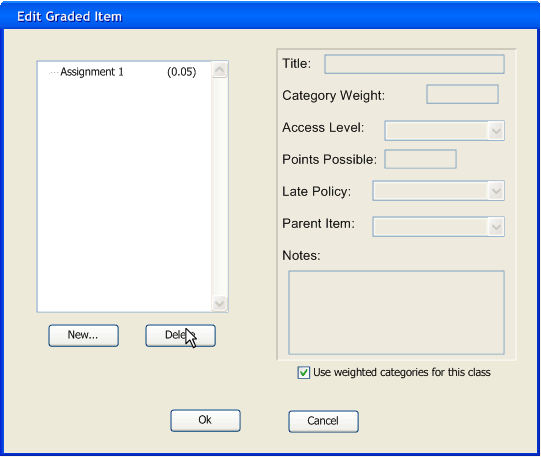
Figure 2.4.1.8
After adding server Items and sub-items, the display will typically look something like this:
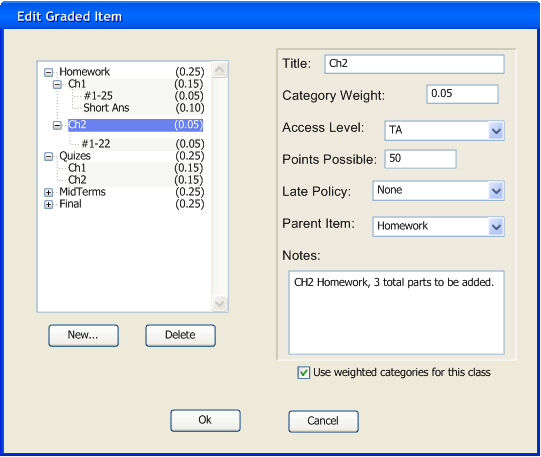
Figure 2.4.1.9
The user interface, in the overview will now be updated to contain the items and their sub-items:
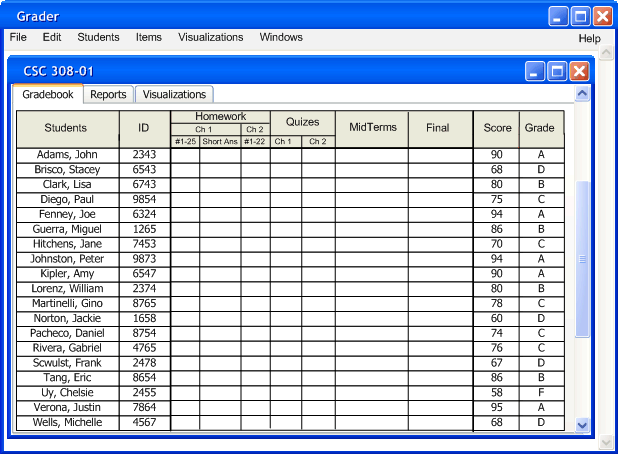
Figure 2.4.1.10