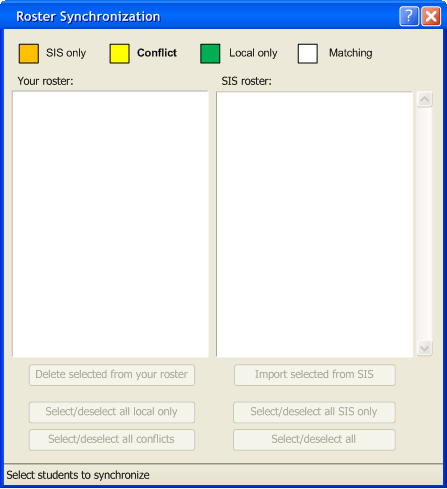
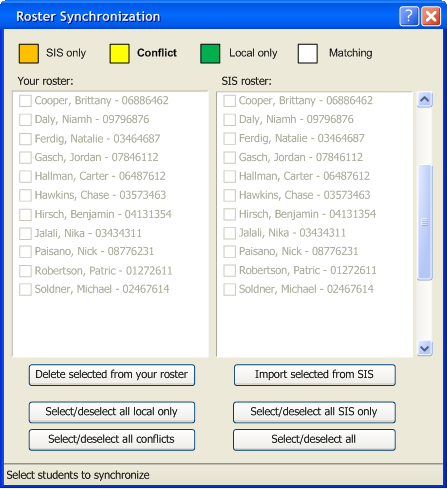
Figure 2.3.1a. Roster Synchronization dialog
Once the user has logged into SIS as in Section 2.2.2, the user can view their roster compared against the SIS roster. The differences between the two rosters are highlighted. Figure 2.3.1a show the dialog when empty.
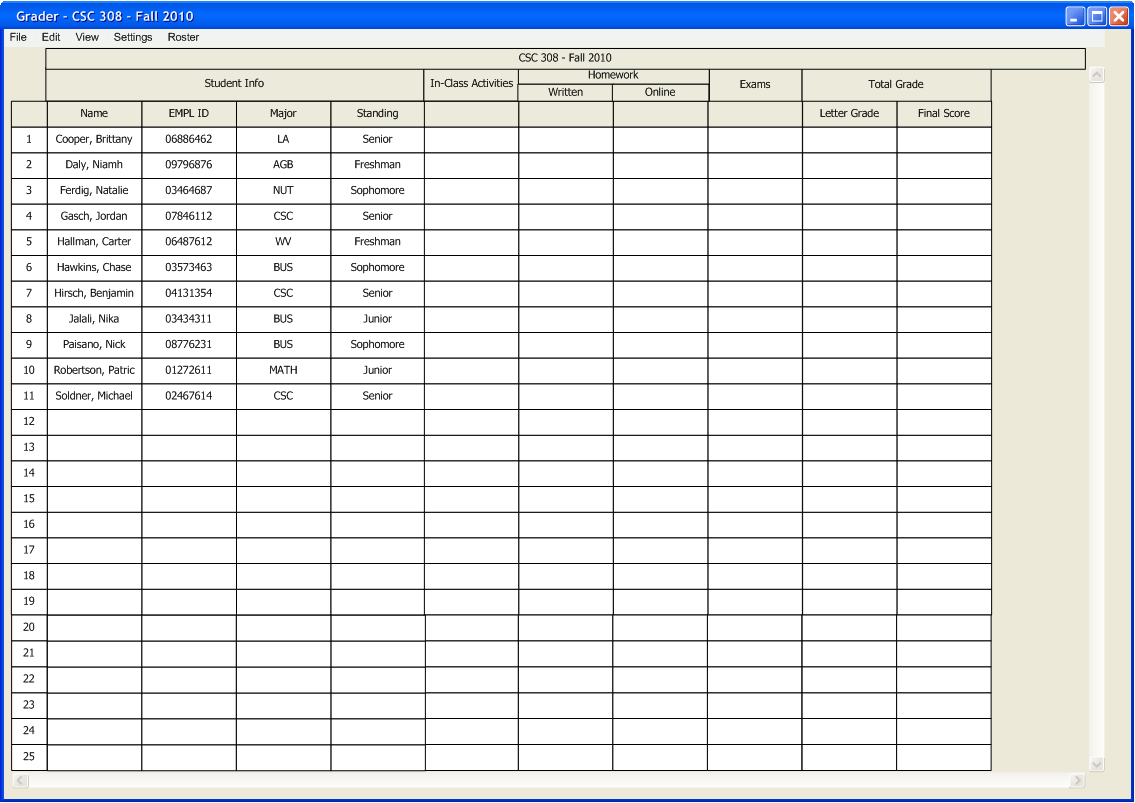
Figure 2.3.1b shows a sample screenshot of the gradebook with some students in the roster. Now the user starts roster synchronization.
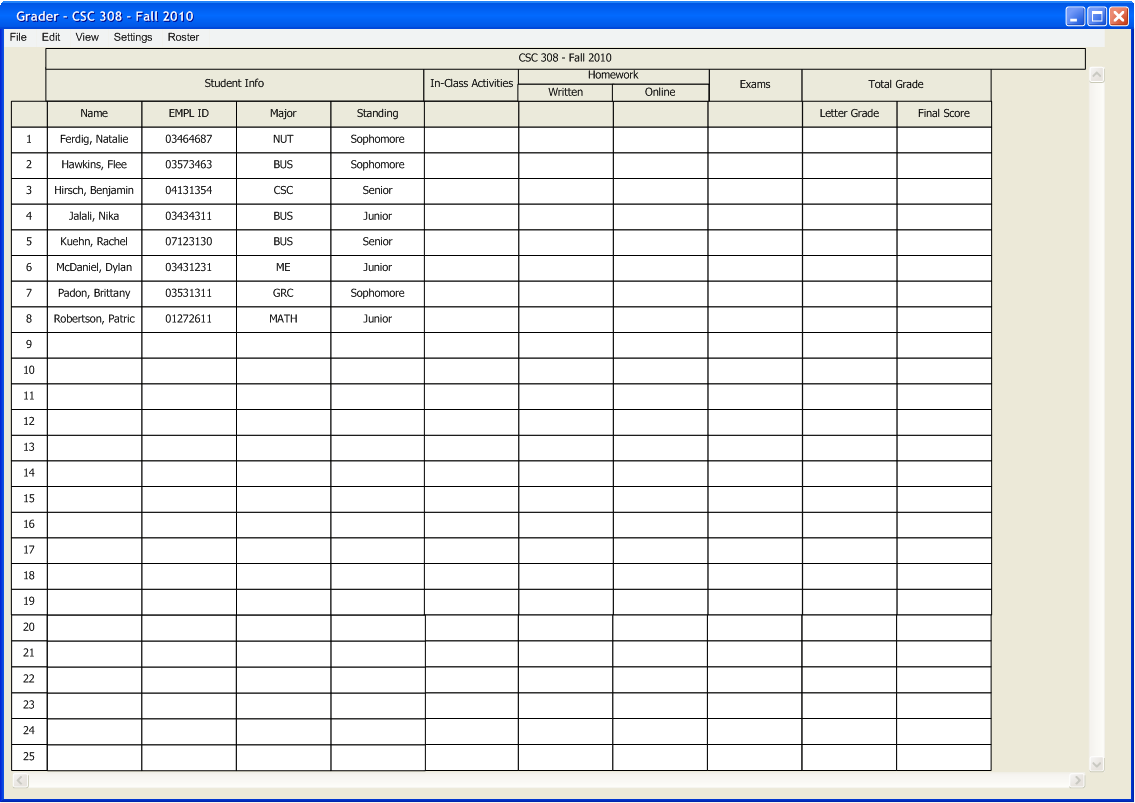
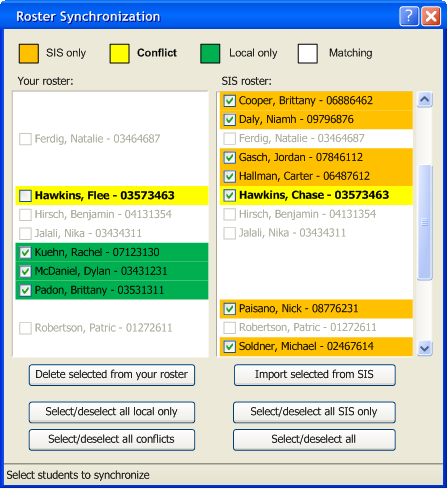
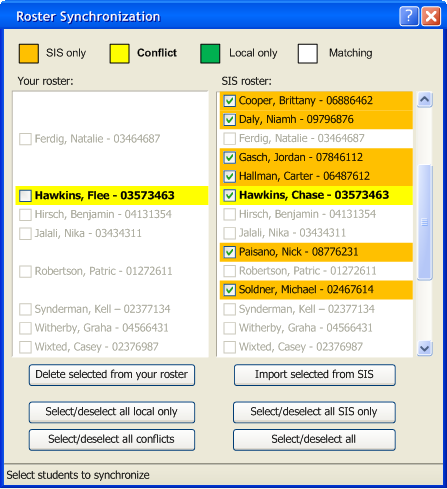
Figure 2.3.1c shows how discrepancies are indicated. The roster comparison view between the local roster and the SIS roster is modeled after typical document comparison views. The local roster is on the left and the SIS roster is on the right. If any side does not have the other side's student, there is a blank spot at the student's location. Also, if only the local roster has a particular student, the student will be highlighted green. Students only on the SIS roster will be highlighted orange (because black on red has poor contrast). Students that appear different are conflicts that are highlighted yellow. The rosters are sorted in alphabetical order by last name and the students are matched by their employee IDs.
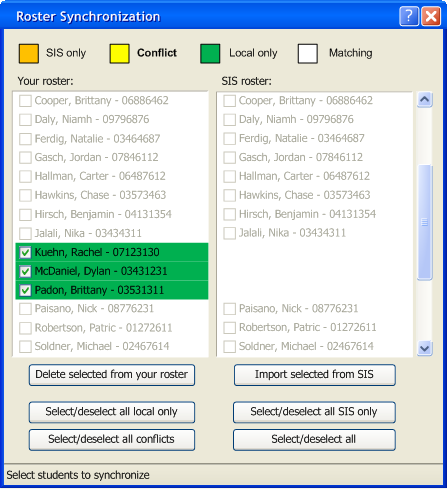
If the user clicks on the "Import selected from SIS" button, the result will be as seen in Figure 2.3.1d.
If the user clicks on the "Delete selected from your roster" button, the result will be as seen in Figure 2.3.1e.
Once the user clicks OK, the gradebook will look like figure 2.3.1f.
In a branched out scenario from those above, if the user clicks on the "Delete selected from your roster" button from Figure 2.3.1c, the result will be as seen in Figure 2.3.1g. Note that students below the deleted students are moved up.
Students that appear different are virtually treated as students only on the SIS roster, where the local copy of the student's information is overwritten by the SIS information. The user may alternatively choose to keep the conflicting information by doing nothing. In order to view a complete list of differences, the user can double click on the conflicting student, which brings up Figure 2.3.1h.
