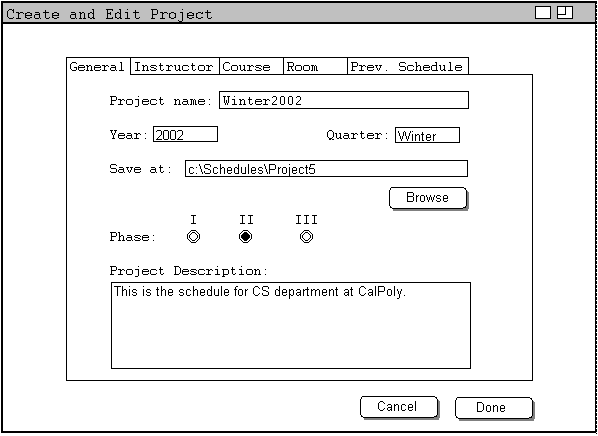
Figure 1: Fields in General tab are filled.
The scenario in this section shows the steps needed for a user to create a project. The interface described below is common to the interface for editing a project.
Class Scheduler allows the user to create a project through three methods. The three methods are creating a project from scratch, create project based on a finished schedule, and create a blank project. Regardless of which method the user choose to create the project, General tab must be filled before a project is created.
The method Creating Project from Scratch is for users who want to manually choose what courses, instructors, and rooms from the main database to be available in the current schedule. This method is preferred if the current schedule has major changes from the previous schedule or the user simply wants create a schedule from scratch.
To create a new project from scratch, click 'File -> New Project...'. This brings the Create and Edit dialog to the screen. (as shown in Figure 1) The fields in the General tab must be filled before the "Done" button is pressed. The desired project name is to be filled in the 'Project name' field. The year and the quarter fill the 'Year' field and 'Quarter' field respectively. The reason for Class Scheduler to acquire the year and quarter of the schedule is that it then will be able to search for this schedule by its year and quarter. The project location is filled in the 'Save at' field. Each project is divided into three phase. The definition of each phase is defined by the end user. Class scheduler has on control on which phase the project is at. The 'Project Description' field is strings of text that describe the project. (Project Description field can be left blank if user desires)
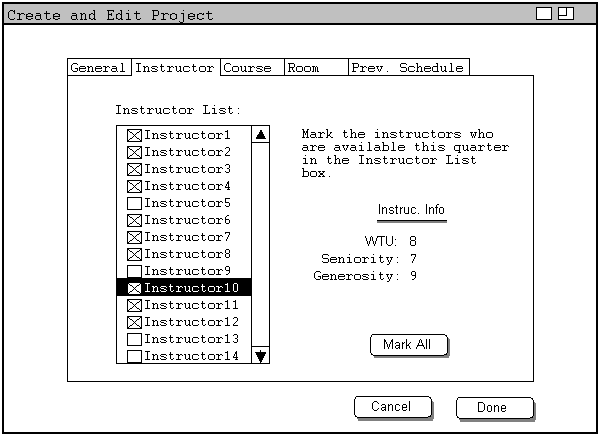
A list of all individuals in the instructor pool is shown in the Instructor tab. (Figure 3) The user can indicate the instructor who is available for teaching by marking the box to the left of this instructor. The "Mark All" button allows the user to mark all the instructors who are in the Instructor List. To see WTU, seniority, and generosity of an instructor on the list, highlight the name of the instructor and this information then shows on the lower right of the tab.
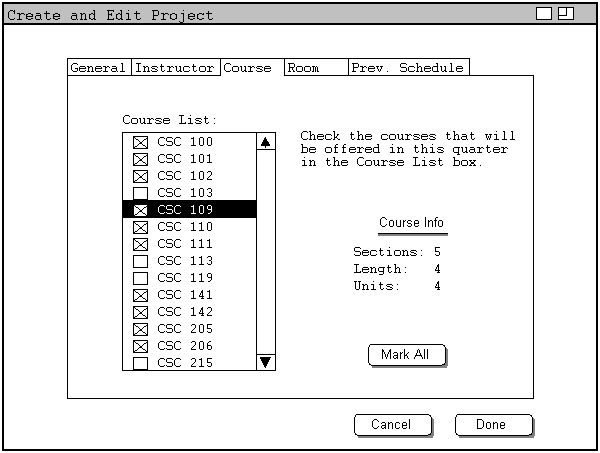
The Course List box on the left side of the Course tab (Figure 5) lists all the classes from the course pool. To make a course available in this quarter, mark the box to the left of this course in the Course List box. The "Mark All" button marks all the courses in the list. To see the number of sections, length, and units of a course, highlight the course that is desired.
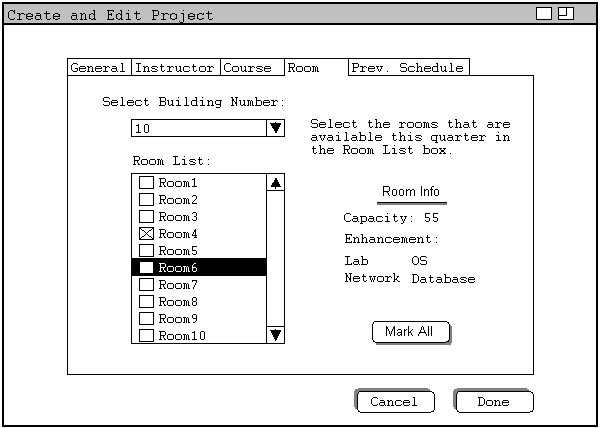
Two steps are needed to make a room to be available for this quarter. First, choose the building number of the room from the 'Select Building Number' field. Then all the rooms from that building are shown in the box on the left side of Room tab. (Figure 7) The Room List box shows all the rooms in the building which is selected in the "Select Building Number" filed. To make a room to be available in the current quarter, mark the box to the left of the room. The ''Mark All" button marks all rooms in the list. To see the capacity and enhancements of a room, highlight the room number in the RoomListing box.
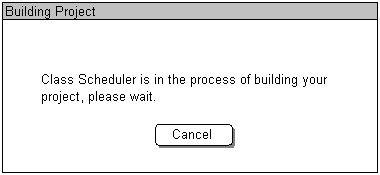
At this point, the user has finished setting up the three databases for the schedule. Next step is to press the "Done" button and have Class Scheduler build the schedule. The Building Project dialog (Figure 9) then appears on the screen.
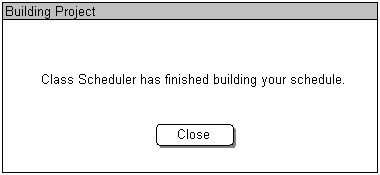
The creating project process ends with the dialog shown in Figure 10. The user is then brought the administrator overview as shown in figure 2 of section 2.1.1.
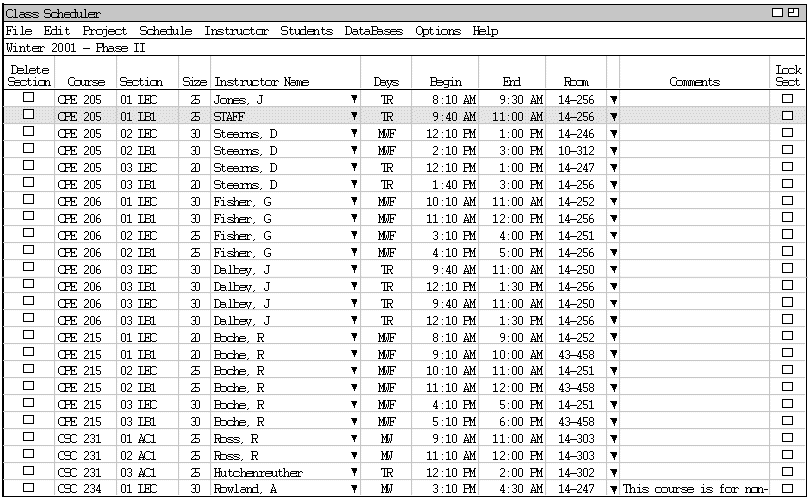
Below is a screen shot of what the user see on the screen when the schedule is created.
This method is preferred if the user wants to create a schedule that has similar settings with a schedule from previous quarter. By importing local databases from the previously done project, the user can skip the hassle of re-entering datas. This way only minor changes are needed to create the current schedule.
To create a project based on a finished project, the General tab and the Prev. Schedule tab must be filled before the "Done" button is pressed. First step is to fill out the imformation in the General tab (refer to explanation on General tab above). The following step is to import the data bases from the finished project into the current project. This process is done by choosing the location of the finished project from the 'Look in' field in the Prev.Schedule tab. Class schedule then will detects the years and quarters of the finished projects in the chosen directory and display them in the 'Year' and 'Quarter' fields. The user can simply choose the desired project to be imported by selecting its year and quarter. The final step is to press the "Import" button. This button is a operation that copies the instructor, course, and room local data bases of the selected project into the local data bases of the current project.
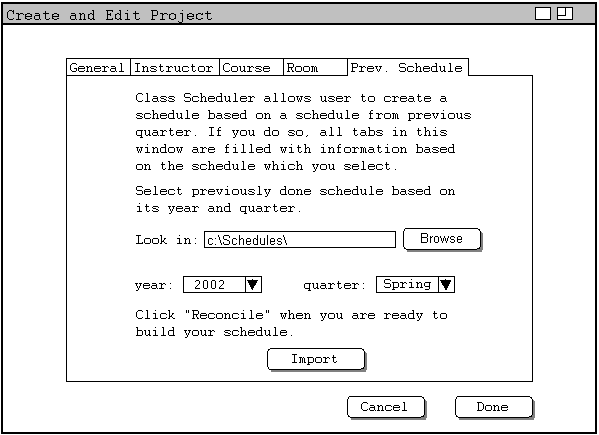
Figure 9 is displayed on screen when "Import" button is pressed.
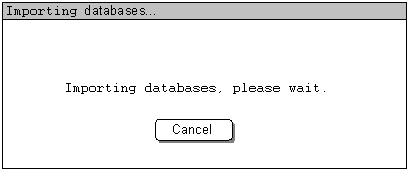
Figure 10 is displayed when reconciling databases is done.
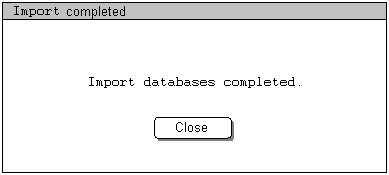
Figure 10: Import databases done
When the importing data bases process is done, all fields in the Instructor tab, Course tab, and Room tab are filled automatically. Next, press "Done" to complete the creating project process. The Building Project dialog (Figure 5) then shows on the screen. The creating project process ends with the dialog shown in Figure 6. The user is then brought the administrator overview as shown in figure 7.
Creating Blank Project is preferred if the user wants to crate a project that has no local databases temporarily. The fields in the General tab must be filled in when creating project using this method. Certainly, the user can create the local databases anytime after the General tab is filled in.
As mentioned above, the General tab must be filled in when creating blank project. For explanation on how to fill in the General tab, please refer to Section 2.2.1.1. Next, click the "Done" button to finish the Creating Blank Project process. The user can skip the Instructor tab, Course tab, and Room tab for the time being. If the user like to build the local databases later on in the creating process, then the user need to go to 'File->Databases' and add data into the local databases. Another option to build the local databases is to go to the Prev.Schedule tab and import local databases from previously done schedule.
Below is what the user see on the screen when the user created a blank project with no local databases at this point.
![]()
Figure 11: This is what the user see on the screen when a blank project is created.