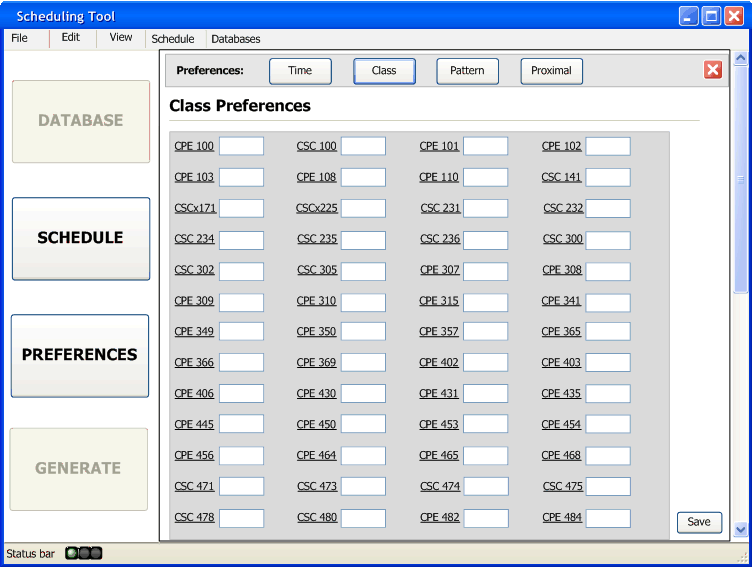
When the instructor clicks on the Class button in the Preferences landing page or the Class button in the preferences toolbar, they will be taken to the screen seen in figure 2.2.2.1.

Figure 2.2.2.1: The Class Preference Screen
This screen has all of the classes that the instructor can teach. The listing of the classes consists of the name of the class, and a text field box. The name of the class can be selected and when selected, a pop up window will open with the class' name, course number, type of class (lecture or lab), the WTUs it fulfills, maximum enrollment, if it must be paired with a lab, equipment required for the class, and finally a description of the class itself, as seen in figure 2.2.2.2.
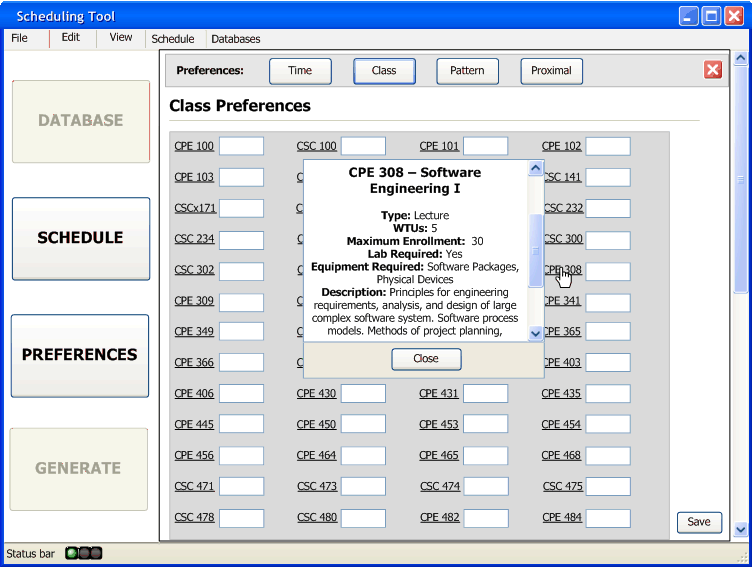
Figure 2.2.2.2: The Course Description Pop Up Window
To close the pop up window the instructor needs to click the close button, as seen in figure 2.2.2.3.
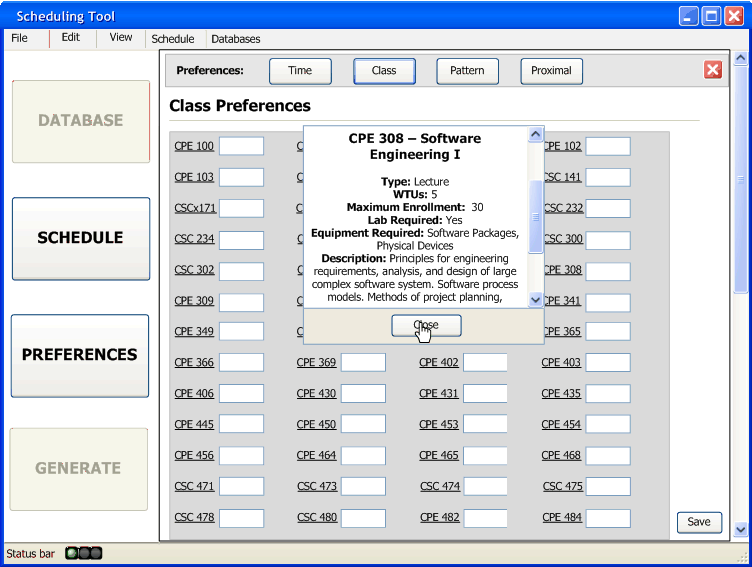
Figure 2.2.2.3: Clicking the Close Button to Close the Course Description Pop Up Window
The text field is where the instructor can enter in any number ranging form 0 to 10. 0 means that they cannot teach that class because they are unfamiliar with the course material. The numbers 1 to 10 are the levels of desirability, 1 being the least desirable class and 10 being the most desirable. A partially filled out class preference screen can be seen in figure 2.2.2.4.
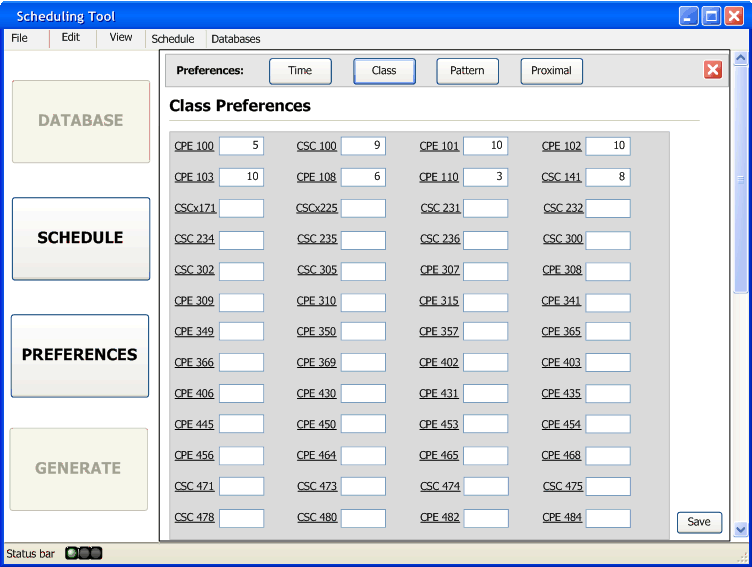
Figure 2.2.2.4: A Class Preference Screen Partially Filled
Multiple text fields can be edited in the same manner as the time preferences. In short, the instructor can highlight the text fields corresponding to the course they want to fill out, as seen in figure 2.2.2.5, and just enter in the value and all those highlighted boxes will contain the number they entered, as seen in figure 2.2.2.6.
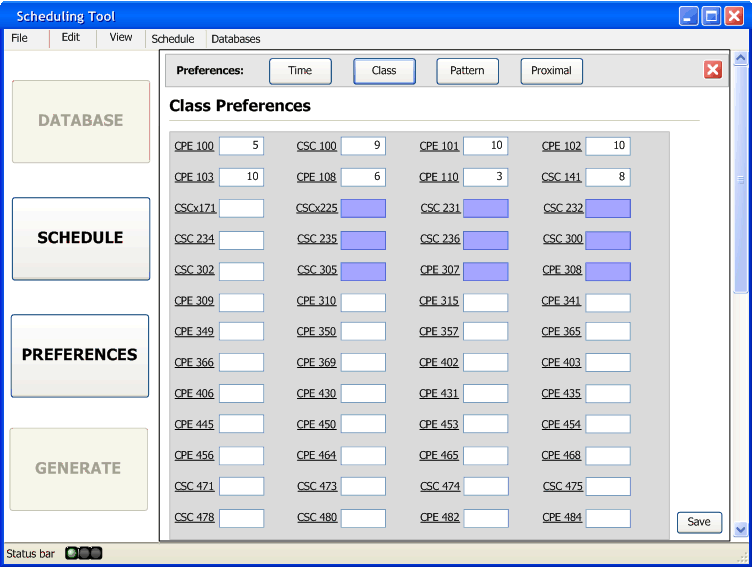
Figure 2.2.2.5: Multiple Boxes Highlighted
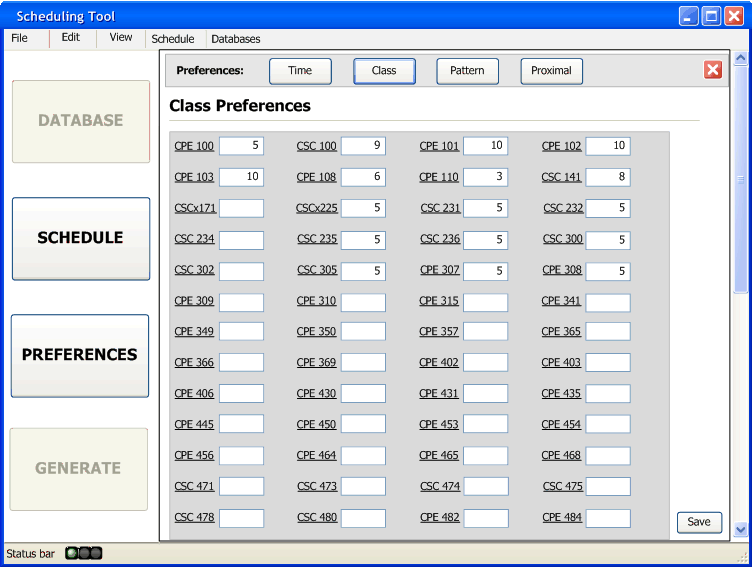
Figure 2.2.2.6: Multiple Boxes Filled Out After Being Highlighted
Any text field with a 0 in it will be grayed out, as seen in figure 2.2.2.7, for the instructor to easily see what class they decided they cannot teach, and just like the time preference screen, these text boxes can still be edited at a later date.
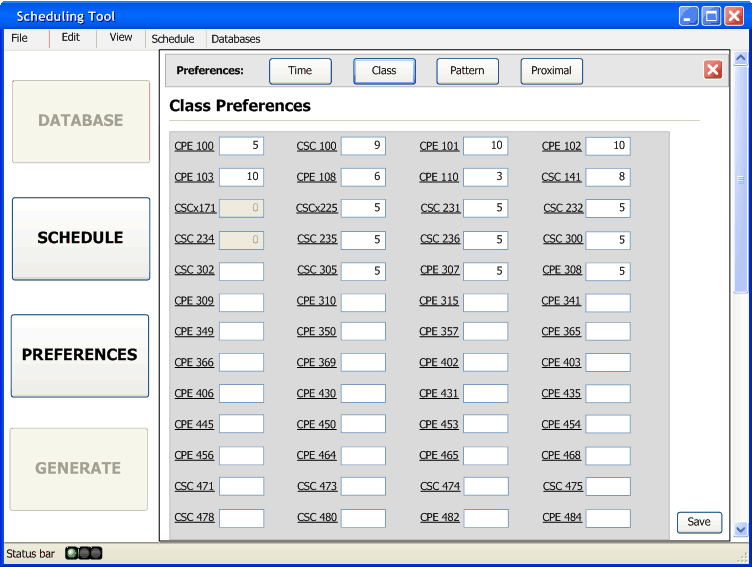
Figure 2.2.2.7: Zeros gray Out Text Fields
Just like the time preference screen (section 2.2.1), and all the other preference screens, there is a save button in the bottom right hand corner for the instructor to save their progress at anytime. When the instructor is completely done filling out their class preferences, as seen in figure 2.2.2.8, they can click on the save button.
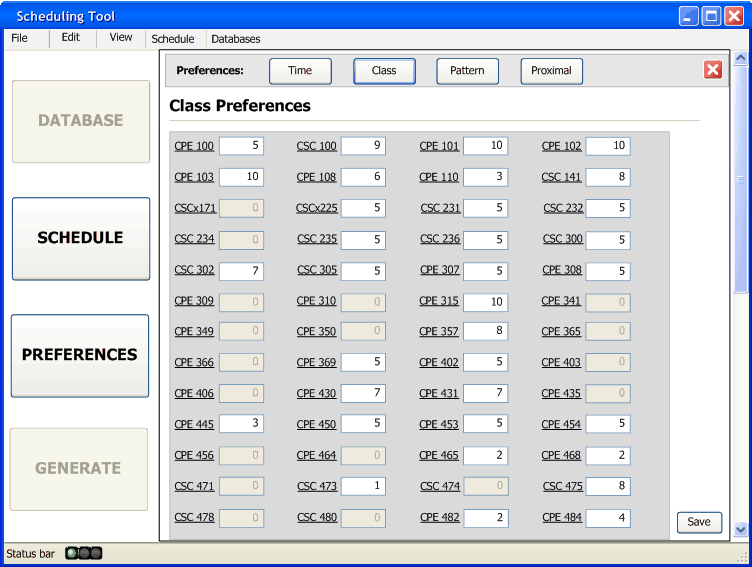
Figure 2.2.2.8: Completed Class Preference Screen
If all the text boxes do not have a value assigned to it, as seen in figure 2.2.2.9, and the instructor clicks the save button, a pop up window will come up stating that not all the fields were filled out and will also ask if the instructor wants to fill the empty text fields with the default value of 5, as seen in figure 2.2.2.10.
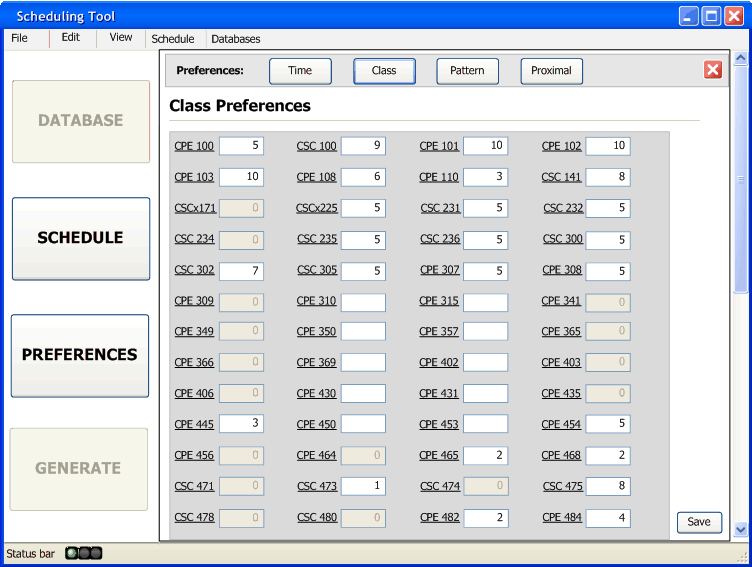
Figure 2.2.2.9: Class Preference Screen with Empty Text Fields
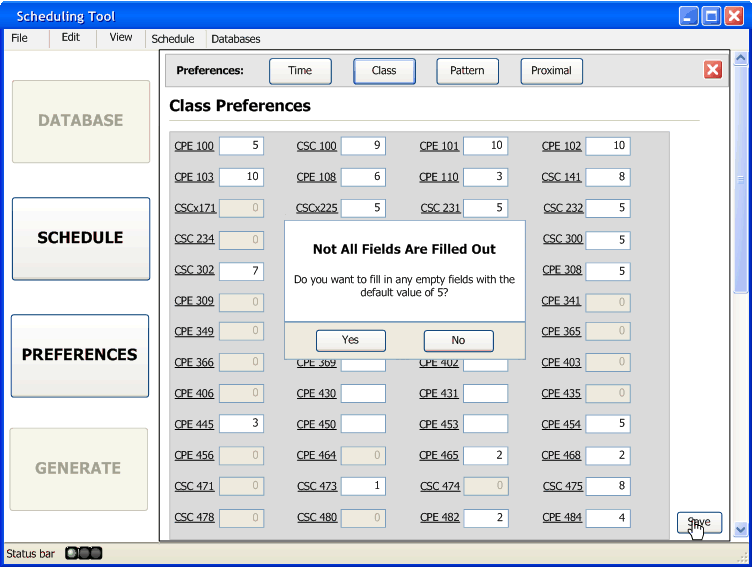
Figure 2.2.2.10: Pop Up Window Stating Not All Text Fields Were Completed
If an instructor clicks "yes" then all the empty fields will be filled with a 5, as seen in figure 2.2.2.11, and save the preferences. If an instructor selects "no" then the pop up window will close and the instructor can fill in the empty text fields.
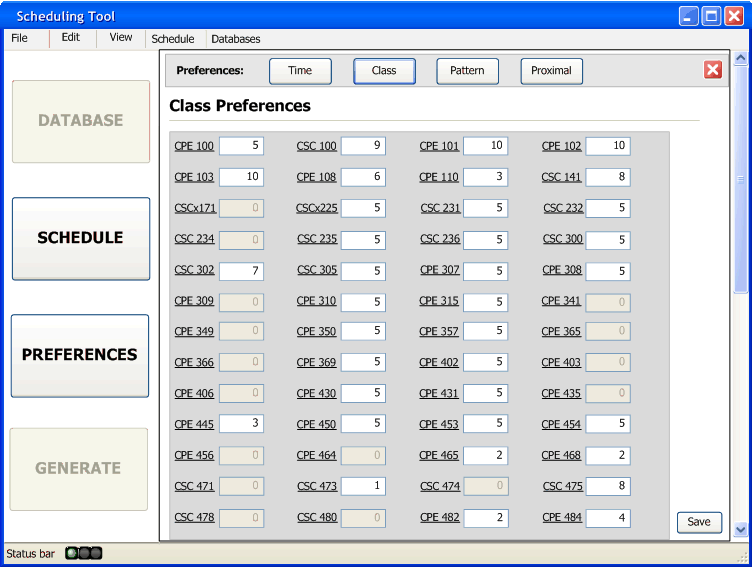
Figure 2.2.2.11: Empty Text Fields Filled in Automatically with the Default Value 5
If the instructor wants to close the window without saving any of the changes they have done all they need to do is click the "x" square button at the top right hand corner of the preference screen and they will be brought back to the preference landing screen.