The scenarios in this section show an instructor configuring his scheduling preferences, in particular:
Additionally, this page will introduce the Instructor Preference 'landing page,' that is, the page that they are presented with
when they click the large PREFERENCES button on the left side of the user interface.
It is important to note that all of the actions described in the following sections depict the actions that an instructor takes to
set their preferences. To view scenarios of a scheduler updating the preferences, please refer to Section
2.5.
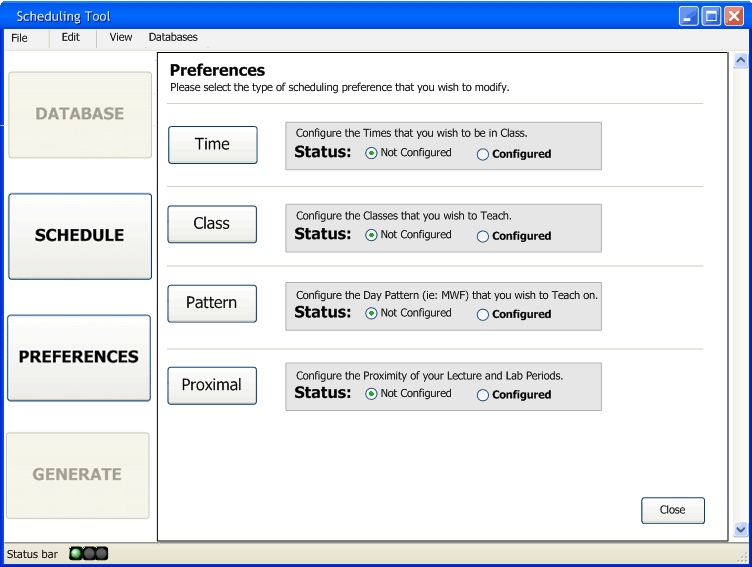
After an instructor clicks on the large PREFENCES button on the user interface, they will be taken to Figure 2.2.0.1. If this is the first time that they have clicked this button, or they have not configured any of their preferences yet, this is what they will see:

Figure 2.2.0.1: The Preference Interface Landing Page
From this interface, the instructor can monitor the status of the Preference configuration. In the Scheduling Tool, a Preference is a value ranging from 0 to 10 indicating an instructor's desire to teach a certain class, teach in a certain room, etc. The following table briefly summarizes the values that a Preference can take. We will use the Class Preference as an example (an instructor's desire to teach a specific class) however the values are identical to the Room, Time, Proximal Preferences.
Internally, the Preferences are stored as integers from 0 to 10 and are calculated in our Scheduling algorithm to produce a close to optimal
schedule (one where the Preferences set by each individual instructor are matched as close as possible). They are stored in the Temporary
Databases for the given Term (Quarter/Year).
It is important to reiterate the difference between the temporary databases and the permanent databases. In the Scheduling Tool, there is a single
set of permanent databases (Room, Class, Time, Proximity) that is unique to the application. For each term, a copy of these databases is made and
stored as temporary databases for the respective term's schedule. The temporary databases are also the ones used by the scheduling algorithm to generate the schedules.
Any Preference that the instructor has not fully completed will be
marked as 'Not Configured.' This means that they have not taken any action in regards to the Preference that is marked as 'Not Configured' (this
will be explained more below). They use the
buttons on this screen to
navigate to each of
the Preferences
that they are allowed to configure.
Upon completion of any of the Preferences configurations, this landing page will change to reflect the instructor's status update. Internally, this means
that the instructor has simply opened the respective preference. No changes or edits are required to change the status of a given preference. This
is done so that an instructor can simply leave the preferences unchanged without having to worry about a minimum amount of edits to satisfy
any requirements. This is especially useful for the non tech savvy that doesn't want to be bothered with online scheduling; they simply have to make
an effort to look over the preferences and edit them if they so desire.
The
screen below shows the
interface following a successful configuration of Time Preferences:
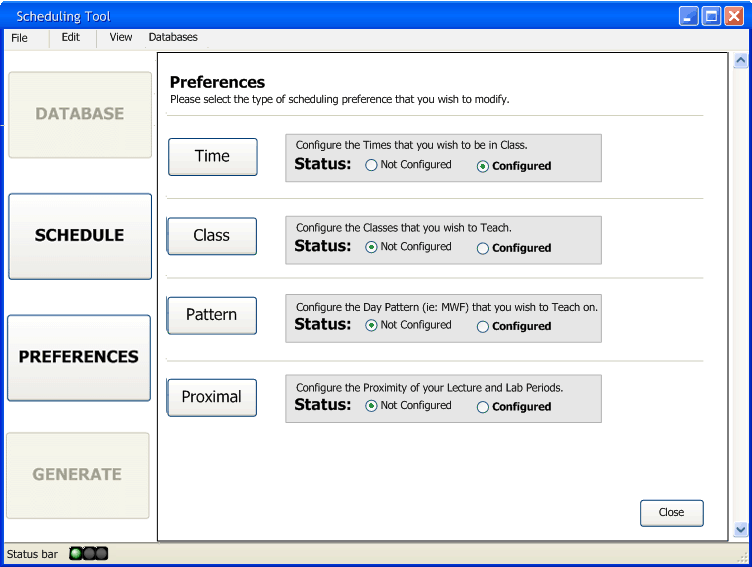
Figure 2.2.0.2: A Partially Completed Set of Preferences
Finally, after an instructor has completed all of their configurations, the landing page will present to them confirmation that all of their changes were successful. They are then ready for a schedule to be generated (via the scheduler, of course).
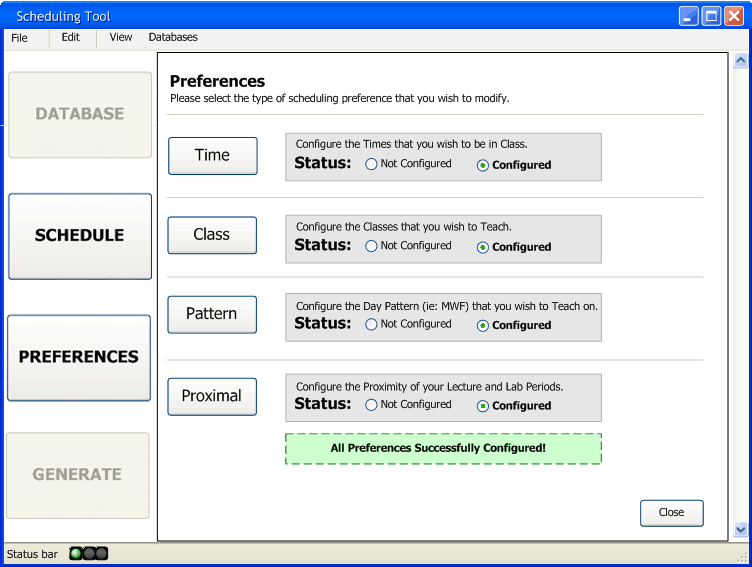
Figure 2.2.0.3: A Completed Set of Preferences
As mentioned previously, an instructor's Preferences are marked as Fully Configured after they have made some kind of action on each of the four Preferences, whether it be simply viewing them or making lengthy edits. When an instructor is done with configuring their preferences, they can click the Close button to return to the default UI as seen in Section 2.1.
One final option with the Preferencing Interface is the ability to cascade and view multiple preference windows side-by-side. This allows an instructor to easily edit all of their preferences at once and toggle between them by selecting whichever window they wish to be active. In the screen below, we show an instructor working on their Class Preferences and their Proximal Preferences (which will be detailed in the coming sections) in a cascaded enviroment.
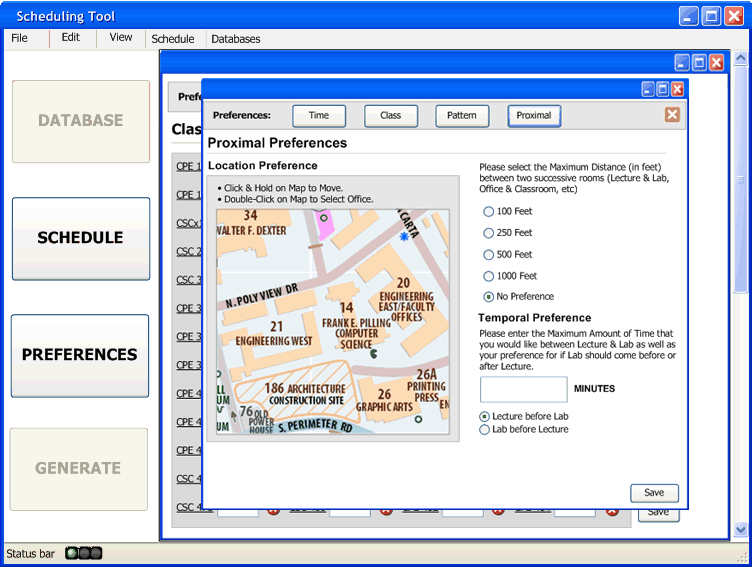
Figure 2.2.0.4: The Preferencing Screens Cascaded
The behavior of these windows are identical to the standard Windows UI Environment: The Minimize button will minimize the window to the bottom of the Scheduling Tool UI, the Maximize will cause it to expand to fill the entire Work Area, and the Close button will close the window. Finally, the below screen shows two Preference Interfaces side by side to ensure efficient preference editing.
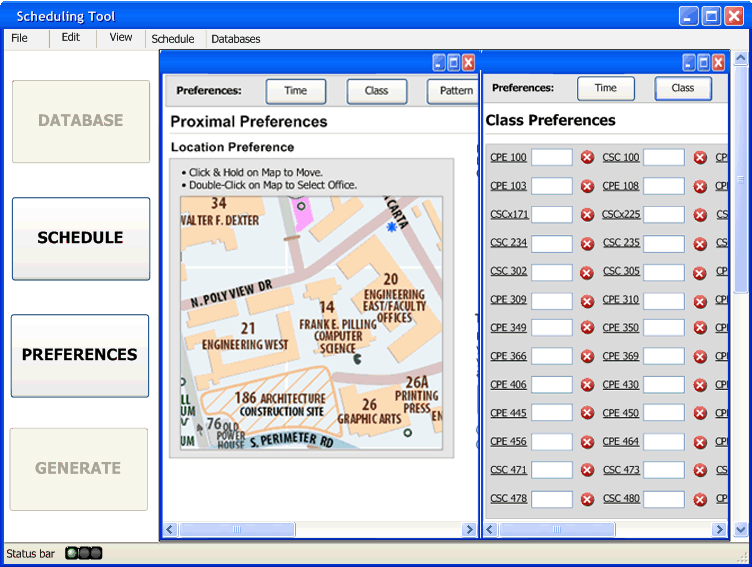
Figure 2.2.0.5: The Preferencing Screens Side By Side