
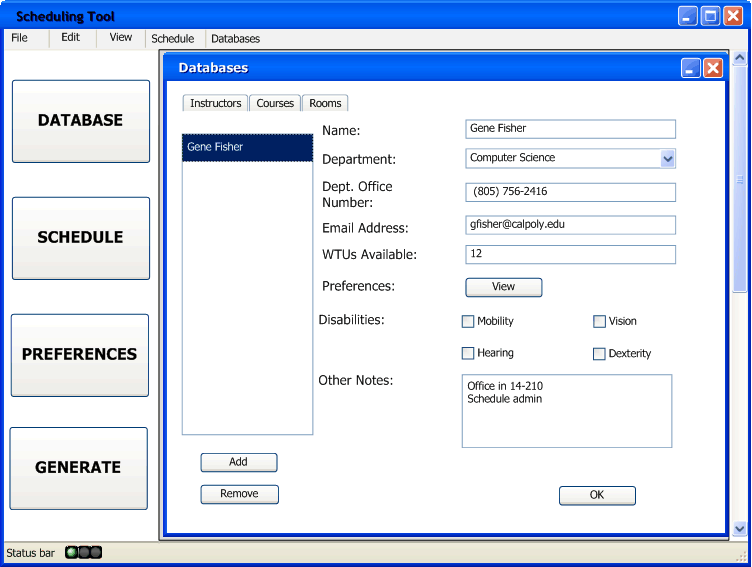
FIGURE 2.4.1.1: Adding a new instructor
The instructor database contains information about instructors who are available to teach a class at some point in time. The scheduler uses data from this database to decide the courses, times at, and rooms in which the instructor will teach for a particular term. It also contains information that is useful for an administrator searching through the database to find information about a particular professor. This scenario depicts an administrator adding items to an empty instructor database.
When the administrator accesses the Database menu using the large Databases button on the left side of the screen, the screen in FIGURE: 2.4.0.1 (see 2.4 landing page) appears in the work space, assuming the instructor database has not been modified and is empty. Alternatively, the user can select Instructors, under Databases, in the top-level menu bar. The tabs at the top are used for accessing the different databases, covered in future sections. On the left side of the screen, the user sees a list of items that exist in the database sorted alphabetically by first name. On the right side are the fields applicable to each instructor. Since the database is empty, most of the fields are greyed out. The available fields for each instructor are:
Note that the Impairment options directly correspond with Impairment options in the room database. The scheduler uses these settings to assign instructors to rooms according to any disabilities whenever possible. Also, the instructor can only be assigned as many courses as they have enough WTUs
The scheduling tool uses the data from these preferences to generate a schedule that satisifes as many instructor preferences as it can..
To add an instructor to the database, the user can click the Add button under the list on the left side of the screen. Clicking the add button creates a new entry in the database, with some default values for certain fields, and selects the new entry so that its properties are displayed on the right side of the screen, as seen in FIGURE: 2.4.1.1
The user can enter data for this new instructor over the default values simply by modifying the data in the fields on the right side of the screen. The name of the entry as it appears in the list is determined by the Name field, sorted alphabetically by first name. The user can fill out the fields as described above. For more information on editing instructor preferences, see Section 2.2. The Name field is mandatory for any entry in the database. The administrator does not need to set up preferences immediately, but the administrator or instructor must configure them before a schedule can be created. Once the user has filled out the available fields, the screen will look like FIGURE: 2.4.1.2 seen below.
This screen shows the new entry after the user has filled in the fields. The user can continue adding entries to populate the database. When enough entries exist in the database, a vertical scrollbar appears in the list of entries as seen in FIGURE: 2.4.1.3
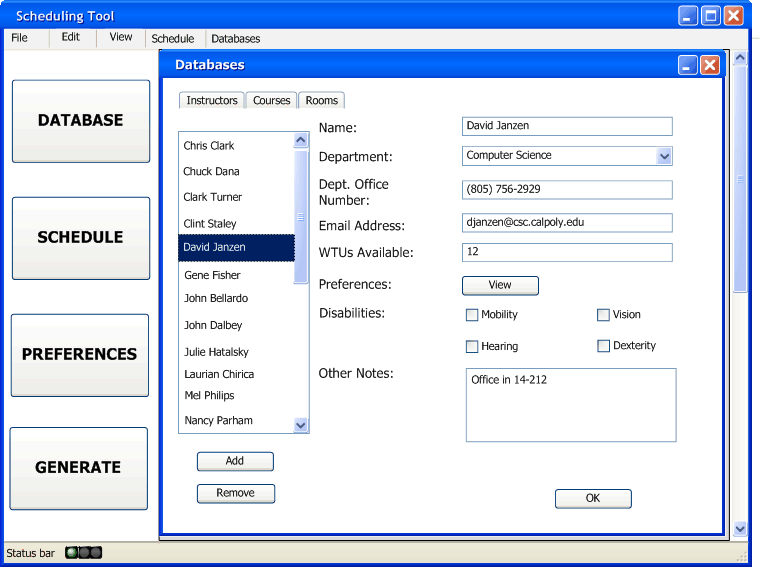
This is what the database screen looks like after the user has added several entries. The list is ordered by First Name. To remove an entry from the database the user can select an entry and push the Remove button. The prompt seen in FIGURE: 2.4.1.4 will appear to confirm the removal of the selected entry.
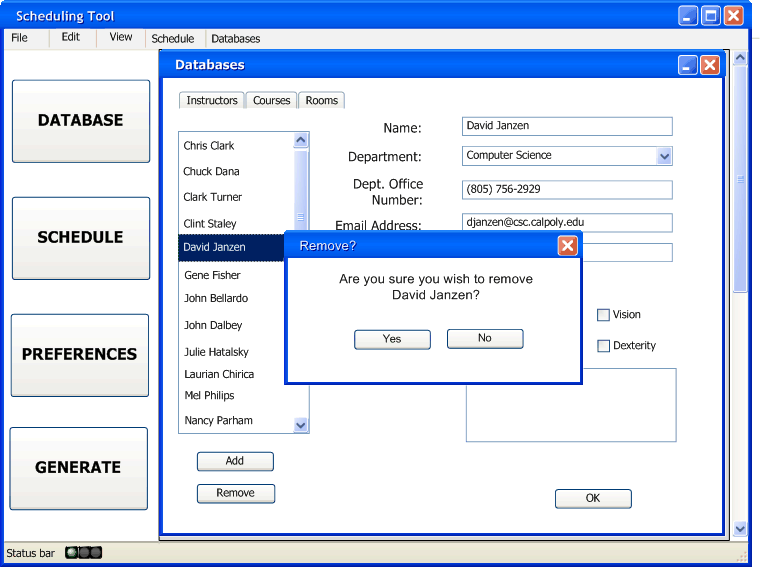
If the user clicks Yes, the entry will be removed from the database, otherwise no changes are made. Once the instructor database is populated, individual instructors will be allowed to create their preferences if the instructor exists in the database. See Section 2.2 for more details on adding instructor preferences.