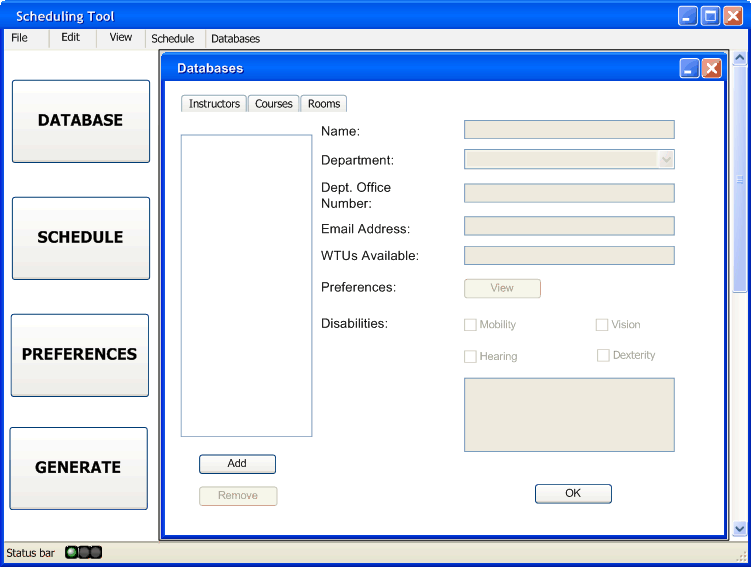
FIGURE: 2.4.0.1
This introductory scenario shows an administrator logging in to the Scheduling Tool and populating the permanent Instructor, Course, and Room databases. There are several necessary databases for the scheduling tool to function properly, so adding items to the database, or editing the existing items, is a very important process.
Upon logging in as an administrator, the user sees the opening screen (see section 2.1 for the UI overview). In order to access the databases, the user can either click on the large Databases button on the left side of the screen, or can select one of the Databases from the Schedule menu on the top toolbar. Selecting the instructor option from the top menu, or clicking the large Databases button on the left will bring up the screen seen in FIGURE: 2.4.0.1. Selecting a different database from the top-level menu will bring up a similar screen, but for a different database.

This figure shows the default view of the Databases screen. Inside this window there are 3 tabs, each representing a database. There is a tab for Instructors, Courses, and Rooms. The default tab is Instructors.
Detailed Database Information: