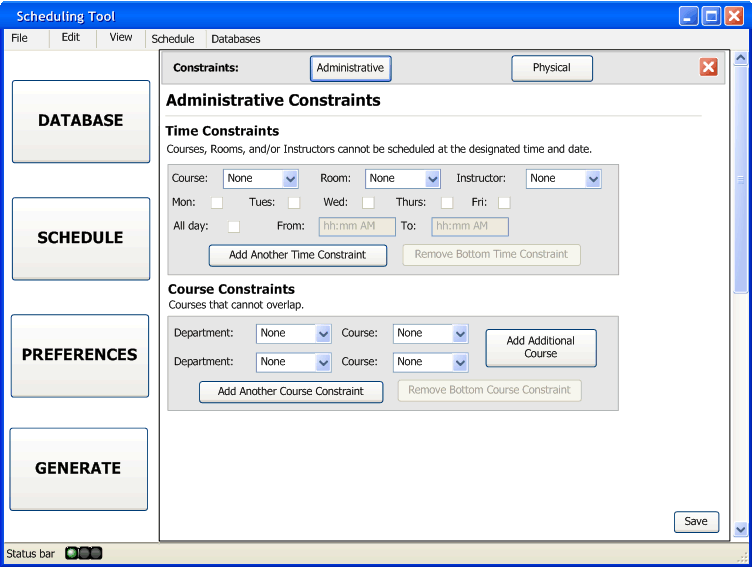
When an administrative user clicks on the Administrative button, they will be taken to the screen seen in figure 2.5.2.1.1.

Figure 2.5.2.1.1: The Administrative Constraints Screen
This screen has two different types of administrative constraints subsections, time constraints and course constraints.
The time constraints subsection is used to add a constraint so a course, room, and/or instructor are not scheduled for a particular day and at a particular time. As seen above, in figure 2.5.2.1.1, the time constraint subsection has many fields. The course selection is done by drop down menu (which lists all the courses), the room selection is done by drop down menu (which lists all the rooms), and the instructor is done by drop down menu (which lists all the instructors), as seen in figure 2.5.2.1.2. A course and room have been selected, as seen in figure 2.5.2.1.3.
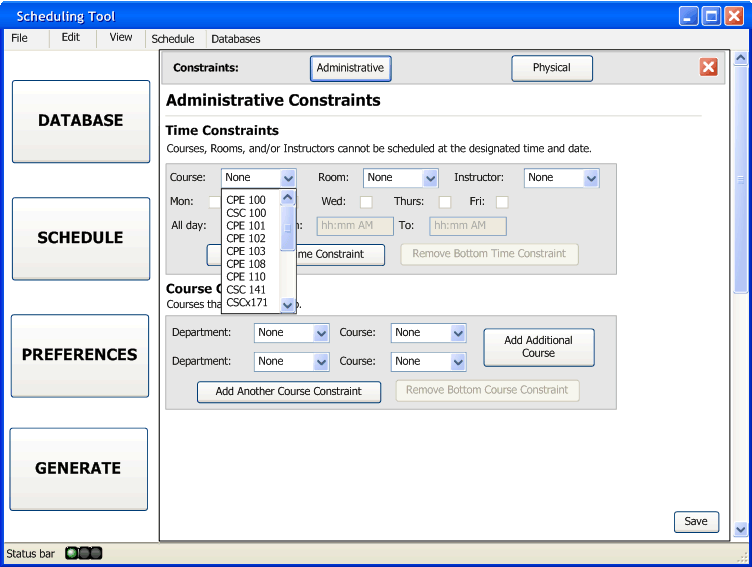
Figure 2.5.2.1.2: Drop Down Menu for Selecting a Course
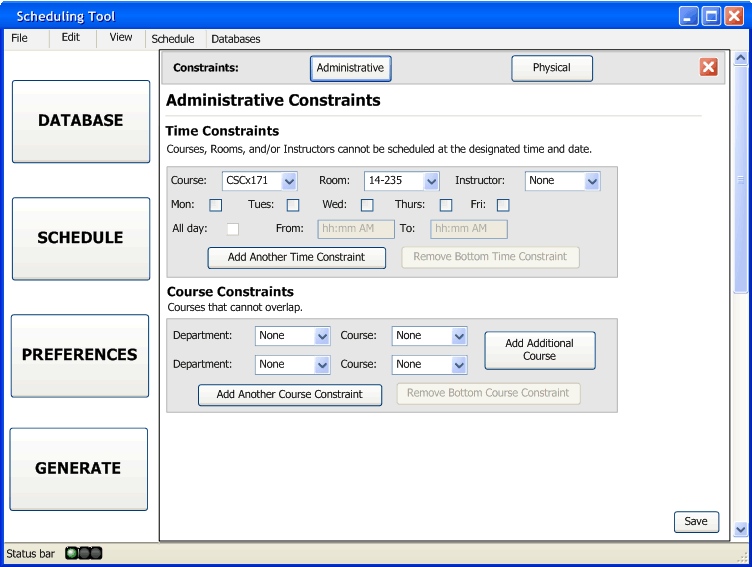
Figure 2.5.2.1.3: A Course and Room Have Been Selected
To select the day(s) of the week, a course, a room, and/or an instructor cannot be scheduled is by checking the check box to the right of the abbreviated day of the week, as seen in figure 2.5.2.1.4. If there is no course, room, or instructor selected the check boxes for the days of the week will be unavailable to be checked, as seen in the above first figure (figure 2.5.2.1.1). When one of them has been chosen the check boxes will become available, as seen in the above figure 2.5.2.1.3.
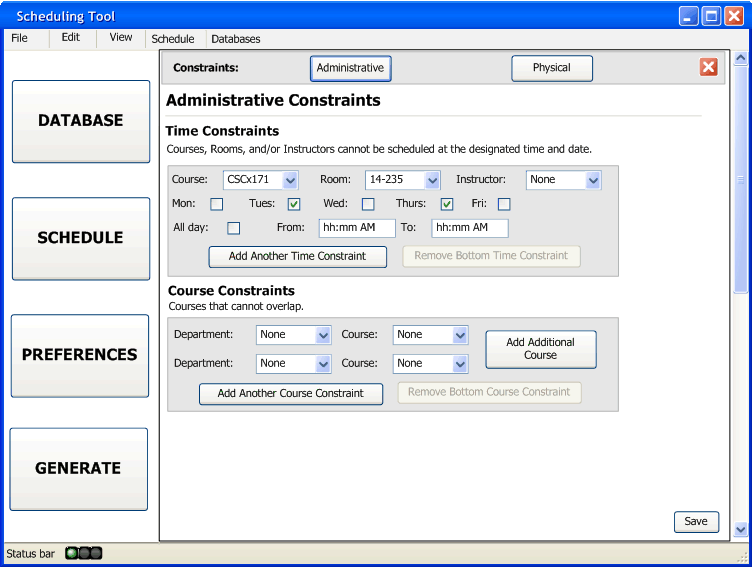
Figure 2.5.2.1.4: Day(s) of the Week That Cannot Be Scheduled Selected
There is an all day check box if the course, room, and/or instructor cannot be scheduled for that whole day. If the administrator does not want to exclude the course, room, and/or instructor the whole day, they can enter in a start time and an ending time, as seen in figure 2.5.2.1.5. If no day of the week is chosen then the all day check box, the "from" field, and the "to" field will be grayed out (as seen in the first figure 2.5.2.1.1) signifying that since no day has been chosen then no time can be chosen either. If the all day box is checked then the "from" and "to" fields will be grayed out, as seen in figure 2.5.2.1.6.
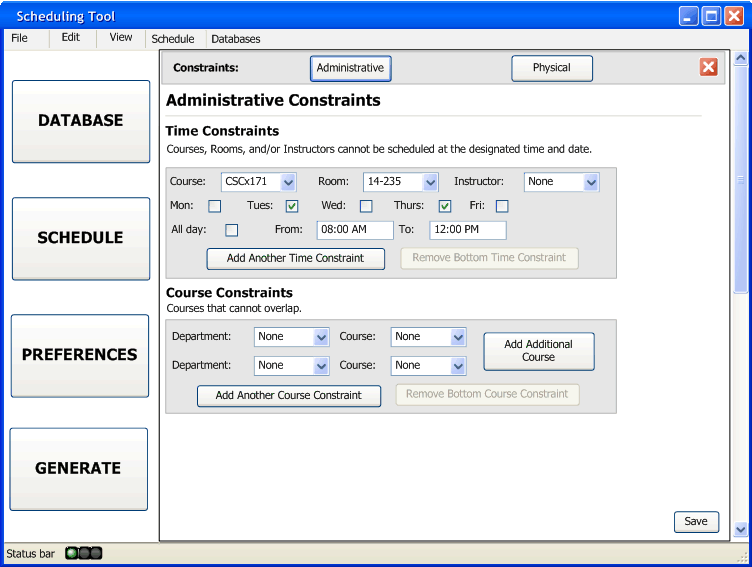
Figure 2.5.2.1.5: The From and To Fields Filled Out
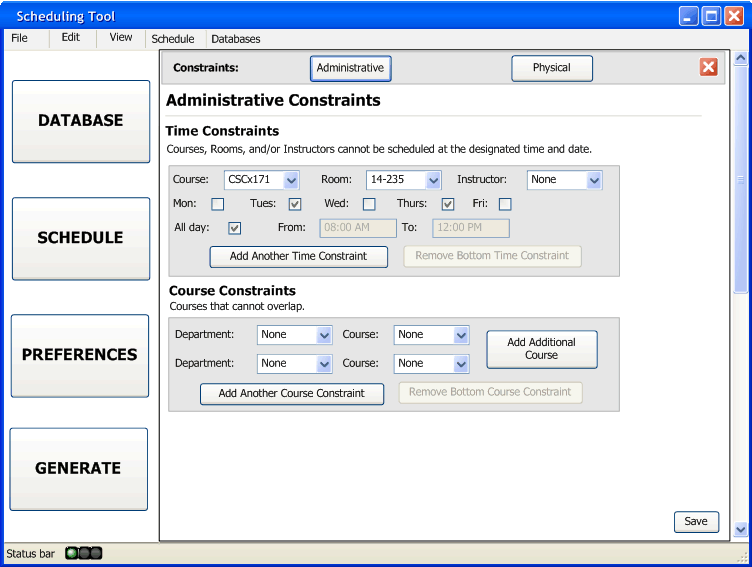
Figure 2.5.2.1.6: The All Day Box Checked
If the administrator wants to add more time constraints for an additional course, room, and/or instructor they need only select the "Add Another Time Constraint" button and another set of fields will appear in between the already filled out constraint and the button, as seen in figure 2.5.2.1.7.
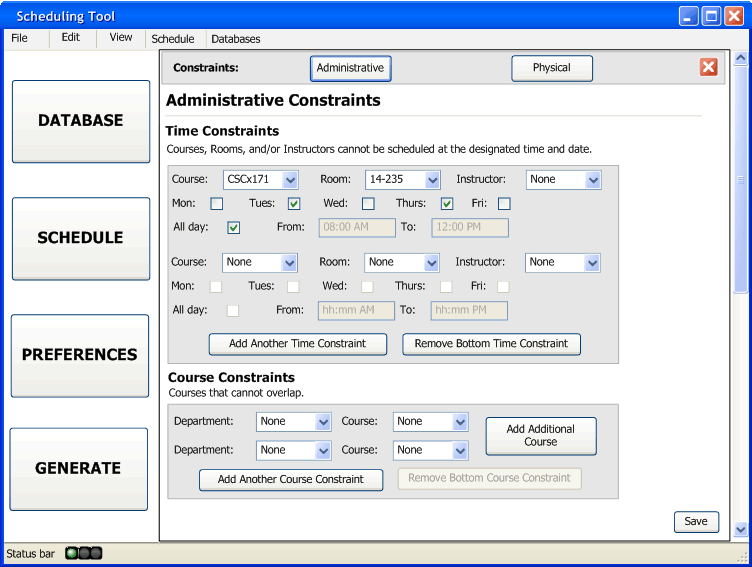
Figure 2.5.2.1.7: Another Time Constraint Added
Although it is not necessary to have the number of constraints correspond to the number of fields, there is a "Remove Bottom Time Constraint" button to keep the time constraints condensed. The button will remove the most recently added time constraint fields, as seen in figure 2.5.2.1.8.

Figure 2.5.2.1.8: An Additional Time Constraint Removed
Underneath the time constraints subsection, is the course constraints (see first figure, figure 2.5.2.1.1). The course constraint is to prevent any two courses from overlapping at the same time frame, no matter what time frame that maybe. The subsection starts out with only two sets of fields, a department drop box and a course drop box. The department drop box includes all the available departments and the course drop down includes all available courses for that department. If no department is chosen the course drop down will only read "None." After a department is chosen, the administrator can browse through the available course, as seen in figure 2.5.2.1.9.
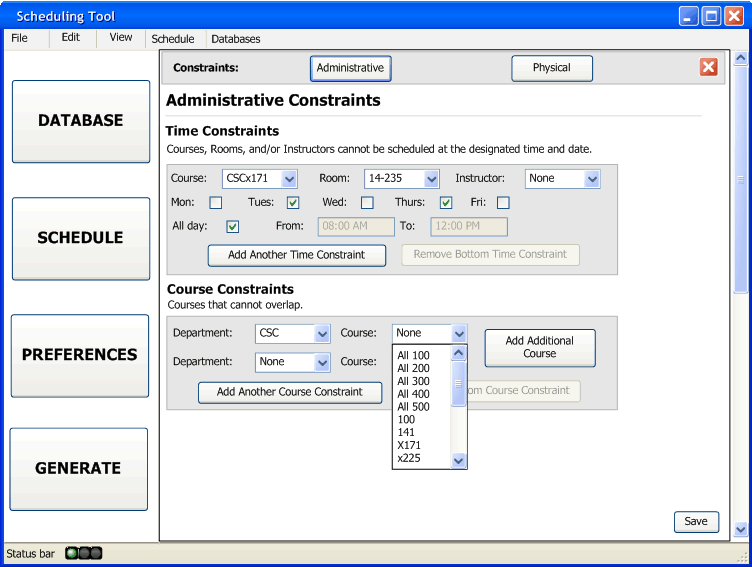
Figure 2.5.2.1.9: The Course Drop Down Menu
As seen in the figure above, figure 2.5.2.1.9, there is the option of selecting all 100, 200, 300, 400, and 500 level courses. If the administrator wants to have an overlapping constraint on more than just two courses, they need to select the "Add Additional Course" button and another row of the department and course fields will appear under the last row of fields in the set, as seen in figure 2.5.2.1.10.
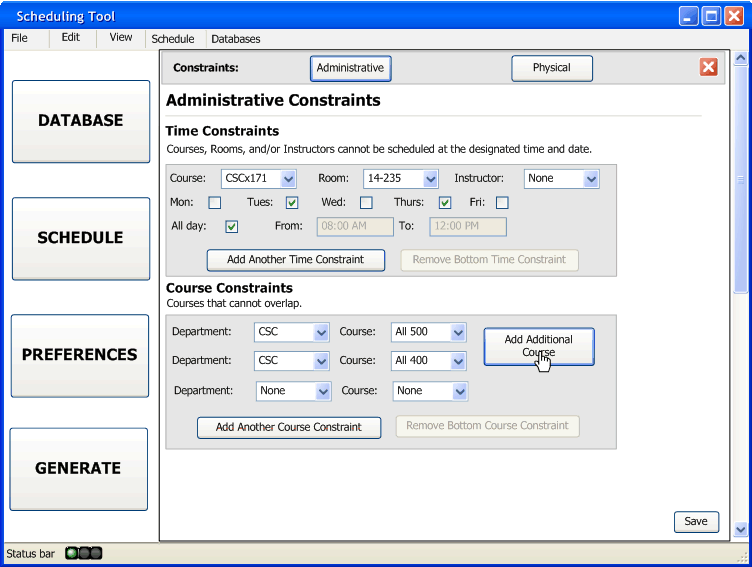
Figure 2.5.2.1.10: Another Course Row Added
A course constraint set will only take effect if two or more courses are selected for that set. If the administrator wants to add another set of course constraints. They will select "Add Another Course Constraint," and just like the time constraint subsection, a next set will between the last set and the button, as seen in figure 2.5.2.1.11.
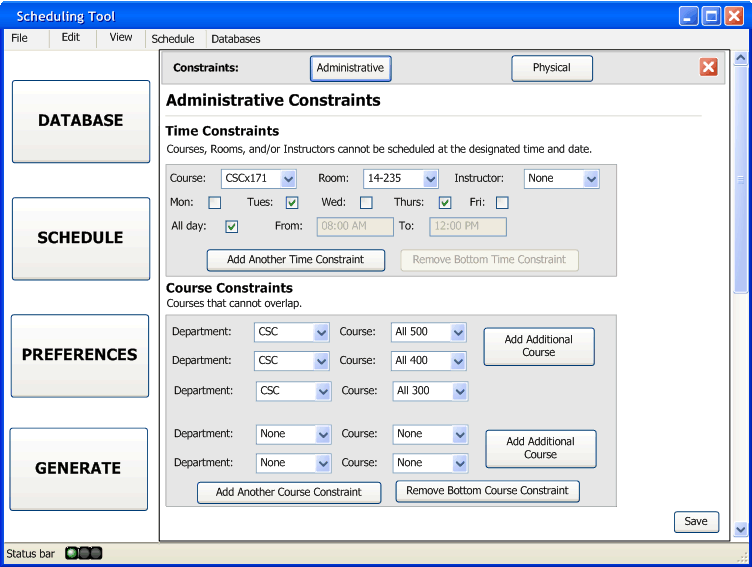
Figure 2.5.2.1.11: Another Course Constraint Added
Just like the time constraint subsection, it is not necessary to have the number of constraints correspond to the number of sets shown. However, if the administrator wanted to remove the most recently added set, there is a "Remove Bottom Course Constraint" button, the effect of selecting the button are seen in figure 2.5.2.1.12.
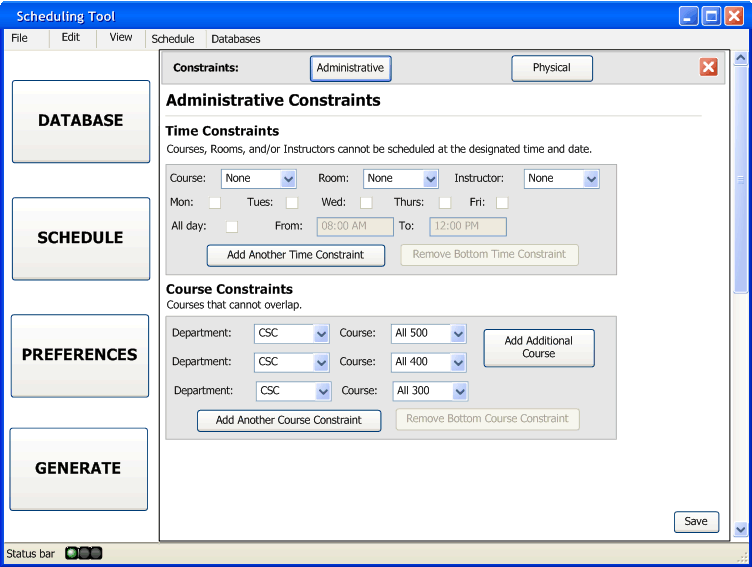
Figure 2.5.2.1.12: An Additional Course Constraint Removed
When all the desired fields are filled out, as seen in the above figure 2.5.2.1.12, the administrator needs to press the "Save" button. After selecting the save button, the administrator will return to the Constraints landing page.