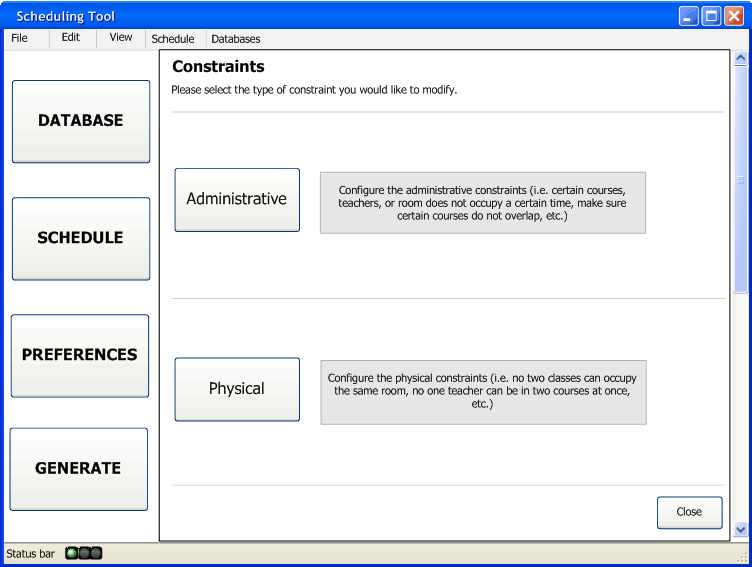
The administrator has the ability to set up what constraints the schedule can have prior to and after generating the schedule. A constraint is simliar to a preference, except that constraints work at a yes or no scale, while the preferences work at a 0-10 scale. An example constraint the administrator can set is not having one instructor teaching two different courses in two different rooms at the same time. The following scenario will walk through how to set the scheduling constraints. In particular the:
This page will introduce the landing page the administrator will be presented with upon entering when the administator selects the preferences button.
After clicking on the preferences button, the administrator will see the screen shown below (figure 2.5.2.1).
Figure 2.5.2.1: The Constraints Screen
In the constraints screen, the administrator has the ability to edit the administrative constraints and the physical constraints. The buttons shown have the following properties:
Accompaning the screen seen in figure 2.5.2.1 is the screen seen in figure 2.5.2.2. This screen will only show up if there is a constraint problem in the post-generation editing. The red boxes indicate where a constraint is being broken.
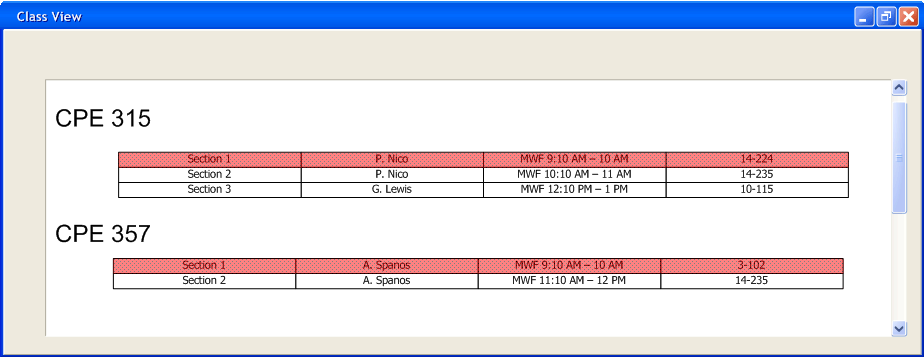
Figure 2.5.2.2: A Constraint Being Broken
If the administrator allows this constraint (by editing what the constraints are in sections 2.5.2.1 and 2.5.2.2) then the screen from figure 2.5.2.2 will now be seen like the screen in figure 2.5.2.3. This change is to notify the administrator what change has happened.
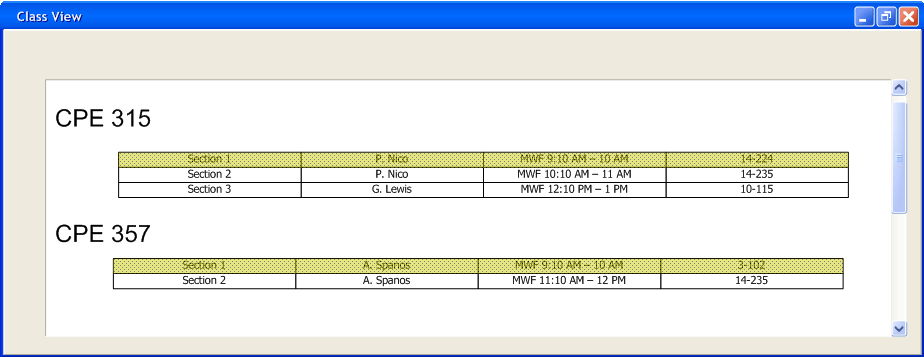
Figure 2.5.2.3: After the Administrator Allows the Constraint that was Once Broken