2.4.2. Adding Faculty, Courses, and Rooms to database.
The admin first selects and starts the Database Manager. The Scheduler then
displays the database manager of the form as shown in Figure 2.4-4. The admin
then selects add course, add faculty, or add building.
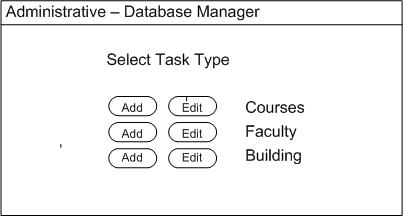
Figure 2.4-4: Database Manager.
2.4.2.1 Adding Courses
If the user selects add course, a screen of the form of Figure 2.4-5 is
displayed. The user then enters the Department in the Dept field (i.e. CSC),
the course number such as 308, and the course title. In this case Software
Engineering I. The Course description may also be entered and should reflect
the official catalog description for the course. Prerequisites should be entered
in the Prequisites section as well if any exist. A Grade of P (passing)
is equivalent to a D or Credit in a Credit/No Credit course.
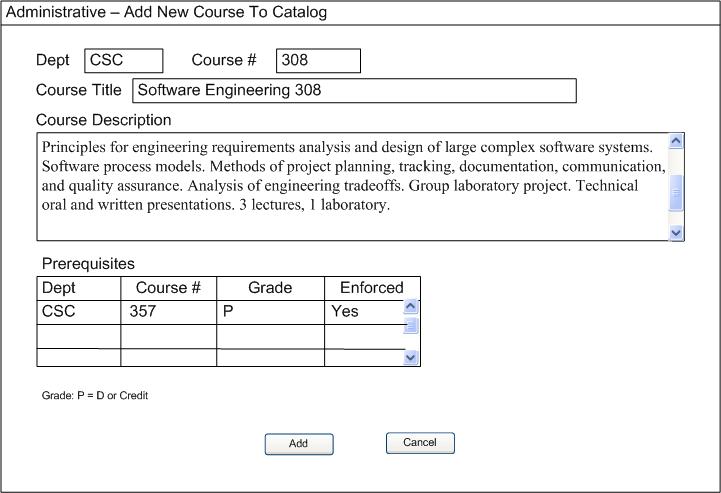
Figure 2.4-5: Class Roster.
Once the user has filled in the fields the user selects the add button. The
add course button will cause the course to be added to the master list of
courses available to be offered. The fields will reset to empty and another
course may be added or the user can select cancel which will return user to
Database Manager as shown in Figure 2.4-4.
2.4.2.2 Adding Faculty
If the admin selects add faculty, a screen of the form of Figure 2.4-6 is
displayed. The admin then enters the Department in the Dept field (i.e. CSC),
the Faculty members First, Last, and Middle name in the corresponding fields.
The admin also selects the faculty members gender, full or part time and if the
Faculty are currently active. Below these fields is a section of tabbed screens.
The Contact information tab is shown.
(Note: due to the lack of full development for Faculty fields only contact info
fields are shown)
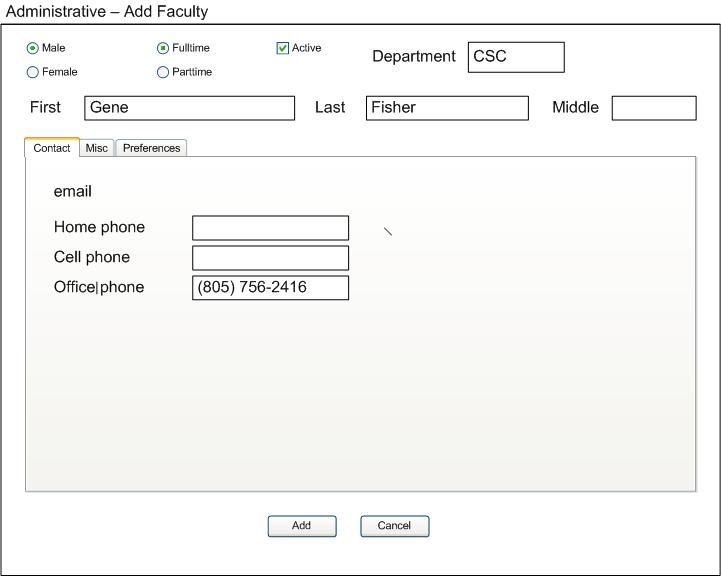
Figure 2.4-6: Add Faculty.
The admin may then enter the contact information for the Faculty member. The
admin then can select add to add the Faculty member to the database. Once the
member is added the fields are reset to empty and the admin may repeat steps to
add more faculty or cancel to return to Database Manager screen as shown in
Figure 2.4-4.
2.4.2.3 Adding Buildings
If the admin selects add building, a screen of the form of Figure 2.4-7 is
displayed. The admin will then enter building name and a building number as
shown as well as the number of rooms contained within the building. The user
will then either enter the coordinates from a gridded map of the campus for the
building or click the use map button to click on a building in the map which
will fill in the values for X and Y for the admin.
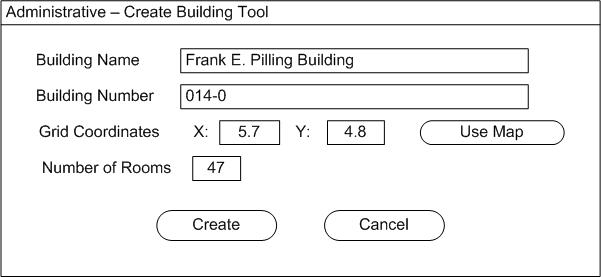
Figure 2.4-7: Add Building.
Figure 2.4-8 shows a screen of the form that can be expected if the admin used
the Use Map button to get coordinates for the building. Note the coordinates
will later be used to calculate classroom proximity for use in distance
constraints versus time between scheduled courses for a particular instructor.
In this case the admin had click building 14 on the map and the coordinates for
the click were entered automatically into the fields X and Y as shown above in
Figure 2.4-7 and the map is closed.

Figure 2.4-8: Use Map.
The admin then clicks the Create button. The building is then entered into the
database for later use. Note: each classroom in the building is automatically
generated and placed in the database using admin defined classroom default
constraints. The fields are reset to empty. The admin may repeat the building
creation process until finished and then select cancel. The admin will then
be returned to the Database Manager screen again.
Here the selects edit building. The system responds with screen of the form in
Figure 2.4-9. The admin will enter a building number and select the Select
button. Once selected the system will then show the rooms in numeric order for
the building in the scrolling list. Here only one room is shown as an example.
The current features set for the room are marked below the scrolling window, but
can be changed by select various features of the classroom. The changes then can
be committed to the database by selecting update. Note: room removal will be
removed from slide in near future and instead rooms will be either active or
inactive if not available for instructional purposes. Also the screen will
require a room number field since each room must have real room number assigned.
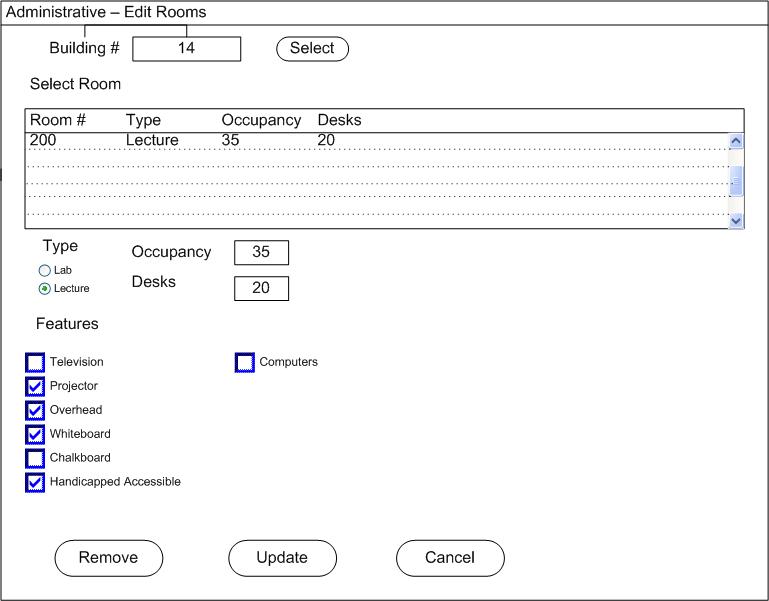
Figure 2.4-9: Edit Building.
Prev: Per Quarter Offerings
| Next: Conflict Resolution
| Up: Administrative Functions
| Top: index