This scenario shows how users can access or modify aspects of buildings database. In this initial scenario there have been no previously created buildings. How a user arrives at many of the screens in this page can be explained in the navigation bar section: 2.1.3 UI Navigation Bar
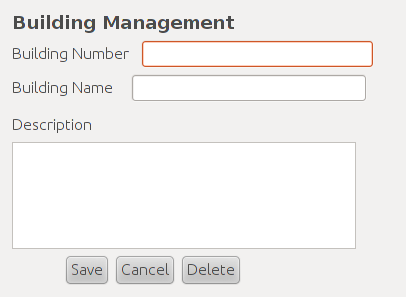
Figure 1: Initial Buildings Management Screen
Building Number is the unique number/letter combination given to a building.
Building Name is the full name of the building.
Description is a description of the building.
Right at the bottom of this context window lie three commonly seen buttons: Save, Cancel, and Delete. Their functionalities will be better explained later in this document.
This example will demonstrate how users go about creating and adding new buildings to the buildings database. From the nav bar a user clicks the "add new" icon in the Buildings category header to bring up an empty Building Management context window as seen in Figure 1.
With the Building Management context window up it's only a matter of filling in Building Number, Building Name, and Description with reasonable values as seen in Figure 2.
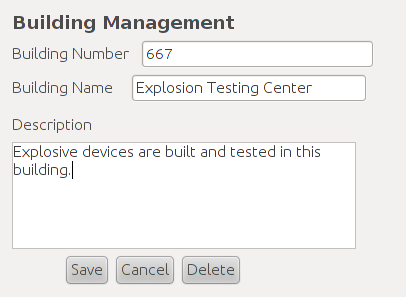
Figure 2: Filled-in Building Entry
Now that all of the fields have been filled in the user needs to add this building to the database. To do this the user clicks the Save button to do validation checks for this new building. If this building passes the validation checks then it will immediately be added to the buildings database. If this building fails to pass any of the checks then a dialog box will appear informing the user of why this building failed the check. In either case the Building Management context window will remain open to allow the user to edit the fields and perform another save if desired. Alternatively, the user can click the Cancel button to discard anything entered in the fields and close the Building Management context window. Any information not in the database before a cancel will be lost.
This scenario covers the selecting of a building in the database for viewing which can lead into modification or deletion.
The actions necessary to select a single or multiple buildings are covered in the nav bar section of the requirements document. When a user selects a building the Building Management context window will appear with all the information for the selected building filled in as seen in Figure 2.
The user can simply view the information for the building and then close the context window using Cancel or he can proceed to modify or delete the building as explained in thier respective scenarios.
The functionality of selecting multiple buildings will be covered in its own scenario.
This scenario will cover how different properties of a building can be changed along with what guidelines need to be followed to successfully make the modification.
In order to modify a building it is necessary for a user to have selected a building first. Please refer to the Selecting and Viewing a Building scenario. When the user has selected the building properly he is presented with the dialog seen in Figure 2.
When changing the Building Number users need to be aware that this is the unique identifier for the selected building and can't be the same as another already existing building. Building numbers must start with two or three numbers and can have an optional capitol letter at the end of it.
Changing the Building Name is simply a matter of editing the current text inside the field.
Just like the Building Name changing the Description is another matter of editing the text inside the field.
When a user is finished making changes to a building he can click Save to validate the modified building and if it passes all the checks then the changes will be committed to the database. If this building fails any check then a dialog box will pop up informing the user why the changes weren't committed to the database. Alternatively the user can discard all changes and close this context window by clicking Cancel.
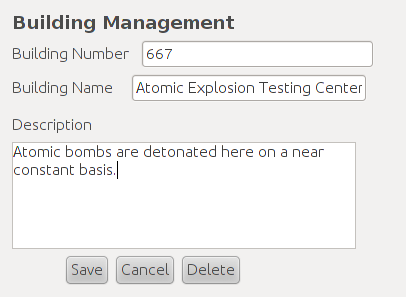
Figure 3: Sample Building Modification
This scenario describes the deletion of a selected building as seen in the in the Selecting and Viewing a Building scenario. If the user performed the selection correctly then the Building Management screen should be displayed with all of the selected department's information filled in as seen in Figure 2.
The act of deletion begins by clicking the Delete button. Upon doing so the dialog in Figure 4 pops up.
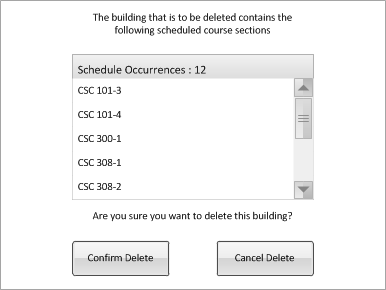
Figure 4: Building Deletion Dialog
Figure 4 asks the user to confirm deletion of the currently selected building. If there are any scheduled courses that are scheduled inside this building then thier instances will be listed in the dialog box and the number of these courses will also be displayed.
If the user still wants to procede with the deletion then clicking Confirm Delete will remove this building from the database and all affected courses will listed as TBA for thier locations. If the user decides against the deletion then clicking Cancel Delete will close the dialog box and nothing will change in the database.
This scenario show how a user modifies multiple buildings. This requires the user to select multiple buildings from the Nav Bar. Upon doing so the user will be presented with the Building Management dialog box in Figure 5.
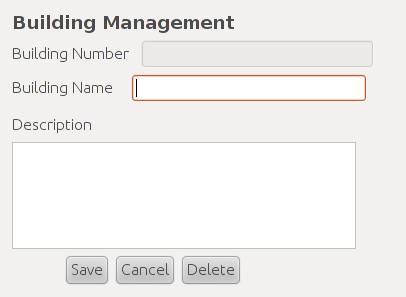
Figure 5: Building Multi-Selection Dialog
Selection of multiple buildings leaves the user with only two operations: mass modification or mass deletion. Building Number is left disabled to prevent its modification. Entering any string inside the Building Name or Description fields and clicking Save will change those properties for all selected buildings. Clicking Delete will run through the deletion scenario for all selected buildings. Clicking Cancel will cancel the selection and close the context window.