This scenario shows how a scheduling administrator would modify course attributes. How a user arrives at this screen can be explained in the resource management section: 2.3 Resource Management
The first time that the user selects the Course on the nav bar, explained in 2.1.3, and the following window (Figure 1) appears.
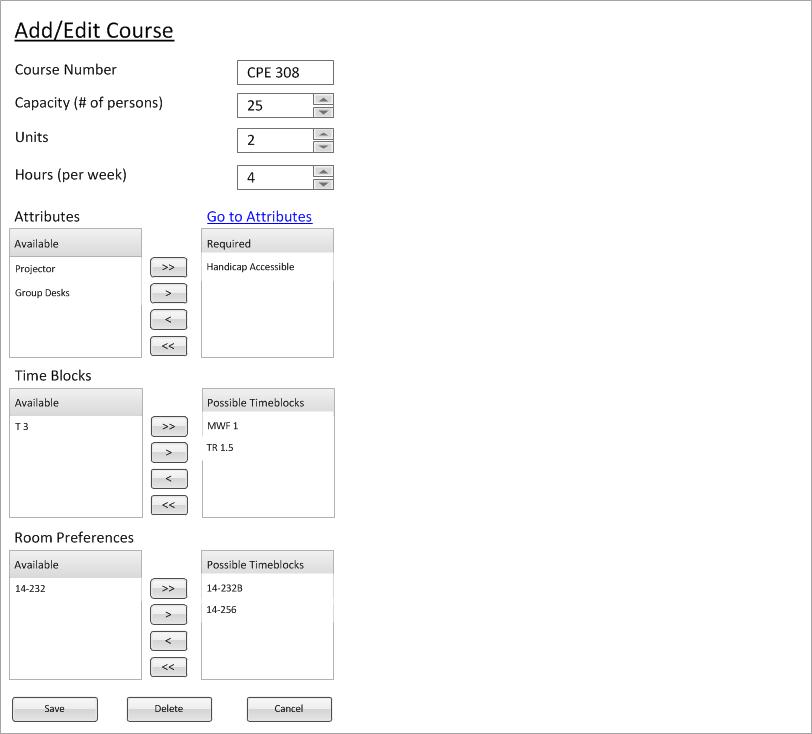
Figure 1: Course Management Example
Department is a drop down box where the user can select the department to which this section belongs.
Course Number is an integer input control which allows the user to enter an interger for the
course number.
Sections is a list box which displays the current sections that belong to this course. The user can double-click
a section to naviagte to that page.
In the lower right area of the screen, there are three buttons labeled Apply, Cancel, and Delete respectively. These buttons will be explained later in the document.
If the user presses Apply, a dialog will pop up asking the user if they are ready to commit the changes
(if any have been made). The current state of the section (all the fields) will first be validated and then the database will be updated accordingly.
If the user presses Cancel, a dialog will pop up asking the user if they are ready to throw away the changes
(if any have been made). The window will close and return to the workspace before section management was called.
If the user presses Delete, a dialog will pop up asking the user if they are sure they wish to delete the
specific section. This operation will first be validated by the program and the user will be informed if it is not possible
to delete the section for some reason.
The scrollbox on the right contains the pool of all attributes that a room can have. The scroll box on the left is all of the attributes that the room actually has. The buttons between the two scroll boxes are the way you move available attributes to be the actual attributes for the room. There are four buttons and each is explained next. Go to Attributes is a link for the user to quickly edit the attributes for a room. Visit 2.5.1.2 Lookup Attributes for more infomation on editing attributes. This allows ease in adding and removing features from rooms and allows for flexibility to work with future classroom technology and equipment.
The " > >"button is a "add all" button. Pressing this button will add all available attributes to the current room.
The " >" button is a "add single" button. Pressing this button will add the selected attribute(s) to the current room.
The " < " button is a "remove single" button. Pressing this button will remove the selected attribute(s) to the current room.
The " < < " button is a "remove all" button. Pressing this button will remove all available attributes to the current room.