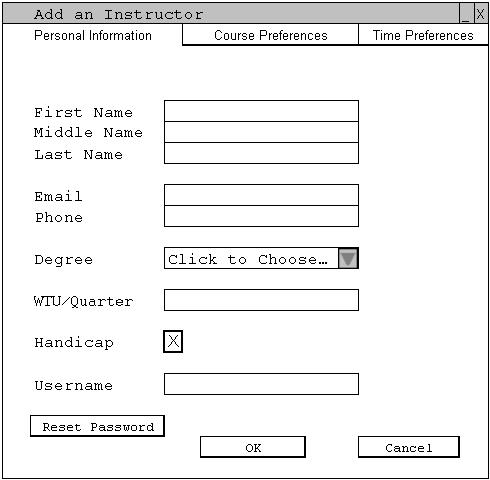
To add an instructor to the database, the user clicks the 'New' button on the Instructors window. A new window with three tabs appears, as shown in Figure 2.4.1-1.
Figure 2.4.1-1: 'Personal Information' tab of the Add an Instructor window.
The user fills in the instructor's personal information such as first, middle, and last name, email, and phone number, by typing them into the appropriate text box. The user selects the highest degree obtained by the instructor from the 'Degree' dropdown box, as explained below. The user clicks in the small box next to the handicap option, if the instructor requires a classroom that is handicap accessible. Next, the user creates a username for the instructor. The instructors use their username and password to log in and view/edit their schedule preferences. The user clicks 'Reset Password' to reset the instructor's password to their id number. A dialog box appears, as shown in Figure 2.4.1-2, prompting the user to confirm that they want to reset the instructor's password.
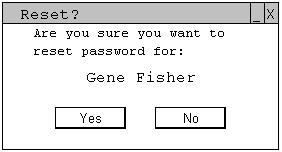
Figure 2.4.1-2: The user is being prompted to confirm the reset of the instructor's password
.The 'Degree' dropdown is where the user selects a degree from the menu or can add a custom degree if there is not one already there. The user expands the drop down then chooses 'Edit Degrees...', as shown in Figure 2.4.1-3.
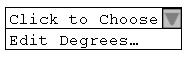
Figure 2.4.1-3: No degrees are currently added, so the user must choose to 'Edit Degrees...'.
The user has chosen to edit the degrees and a new window has appeared with the list of degrees, as shown in Figure 2.4.1-4.
![]()
Figure 2.4.1-4: The current list of degrees is shown.
The degree that the user is looking for is not in the list, so the user chooses to 'Add' a degree. A new window appears, as shown in Figure 2.4.1-5, and the user inputs the name of the degree.
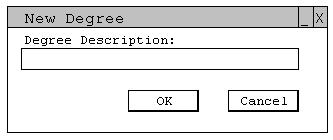
Figure 2.4.1-5: 'New Degree' window allows the user to add a degree to the list.
The user clicks 'OK' to save the degree and return to the degree list. The list is updated with the new degree and displayed, as shown in Figure 2.4.1-6.
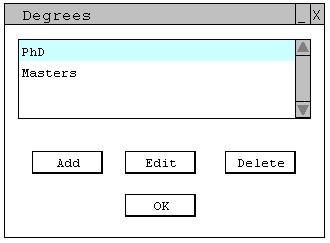
Figure 2.4.1-6: Updated degree list window.
If the user chooses to 'Delete' a degree that is currently being used by other professors in the database, then those professor's 'Degree' field will be reset back to 'Click to Choose'. The user closes this window, and continues adding the instructor with the correct degree.
The user moves on to the 'Course Preferences' tab, which displays the list of courses defined in the course edit mode, as shown in Figure 2.4.1-7.
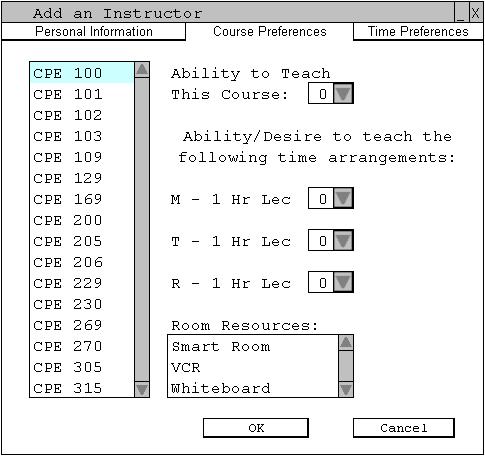
Figure 2.4.1-7: 'Course Preferences' tab of the Add an Instructor window.
The user uses the scroll window on the left to choose "CPE 100" as the current course. The user selects a rating from 0-5 for the instructors ability to teach a course, with 0 meaning the instructor is unable to teach the course. Using this page the user also rates the instructor's preferences on teaching the course during the different time arrangements which have been defined for the course in the course edit mode. Finally, the user highlights 'Room Resources' that the instructor prefers to use while teaching. Room resources are equipment that an instructor prefers to have available when teaching a course.
The user selects the 'Time Preferences' tab, as shown in Figure 2.4.1-8.
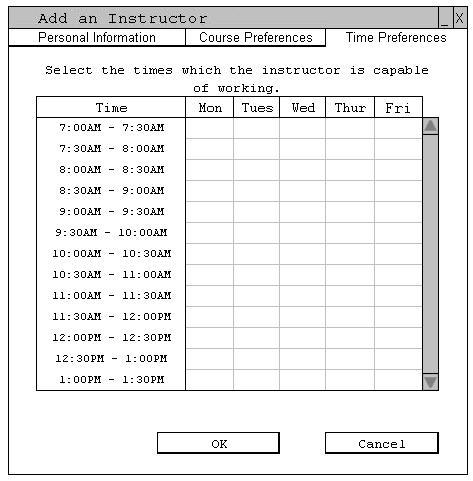
Figure 2.4.1-8: 'Time Preferences' tab of the Add an Instructor window.
The user highlights the time segments throughout the day for which the instructor is available. Finally, the user clicks 'OK' to save the inputted data, and return to the Instructors window. The user also has the option to click 'Cancel', and return to the Instructors window without any new data.
The new instructor has been added to the database and can be seen in the instructor list window, as shown in Figure 2.4.1-9.
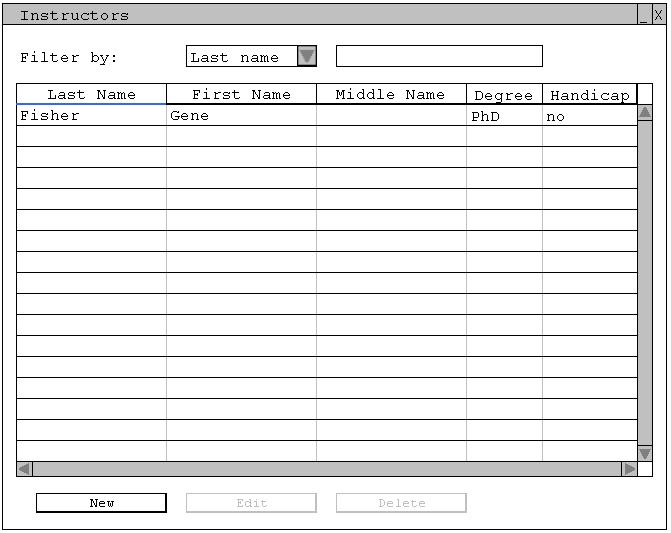
Figure 2.4.1-9: An instructor has been added to the database.
The user adds all instructors for the quarter in a similar way. After all instructors are added the Instructors window would look like Figure 2.4.1-10.
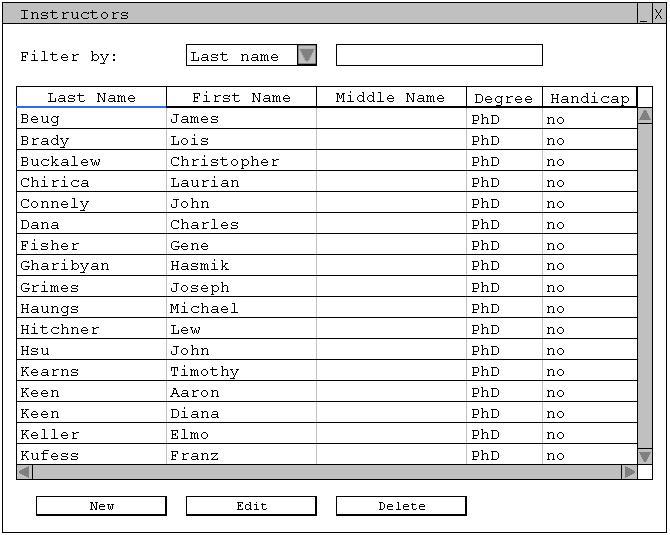
Figure 2.4.1-10:
Instructors window after multiple instructors have been added.