2.4.2 Taking a Test
This section will discuss the student's experience using the Testing
Tool in class. The in class test taking process is designed to be
similar to the way tests are currently taken in class. Students will
take a test in a classroom with a professor administering and
supervising the test. The professor will impose time limits on the test
and is still responsible for preventing cheating.
The most obvious difference in the in class test taking process is
the use of computers. The following sections will describe the new,
computerized, test taking scenario.
2.4.2.1 Starting the test
A student can begin to take a test once the teacher has started the
test with the Test Administration Tool (see 2.4.1 Administrating an
In-Class Test). When the teacher presses the begin button
on this interface, each student computer in the room displays a login
screen. The student will then log-in with a username and password. The
student's username and password are authenticated against her central
UNIX account information.
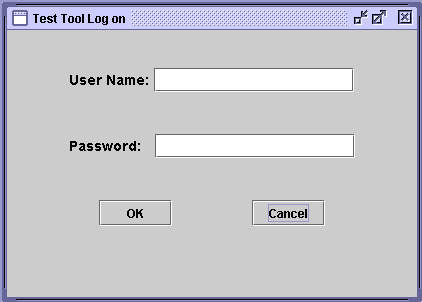
Figure 2.4.2.1.i1: Log In
Once the student has logged in the test appears and she may being
the test.
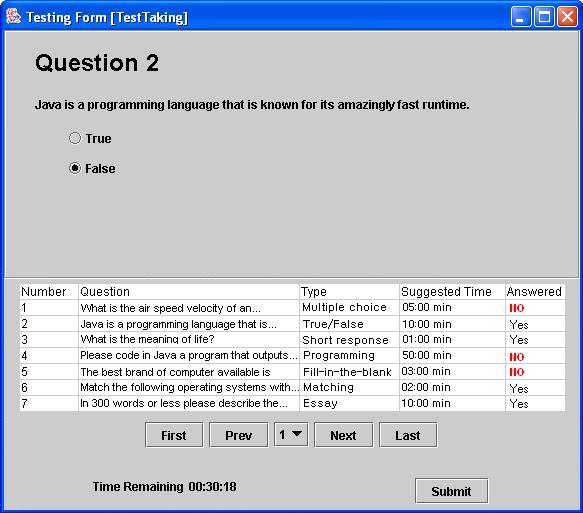
Figure 2.4.2.1.i2: Test Window
The Test Window has two panels: the Test Panel,
which displays the test, and the Menu Panel, which allows the
student to navigate through questions and submit the test.
2.4.2.2 The test panel
The largest panel, located in the upper portion of the window, is the
Test Panel. This is where the test questions are presented to the
student. This panel displays one test question at a time. It will
display horizontal or vertical scroll bars if the question is too large
to be displayed in its entirety in the Test Panel. There are seven
different question types. Each is described in detail in the following
sections.
Answering a True/False Question
A True/False question has two options: true and false. The student
selects her answer by clicking on the radio button next to the answer
she wishes to select.

Figure 2.4.2.2.i1: Example True/False Question
Answering a Multiple Choice Question
Multiple Choice questions have 2 or more possible choices. Each choice
has a radio button next to it. The student selects her answer by
clicking on the radio button next to the answer she wishes to select.
She can select one and only one answer for a multiple choice question.
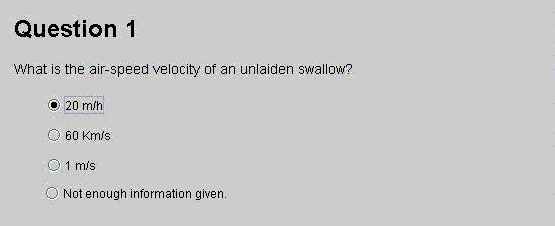
Figure 2.4.2.2.i2: Example Multiple Choice Question
Answering a Fill-in-the-Blank Question
A fill in the blank question displays one or more sentences with one or
more text inputs for students to type a word or phrase. Typically
the text input will take the place of a missing word or phrase in the
sentence.

Figure 2.4.2.2.i3: Example Fill-in-the-Blank Question
Answering a Short Response Question
A short answer question displays a question and a textbox for
the student to type her response in.
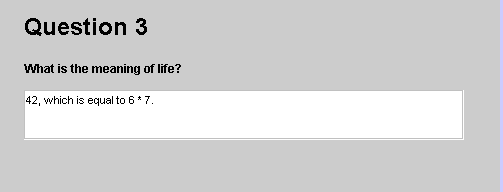
Figure 2.4.2.2.i4: Example Short Response
Answering a Matching Question
A matching question consists of two lists of equal size. One list is
displayed on the left side of the Test Panel and the other is displayed
on the right side. To the right of each item in the left-hand list are
lines with a circle on one end and a square on the other. The circle
end of the line is displayed directly to the right of the list item.
The square end of each line is displayed 25 pixels to the right of the
circle end.
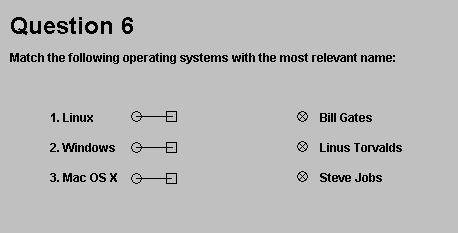
Figure 2.4.2.2.i5a: Example Matching Question
(Before any answers have been matched)
The student matches one item in the left-hand list to an item in the
right-hand list by dragging the box end of the line next to the item in
the right-hand list. The circle end of the line cannot be moved.
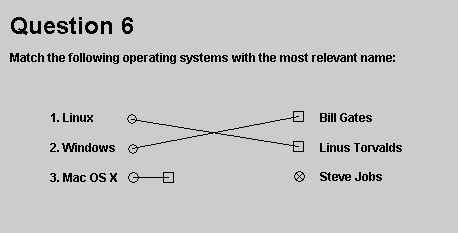
Figure 2.4.2.2.i5b: Example Matching Question
(After matching 2 answers)
Answering an Essay Question
An essay question consists of an essay prompt and a textbox. The
student will type her response to the essay prompt in the textbox. If
her response is to long to fit in the text box a vertical scrollbar will
appear. The textbox will word wrap and thus no horizontal
scrollbar will appear.
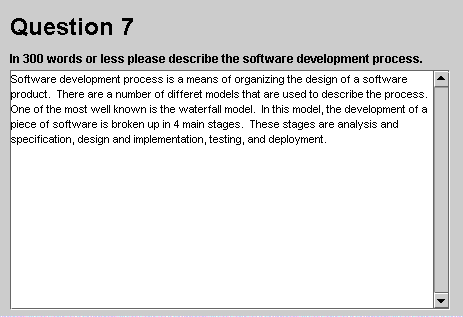
Figure 2.4.2.2.i6: Example Essay Question
Answering a Programming Question
A programming question consists of a prompt and a textbox. The student
will type her program in the textbox. The textbox will not word wrap. If
a line is too long to fit in the textbox a horizontal scrollbar will
appear allowing the student to scroll left and right. If the program has
too many lines to fit vertically in the textbox a vertical scrollbar
will appear.
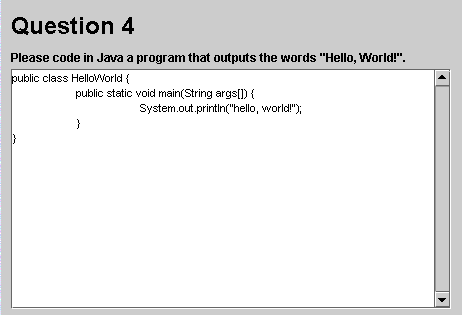
Figure 2.4.2.2.i7: Example Programming Question
2.4.2.3 The Menu Panel
The smaller panel, located at the bottom of the window, is the Menu
Panel. This panel contains three items: Question Navigation Controls,
a clock and a submit button. The clock is a digital clock whcih counts
down the remaining time the student has to take the test. The clock
will have a label to the left of it: "Time Remaining." When the clock
has 15 minutes or less left to count down it displays in a red font.
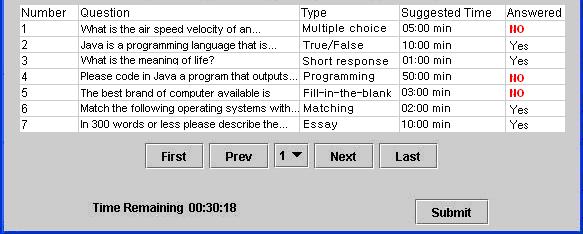
Figure 2.4.2.3.i1: Menu Panel
The student navigates through test questions via a set of Question
Navigation Controls at the top of the Menu Panel. The Question
Navigation Controls includes a table and four buttons labeled "First",
"Prev", "Next", and "Last". The table will display a summary of up to
10 questions at a time. If the test contains more than ten questions a
scroll bar will be displayed allowing the student to scroll through the
question summaries. The summaries consist of the question number, the
first 50 characters of the question, the question type, the suggested
time, and whether or not the question has been answered. The student
may click on any cell in the table. Doing so will highlight the entire
row that the cell is located in and the Question Panel will display
that question. Any questions the student has not yet answered will
display "NO" in a bold red font in the table under the "Answered"
column.

Figure 2.4.2.3.i2: Question Navigation Controls
The student can also use the buttons to navigate through the test
questions. When the student clicks the buttons labeled "First" or "Last"
the Test Panel displays the first or last question in the test
respectively. When the student clicks on the "Prev" or "Next" buttons
the Test Panel displays the next or previous question in the test
respectively. The "prev" and "First" buttons are disabled if the Test
Panel is displaying the first question in the test; the "next" and
"Last" buttons are disabled if the Test Panel is displaying the last
question in the test.
A drop down list of all question numbers is displayed at the center
of the Question Navigation Controls. This contains a list of all
question numbers on the test. The drop down list displays in a bold red
font all questions for which the student has not yet selected an
answer.
The student will click the submit button to turn in the test when
she is done. When she does so the test tool displays the Confirmation
Dialog Window. If she left any questions unanswered this dialog
window contains a confirmation message: "The following questions are
unanswered. Are you sure you want to submit the test?" The Confirmation
Dialog Window displays the list of all unanswered question numbers in a
bold red font.
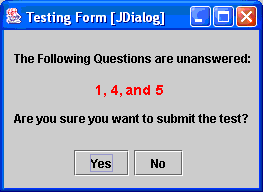
Figure 2.4.2.3.i3: Confirmation Dialog Window
(with unanswered questions)
If all questions have been answered, the message will ask, "Are you
sure you want to submit the test?"
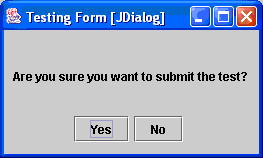
Figure 2.4.2.3.i4: Confirmation Dialog Window
(with no unanswered questions)
In either case, "Yes" and "No" buttons are located below the message.
If the she click the "No" button, the Confirmation Dialog Window will
disappear revealing the Test Window. If she clicks the "Yes" button the
test is turned in, the Test Window disappears, and she is done with the
test.


