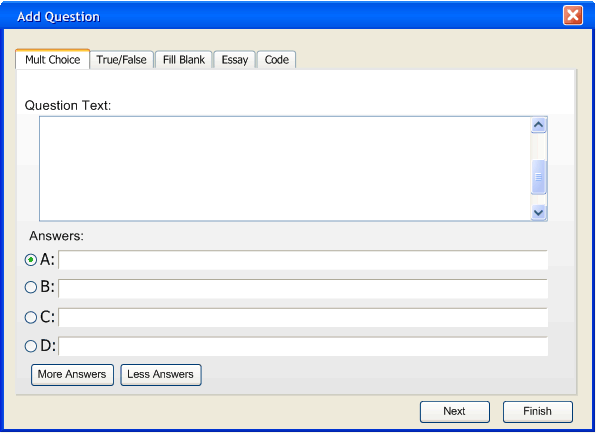
There are two ways to initiate the question add dialog. The first way is to click on the Add button at the bottom of the question manager, the second way is to go to the add menu and select which type of question the user would like to add. Clicking the Add button at the bottom of the manager defaults the question to multiple choice. Clicking the Add button or selecting Add>Mult Choice brings up the Add Question dialogue on the multiple choice tab.
Figure 1: Multiple choice tab
From this window the user can also select the tabs of the other types of questions to change the type of question the user would like. Choosing the other types of questions from the Add menu brings up the Add Question dialogue with the chosen tab selected. This section focus's on the Mult Choice tab. Once the user has navigated to the Mult Choice tab in the Add Question dialogue, the user must fill in all the requested information. When filled in the dialogue looks like the following:
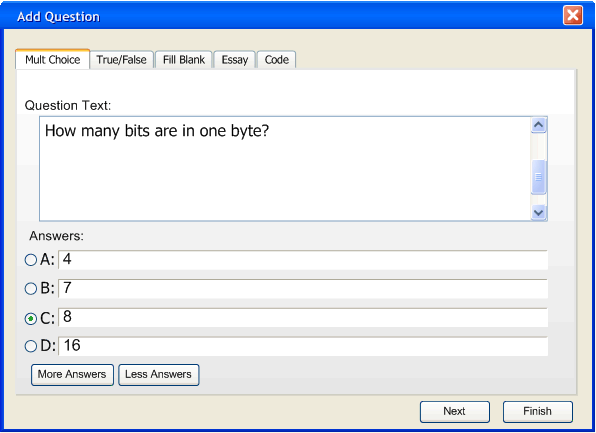
Figure 2: Multiple choice tab filled in
In the Question Text box the user enters the desired question, in the answer boxes the user enters the answers that the user would like associated with each letter. If more answer boxes are needed the user clicks on More Answers. Clicking More Answers adds an answer to the bottom allowing the user to add another answer, this button may be clicked as many times as needed to suit the users needs. Adding an answer looks like the following:

Figure 3: Multiple choice tab with extra answer
The user may select Less Answers to remove an answer box. The user may remove as many answers as desired until there is only one answer left. The answer that is removed is the answer at the bottom of the list. Removing an answer from Figure 2 looks like the following:
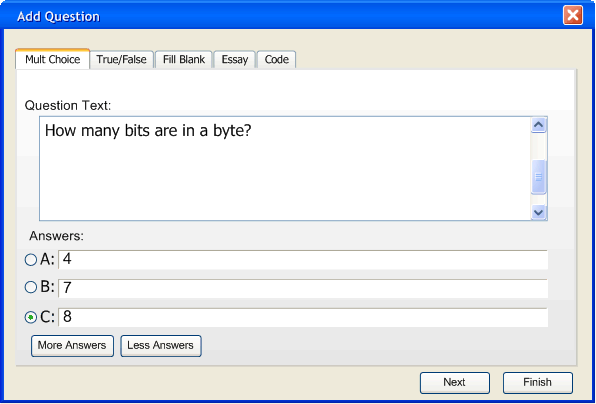
Figure 4: Multiple choice tab with less answers
Once the user has the desired number of answers the user must select the correct answer by clicking on the radio button corresponding to the correct answer. When finished entering the question and answer the user has two options, click Next or click Finish. Clicking Next brings up the following window:
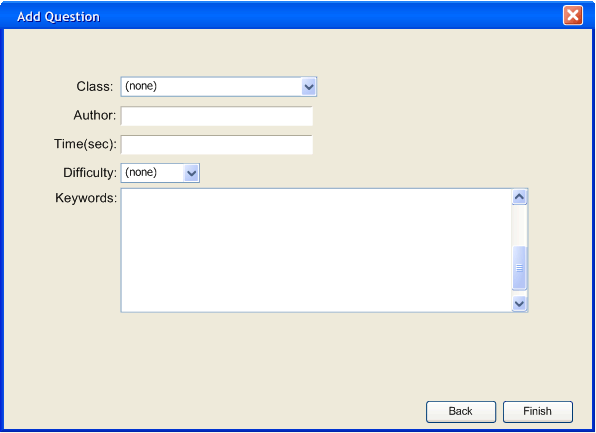
Figure 5: Add question dialogue (part 2)
This window is common to all the types of questions. The user is not required to enter any of the information on this screen, they may enter as much or as little as they wish.
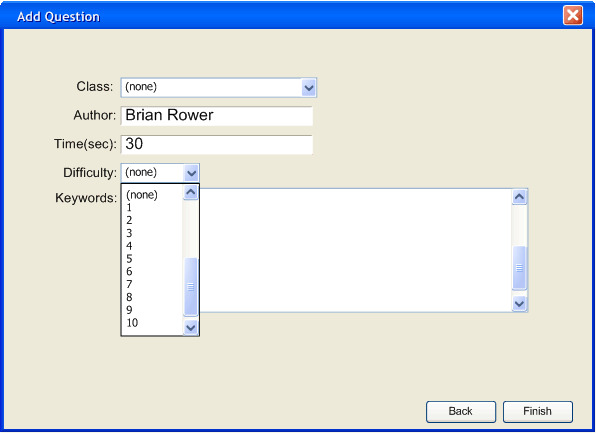
Figure 6: Add question dialogue drop down
The user may enter the class name (see Section 2.3.2), the author of the question, the time it should take a student to do this question, the difficulty of the question and any keywords that may help find the question later. Difficulty is a drop down menu which allows the user to choose a number between 1 and 10 or to leave the difficulty at none.
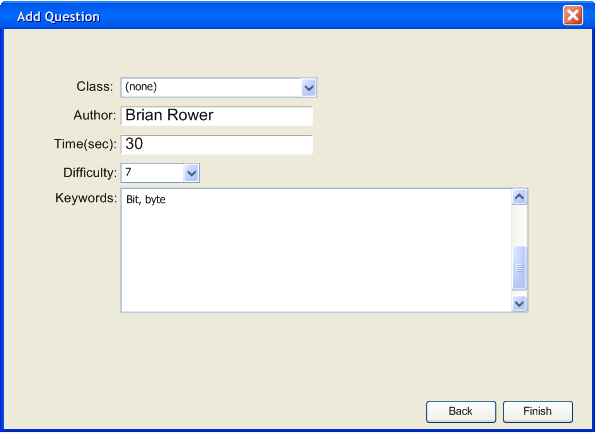
Figure 7: Add question dialogue (part 2) filled-in
In this example the user has selected 1 as the difficulty of the question. The user has also entered the name of the class, the authors name, the time needed for the question, and a few keywords from the question. After the user is satisfied with what they have entered clicking the Finish button enters the question into the list of questions.
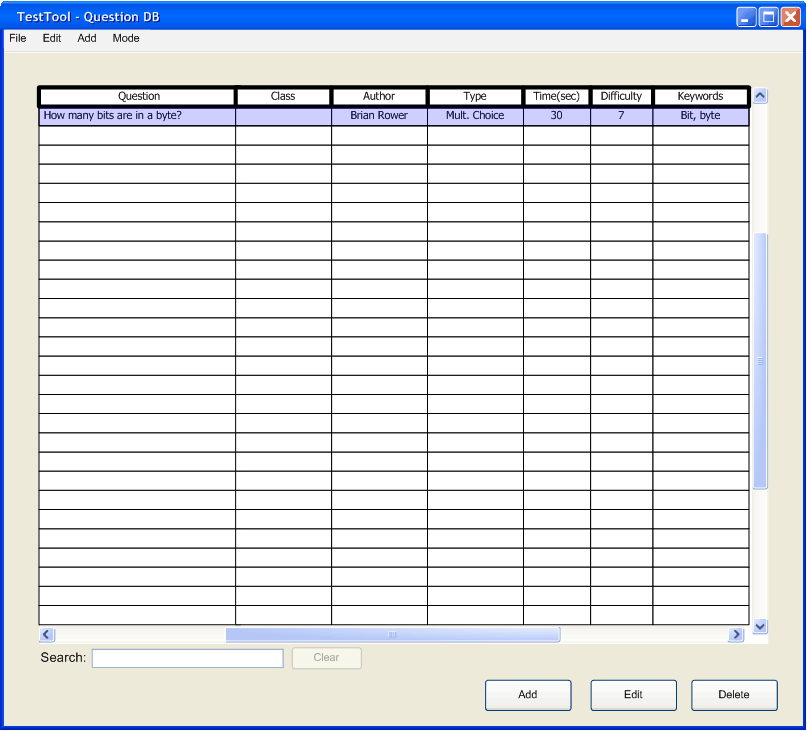
Figure 8: Multiple choice question added
Notice that the Class column is empty because the user did not select a Class for this question. Now that there is a question in the current question database, the edit and delete buttons are available.