
To change or delete an existing card, the user must first locate the card by name, as with the Find command. Once the card has been located, the Change and Delete commands behave in a similar fashion.
When the user selects Change from the Rolodex menu, the
system updates the display area as shown in Figure 14.
Figure 14: Change card dialog.
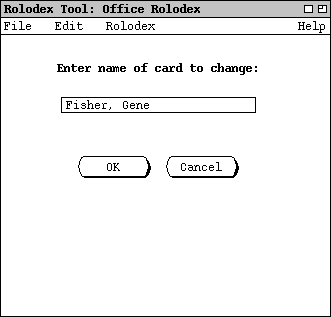
Figure 15: Change card dialog filled in.
To cancel the Change command entirely, the user presses Cancel in the dialog. When Cancel is pressed, the entire data area is cleared, leaving it empty as in the initial rolodex display shown in Figure 1.
As with Find, there are three possible outcomes when the users presses OK in the change-card dialog: zero, one, or multiple cards found. When the system finds zero cards for the Change command, it displays exactly the same dialog as for Find (Figure 10). When the user presses OK in the no-cards-found dialog, the system restores the display to the change-card dialog that resulted in no cards being found.
When the system finds exactly one card, the display contains the information
for that card, as shown in Figure 16.
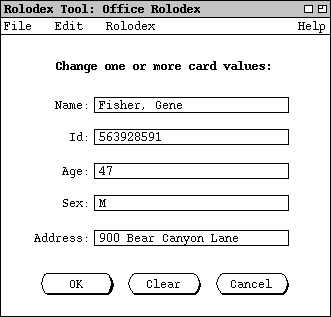
Figure 16: One card found to change.
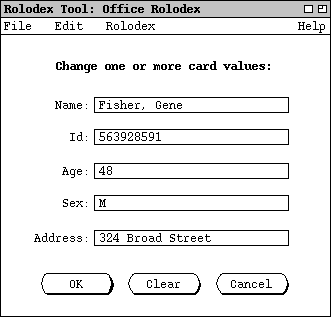
Figure 17: Changes made to a card.
To confirm the changed card into the rolodex, the user presses the OK button at the bottom of the dialog. When the user presses OK, the change occurs and display does not change. That is, the typed-in information stays in place. Although it is not typically likely, the user may make additional changes to the card and press OK as many additional times as desired. In contrast to the Add command, successive presses of OK in the change dialog do not add successive new cards. Rather, only a single card is successively changed. In effect, the Change command removes an existing card, and replaces it with a newly added card, so the total number of cards in the rolodex is the same before and after a change is executed. Pressing OK without making any changes to card field values has no effect on the rolodex.
To clear all of the typed information, the user presses the Clear button. To cancel the Change command entirely, the user presses Cancel. When Cancel is pressed, the display is restored to the change-card dialog that resulted in the original card being found. For example, if the user presses Cancel in the dialog of Figure 16 the system restores the display to the state shown in Figure 15.
The Change command can be applied to only one card at a time. If the
system finds multiple cards for a given name, the user must first select a
single card to be changed. For example, Figure 18 shows the user having
entered the name "Doe, Jane" in the initial change-card dialog.
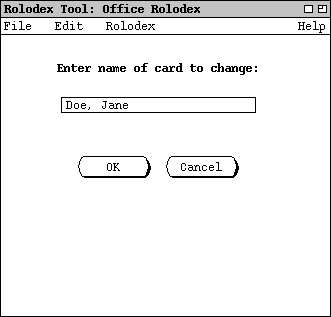
Figure 18: Change card dialog filled in with name to be found on three cards.
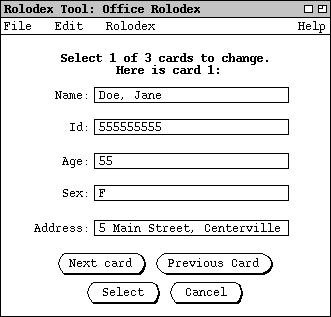
Figure 19: Multiple cards found to change.
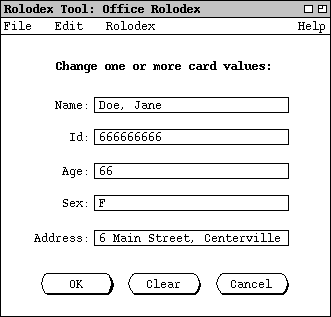
Figure 20: Second of three change cards selected.
Prior
to the press of Select in the multi-card change list, the card fields
are read only. The user must press Select in order to proceed with
change editing. Alternatively, the user may press Cancel to cancel
the Change command entirely. When Cancel is pressed, the
display is restored to the change-card dialog that resulted in the original
cards being found. For example, if the user presses Cancel in the
dialog of
Figure 19
the syetem restores the display to the state shown in
Figure 18.