The color distribution is defined as follows:
- Green = preferred by both department and instructor
- Yellow = preferred by department, not-preferred by instructor
- Orange = not preferred by department, as well as not-preferred by instructor
- Red = not possible, i.e., a hard scheduling conflict
After the user selects the New Schedule option from the Home Screen, the user is presented with the screen shown in Figure 2.2.1.1. The courses in the Department Courses list are the ones being offered in the current department catalog and are labeled LEC/LAB to reflect whether the course has a lecture and lab portion. If the course has no indicator of LEC/LAB it means that the course is a typical Cal Poly lecture with no associated lab portion.
![]()
Figure 2.2.1.1 Basic Schedule Creation New Schedule
The left-most list consists of a list of available Department Courses. The user can drag courses from the Department Courses list directly onto their preferred time slot on the calendar. If the user prefers that the Scheduling program allocates the course days and times automatically, they can either double-click or drag the course onto the Courses to Schedule list on the right. Figure 2.2.1.2 shows the screen after a user has added one section of CHEM 124 lecture and CHEM 124 lab to the Courses to Schedule list.
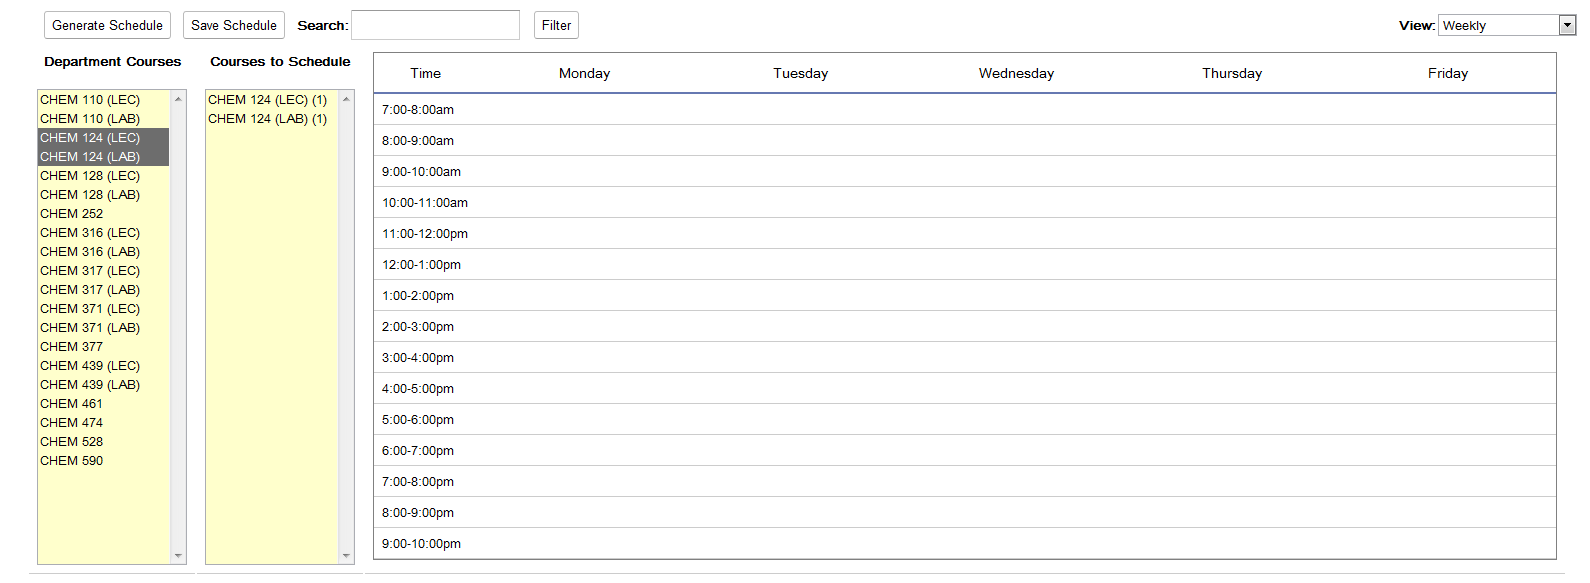
Figure 2.2.1.2 Basic Schedule Creation Automatic Scheduling
The drag-and-drop action can be done repeatedly for a single course. Each time the user drags a course again, it adds another section to be offered, and shows the total number of sections to be offered in parentheses after the course. Figure 2.2.1.3 shows the result of the user having dragged CHEM 110 lab and lecture; and the user having dragged a CHEM 124 lab and lecture for the second time from the Department Courses list to the Courses to Schedule list.
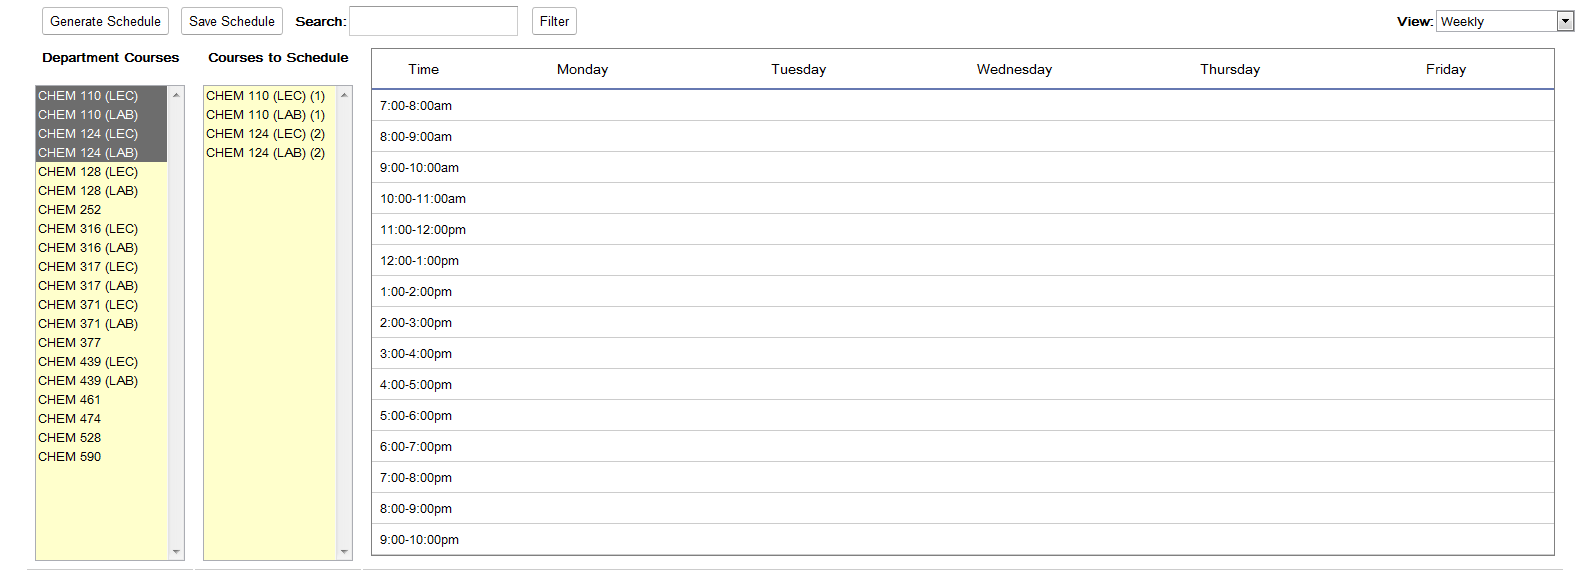
Figure 2.2.1.3 Basic Schedule Creation Adding Additional Sections
Figure 2.2.1.4 shows the result of the user having selected a full quarter's worth of courses to be scheduled for Spring 2012. These selections were made by performing the drag-drop and editing actions illustrated in Figures 2.2.1.1 through 2.2.1.3. Once the user has populated the Courses to Schedule list, the user presses the Generate Schedule button above the Courses to Schedule list, to automatically assign all courses found in the Courses to Schedule to specific time slots on the calendar.
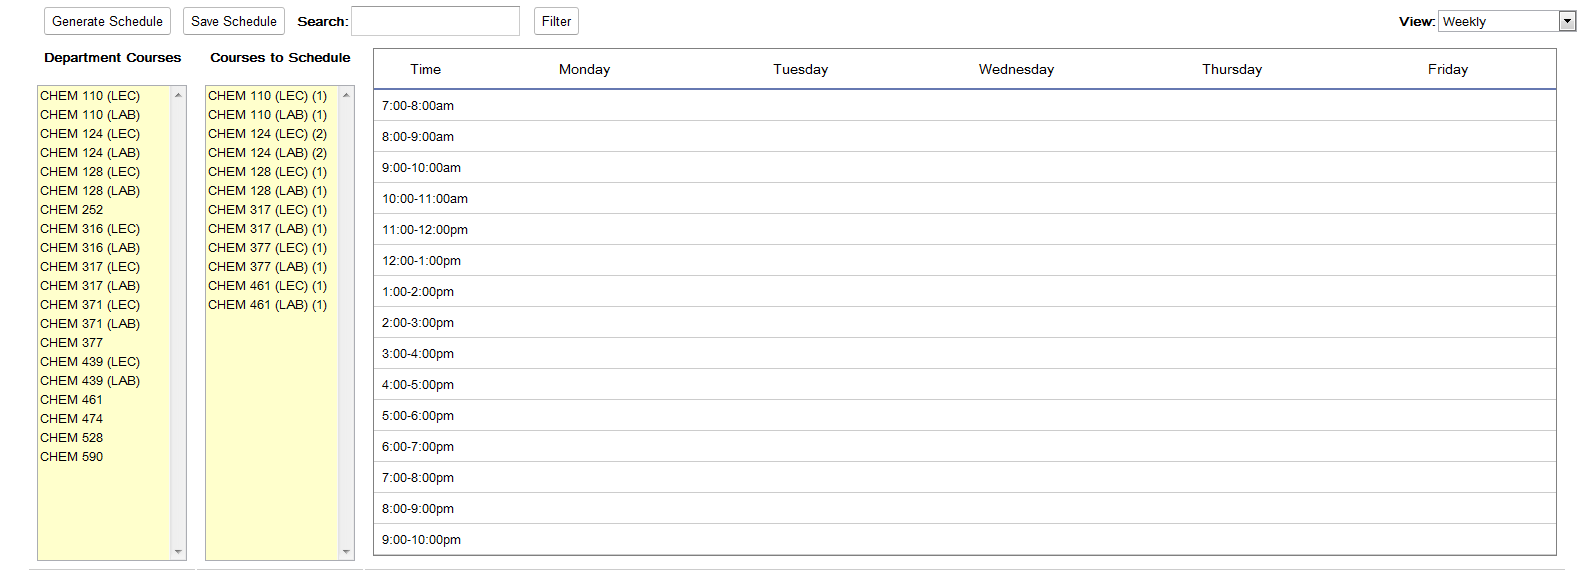
Figure 2.2.1.4 Basic Schedule Creation Generate Schedule
After the courses in the Courses to Schedule list are scheduled into the calendar, the Courses to Schedule list is cleared. The courses are displayed in their appropriate time slots and are colored light green, which indicates that the scheduled time is preferred based on the preferences of both the instructor and department. If the user wishes to get more information about a scheduled course, the user hovers the mouse on a specific course and additional information (course title, course number/section, course location, course instructor, schedules course time) will appear in a small text box as shown in Figure 2.2.1.5 for CHEM 461.
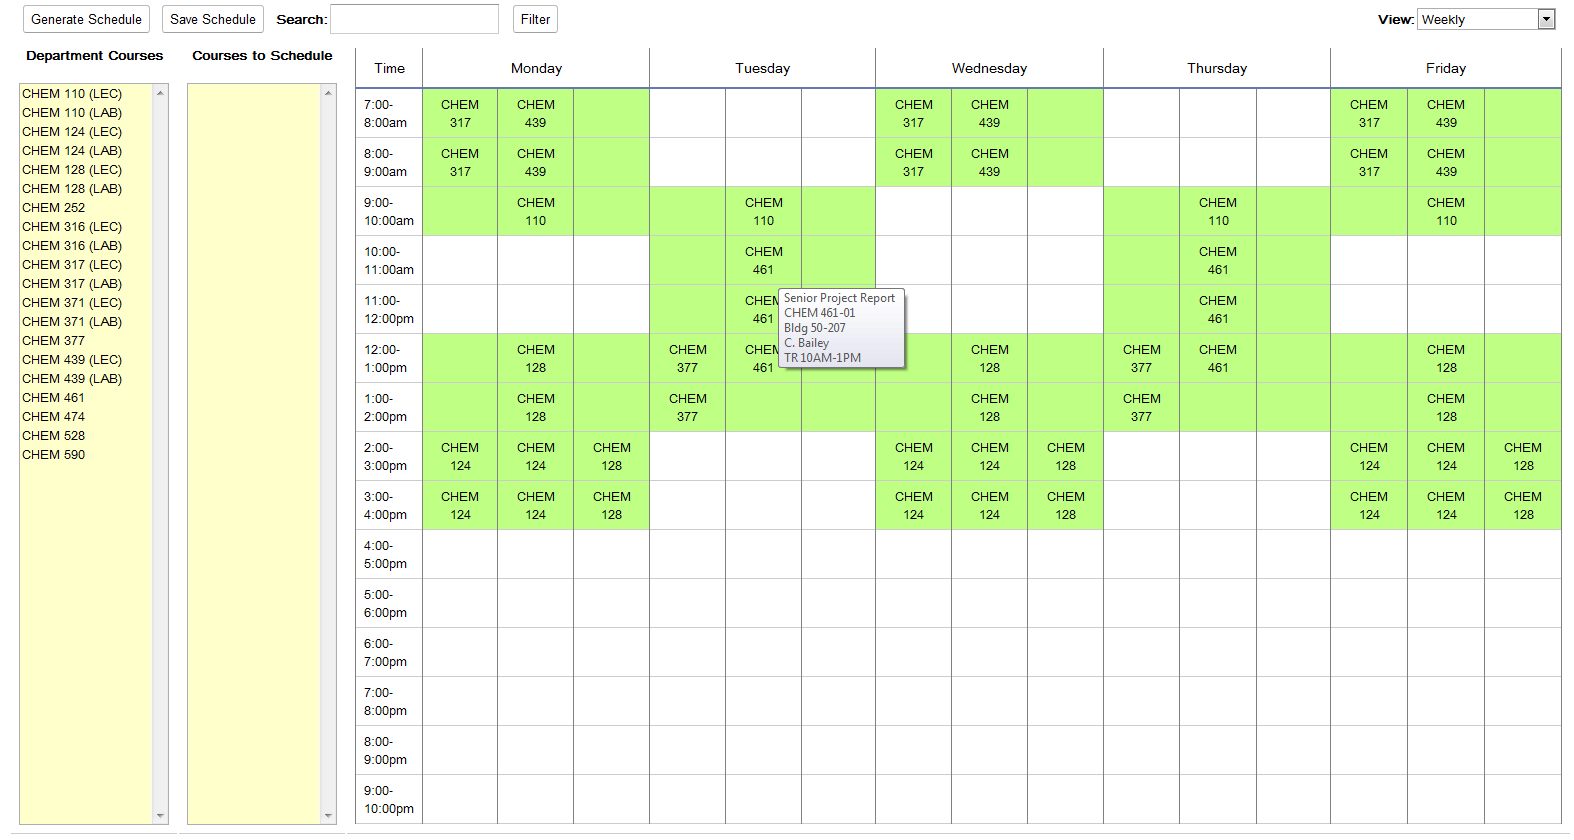
Figure 2.2.1.5 Basic Schedule Creation Hover Popup
If the user wishes to manually edit the schedule, the user can drag a course from the Department Courses list directly onto a time slot on the calendar. The user clicks and holds down on the specific course and drags the selected course onto the calendar. If the course meets the university requirements and is preferred based on the preferences of the instructor, the course is colored bright green. In Figure 2.2.2.1 the user is attempting to drag CHEM 252 to the 7AM - 9AM Tuesday/Thursday time slot. Once the user unclicks, the course turns light green and is scheduled in the specified time slot and after clicking the Save Schedule button the schedule is saved to the database.
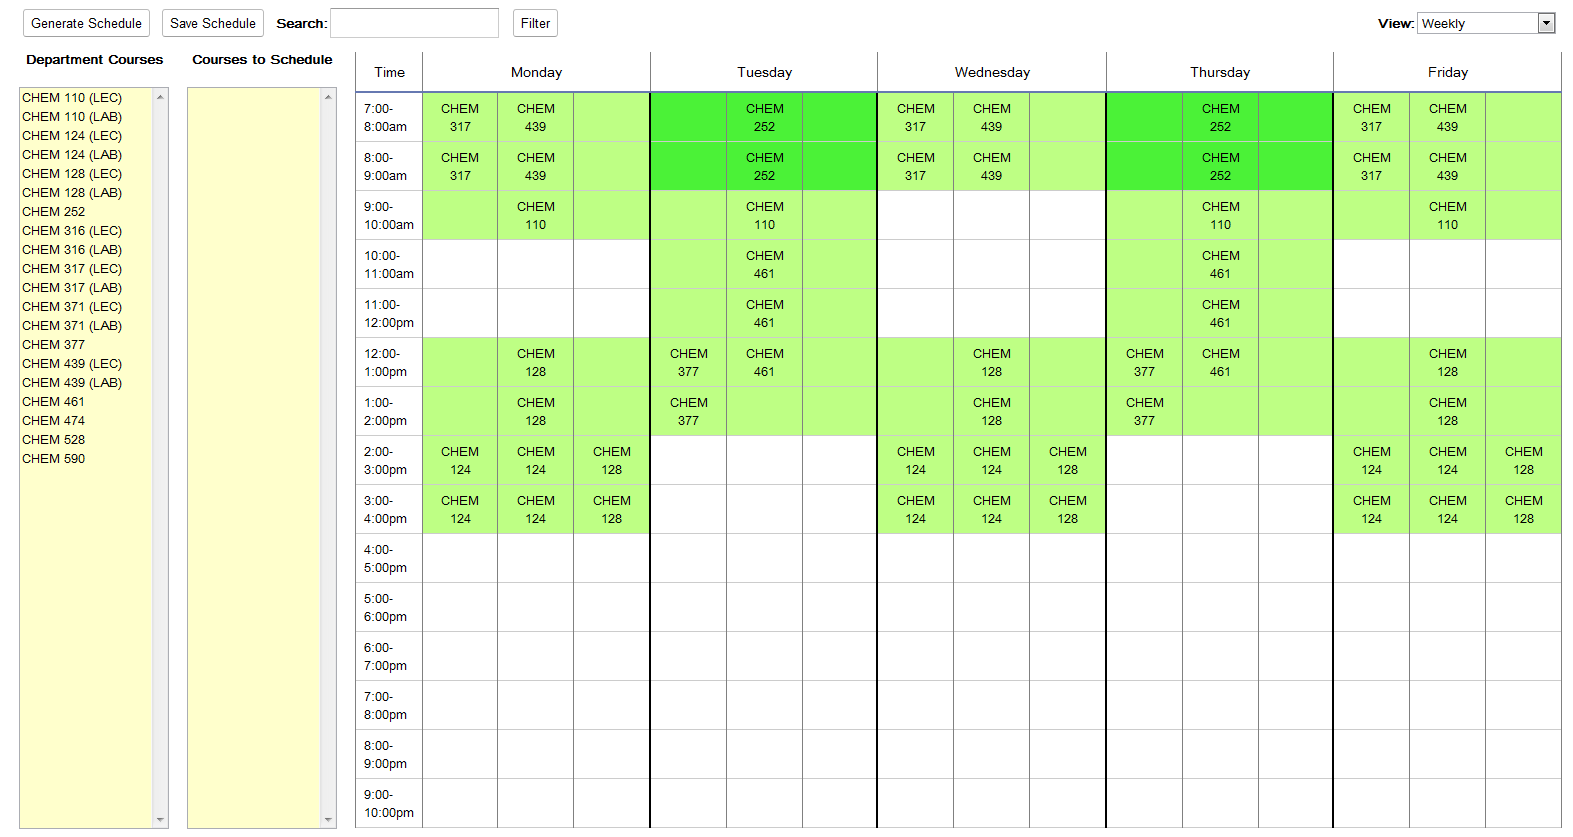
Figure 2.2.2.1 Manual Scheduling Preferred Drag and Drop
If the user drags a course onto the schedule that can be offered over different sets of days during the same time slot, the user is presented with a pop-up box of all available offerings. In Figure 2.2.2.2 the user attempts to schedule CHEM 474 from 7AM - 9AM but the course can be offered on both Monday, Wednesday, Friday or Monday, Wednesday, Thursday from 7AM - 9AM. In the example the user selects MWR 7AM - 9AM and presses the Save Schedule button to save it to the database.
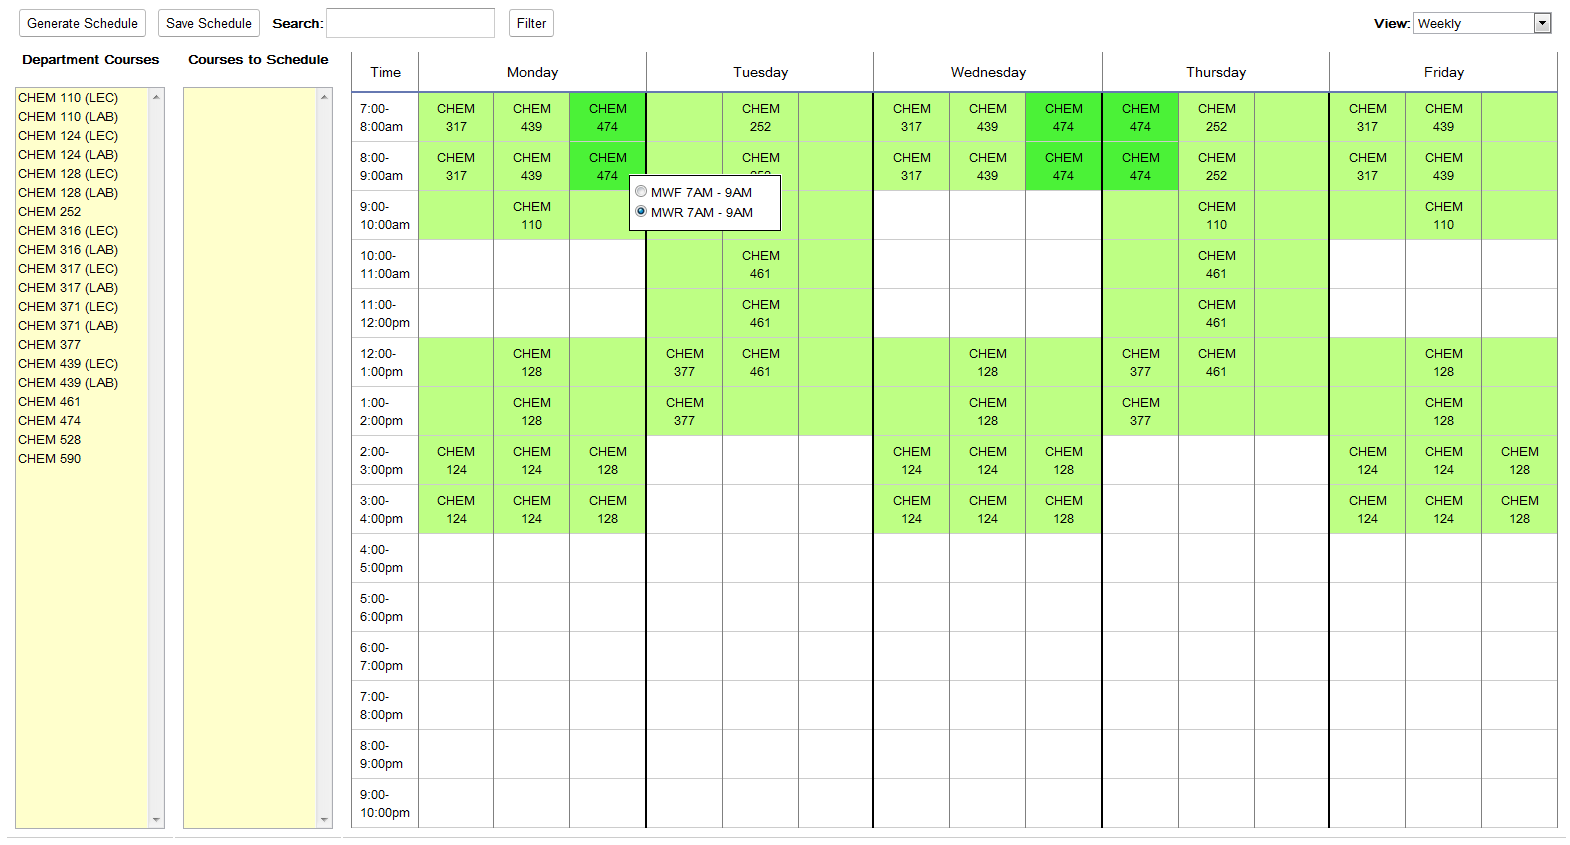
Figure 2.2.2.2 Manual Scheduling Day/Time Selection
If the user wishes to manually edit the schedule, the user can drag a course from the Department Courses list directly onto a time slot on the calendar. The user clicks and holds down on the specific course and drags the selected course onto the calendar. If the course is colored bright yellow while attempting to place the course into a specific time slot it means the course is scheduled in a time that is Not Preferred due to the preferences of an instructor. In Figure 2.2.2.3 the user attempts to schedule CHEM 316 from 10AM - 12PM on MWF, but the course is not prefered due to the preferences of the instructors in the database. The course is colored bright yellow until the user unclicks and places the course in the time slot, then the course is colored light yellow.

Figure 2.2.2.3 Manual Scheduling Semi-Preferred
If the user wishes to manually edit the schedule, the user can drag a course from the Department Courses list directly onto a time slot on the calendar. The user clicks and holds down on the specific course and drags the selected course onto the calendar. If the course is colored bright orange while attempting to place the course into a specific time slot it means the course is scheduled in a time that is Not Preferred due to the preferences of an instructor and the department. In Figure 2.2.2.4 the user attempts to schedule CHEM 590 from 9AM - 12PM on TR but the course is not prefered due to the preferences of the instructors in the database and the department. The course is colored bright orange until the user unclicks and places the course in the time slot, then the course is colored light orange.
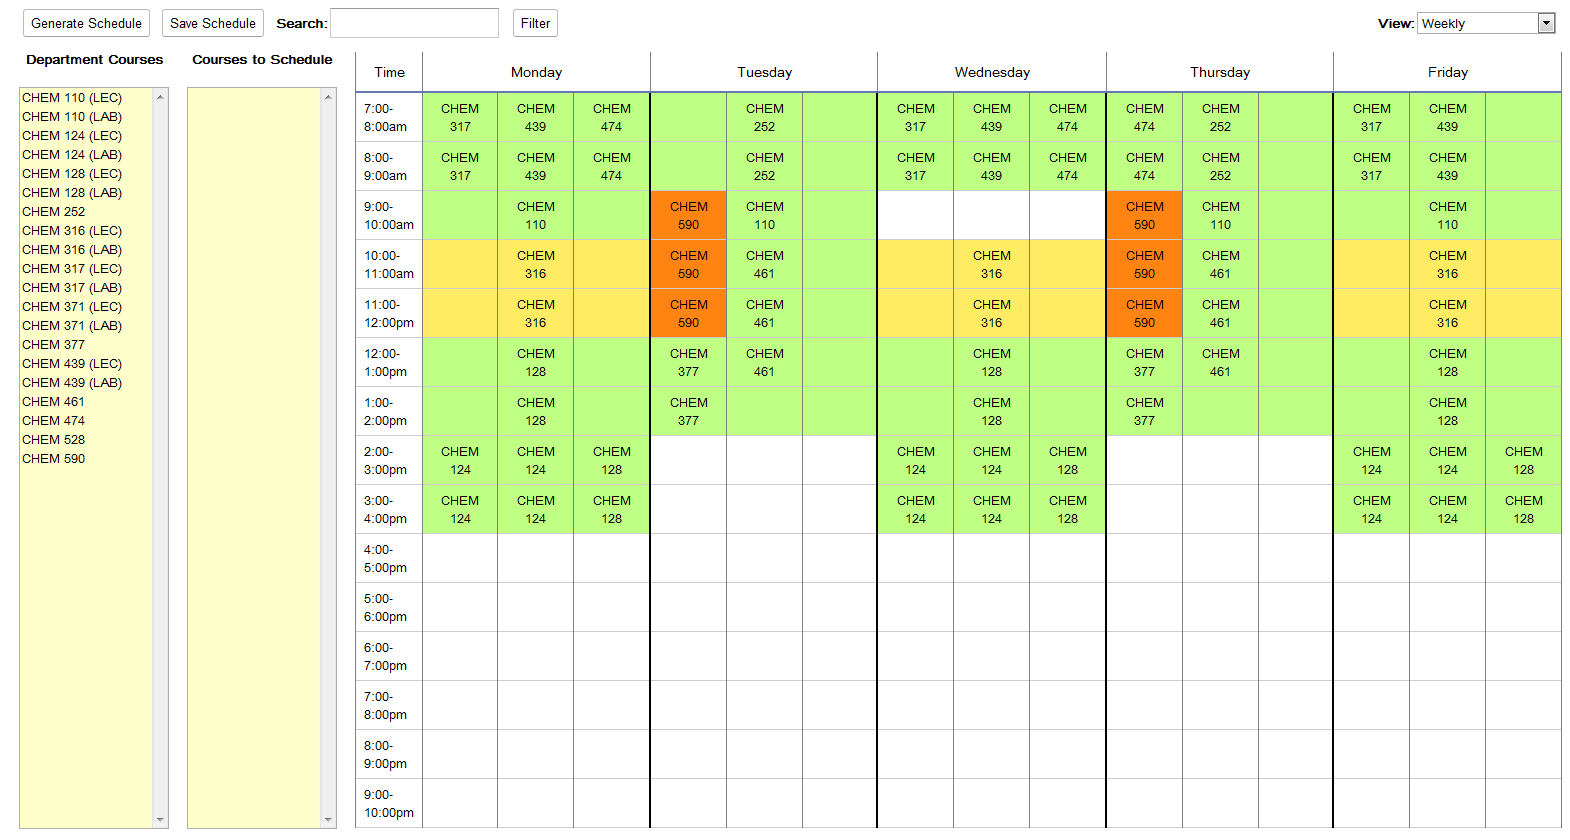
Figure 2.2.2.4 Manual Scheduling Not Preferred Drag and Drop
If the user wishes to manually edit the schedule, the user can drag a course from the Department Courses list directly onto a time slot on the calendar. The user clicks and holds down on the specific course and drags the selected course onto the calendar. If the course is in direct conflict with the scheduling algorithm, university scheduling constraints, or instructor preferences the course is colored red. Once the user attempts to place the course into the time slot the course automatically jumps back to the Department Courses list because it is unable to be scheduled. In Figure 2.2.2.5 the user attempts to drag CHEM 461 from 9AM - 10AM, but the course is Not Possible due to a hard scheduling conflict.
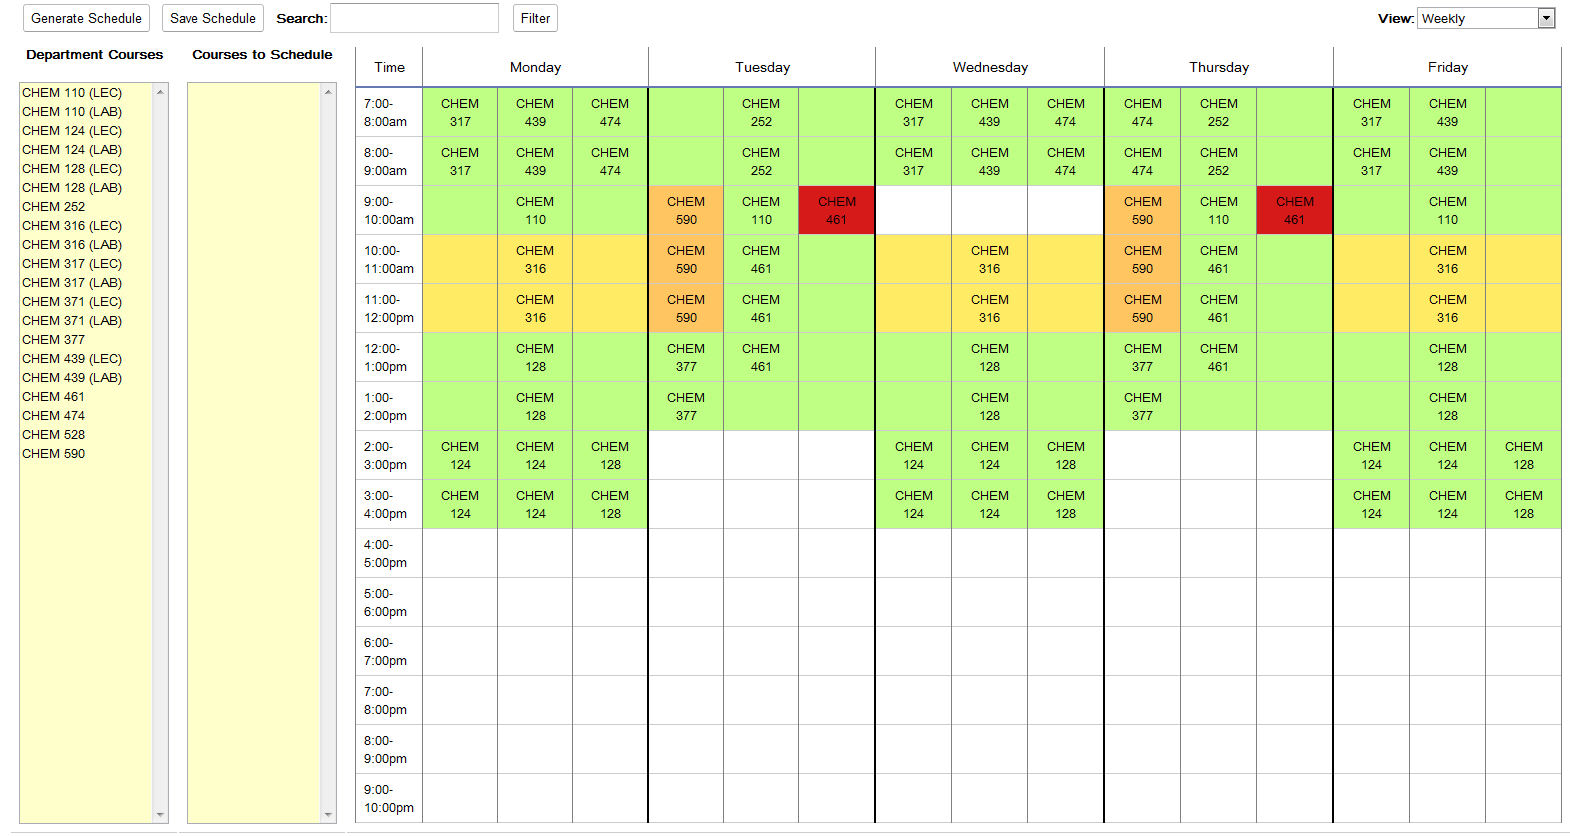
Figure 2.2.2.5 Manual Scheduling Not Possible Drag and Drop