
The User Interface Overview will deal will all the user interface objects that are common across multiple pages. The specific user interface elements on each page will be explained on that specific page.
There will be no data preloaded, so the first time the system is opened, it will be without data. There will need to be data entry when the system is first started.
Also, all these screens are what an Administrator would see. An Instructor would only see the Title Header (Figure 2.1.1), not the Full Header (Figure 2.1.2)
Before an administrator has logged in and chosen which schedule they want to work with, they will be presented with a simple header that is not dynamic, but is mostly just a placeholder.
Figure 2.1.1: Title Header
Once the administrator is logged in and has chosen a schedule to work with, they will see the full interface on every page they visit. At any time they can use the links to jump to another section of the application.

Figure 2.1.2: Full Header
On the far right of the header they will see the current logged in username, and there will be a link for them to log out. As seen in Figure 2.1.2.
The dropdown field shows the current schedule that is selected, and provides an easy way to switch between schedules.
The Schedule Button takes the administrator to the Schedule Setup page where the administrator can view, edit and export a schedule.
The Instructors Button takes the administrator to the Instructor Overview page where the administrator can manage the Instructors data in the system.
The Courses Button takes the administrator to the Course Overview page where the administrator can manage the Courses data in the system.
The Locations Button takes the administrator to the Location Overview page where the administrator can manage the Locations data in the system.
When the administrator clicks on the current schedule name, they get a drop down menu with all the current schedules, and they can quickly choose to manage another schedule. This can be seen in Figure 2.1.3.

Figure 2.1.3: Schedule Chooser Menu
Upon starting the application, the user is greeted with the main login screen, shown in Figure 2.1.2.1. The user enters their Cal Poly username and password, then clicks Login.
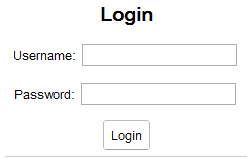
Figure 2.1.2.1: The Login screen
The system consults the user's credentials to determine if they are an administrator or instructor. Instructors are taken to the instructor page, where they may manage their preferences and view proposed schedules. Administrators are taken to the home page, shown below, and have access to the full program.
Once an administrator has successfully validated their credentials and logged in, they are greeted with the Home screen. This screen displays a list of all previous schedules, in addition to the ability to create a new schedule or edit the list of instructors, courses, or locations.
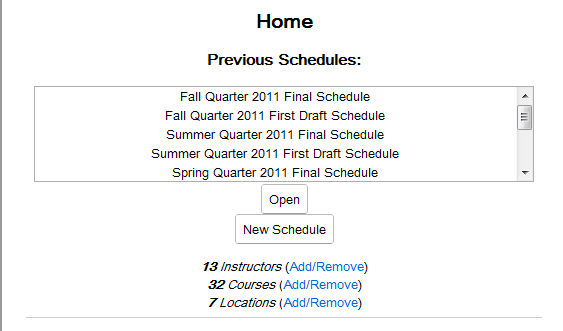
Figure 2.1.2.1: The Home screen
The Previous Schedules list displays a list of all schedules saved to the department. The user may view or edit any schedule by selecting it from the list and clicking Open. Doing so opens the schedule in the default list view. From here, the user may print the schedule, edit the schedule, or save a copy of the schedule.
The ability to save a copy supports a wide array of functionality. If a user wishes to use an old schedule as a template for a new one, they may easily load up the old schedule and save a copy to be used as a template for the new quarter. The user may then load the new copy and edit it as appropriate for the quarter in question. This also makes it quick and easy to make backups or multiple versions of an in-progress schedule.
The Home screen also provides the user the ability to create a new, blank schedule. Doing so will present the user with the blank schedule editor. See that slide for additional information on creating a new schedule.
The Add/Remove links at the bottom of the Home screen allow the user to manage instructors, courses, and locations. This functionality allows the user to edit instructors, courses, and rooms before creating a schedule.
The numbers next instructors, courses and locations correspond to the number of entries of each type in the permanent databases.