Once an administrator clicks on the instructor preferences button from a manage instructors view, they are greeted with the preferences view consisting of three different preferences to adjust. The three options for instructor preferences are Courses, Times, and Distance.
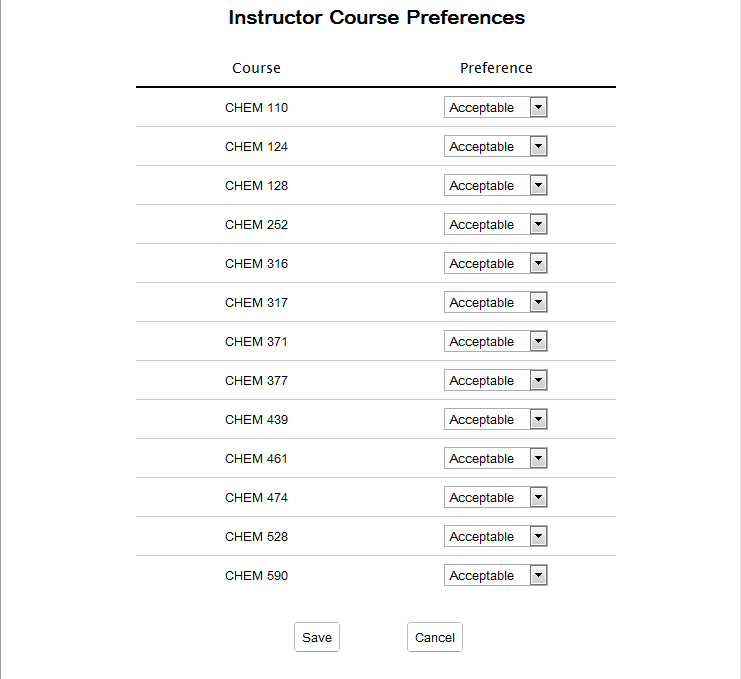
The view that is shown in Figure 2.5.1.1 is reached by clicking on an instructor's Preferences button from the edit instructor view.
Figure 2.5.1.1: Instructor course preferences
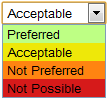
Figure 2.5.1.2: List of options within the dropdown
Figure 2.5.1.1 will list all courses for the department. Beside each course is a drop down menu as shown in Figure 2.5.1.2 with preference options for that specific course. The four options are:
Acceptable is the default choice for all courses.
When the preferences have been set, the user must select the Save button to save the changes. Otherwise, select the Cancel button, which will ignore all changes made to the preferences. Selecting either button will return the user to the manage instructors view.
The view that is shown in Figure 2.5.2.1 is reached by clicking on an instructor's Preferences button from the edit instructor view.
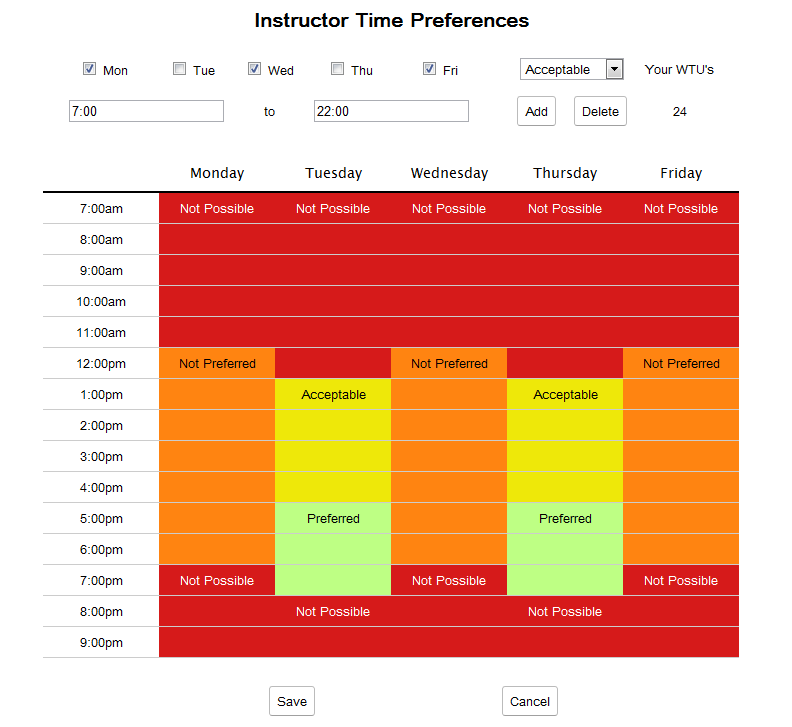
Figure 2.5.2.1: Instructor time preferences
This screen will show a calendar week view. It allows the user to set an instructor's time preferences. Times are added using the settings at the top.
At the beginning, the week view will be fully yellow, indicating an acceptable preference for all possible instruction hours. The two text entry boxes allow the user to enter the beginning and ending time of the block they wish to add. The Mon, Tue, Wed, Thu, and Fri checkboxes specify which days of the week for which the block will be added. To the right, above the Add and Delete buttons is a drop down menu, Figure 2.5.1.2, that allows you to choose a preference level from the choices listed below:
Once the user is done making the available adjustments to add a block of time, they can then click on the Add button. Blocks of time added will appear on the week view. For deletion of blocks of time, the user may click on the block and then click on the Delete button.
Figure 2.5.2.2 shows the result of clicking on the Add button with the settings shown in Figure 2.5.2.1.
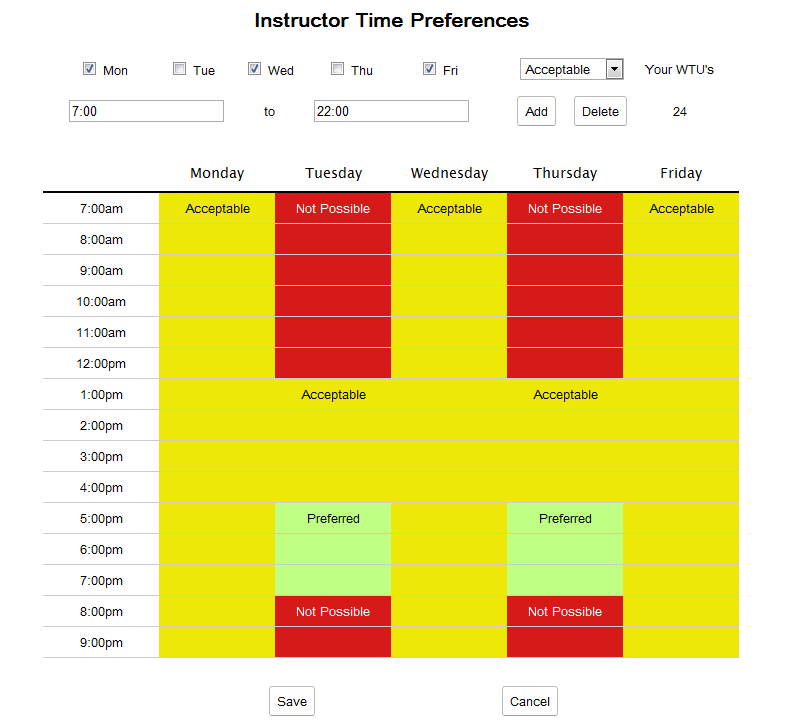
Figure 2.5.2.2: Instructor time preferences modified
When the preferences have been set, the user must select the Save button to save the changes. Otherwise, select the Cancel button, which will ignore all changes made to the preferences. Selecting either button will return the user to the manage instructors view.
The view that is shown in Figure 2.5.3.1 is reached by clicking on an instructor's Preferences button from the edit instructor view.
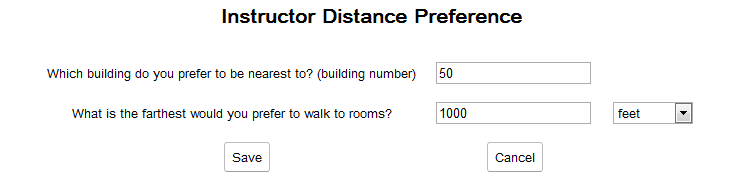
Figure 2.5.3.1: Instructor distance preference
There are three user input fields on this view. The first input is specifying the preferred center point on the map of the campus for which to apply the distance value that is given in the second input. This is done by specifying the building number that the instructor wishes for their courses to be nearest to. If this field is left blank, then the building of the instructor's office will be used.
The second input is the numerical value for maximum preferred distance.
The third is a drop down menu for specifying the distance unit for the value given in the first input. Drop down choices are feet, yards, meters, miles, and kilometers.
When the preferences have been set, the user must select the Save button to save the changes. Otherwise, select the Cancel button, which will ignore all changes made to the preferences. Selecting either button will return the user to the manage instructors view.
When an instructor logs in, they are greeted with a more limited version of the program. The instructor has access only to change course preferences, change time preferences, change distance preferences, and view schedules.
This interface only gives the instructor access to his own preferences and does not allow the editing of viewable schedules; only the ability to view, filter, and print schedules that have already been generated by an administrator.