Overview of the Final Renders
For my final three renders from the ray tracer I'd been building all quarter, I wanted to emphasize both its somewhat unique aspects, as well as its ability to render reflections and refractions, both of which I thought worked well. I also wanted to create my own scenes that were artistically pleasing and interesting. As a final note, all of the below renders were also created using the anti-aliasing feature of my raytracer, allowing for much smoother edges on the geometry of the scene.
Other techniques developed in my final ray tracer but not demonstrated below include the ability to display multiple lights, shape transforms, and a bounding volume hierarchy (BVH) data structure to improve the performance of the ray tracer. Also, while it is subtle, Schlick's approximation is present in the refractions shown below. All three images were rendered at a 640 x 480 resolution.
Render 1 (Source .pov file)
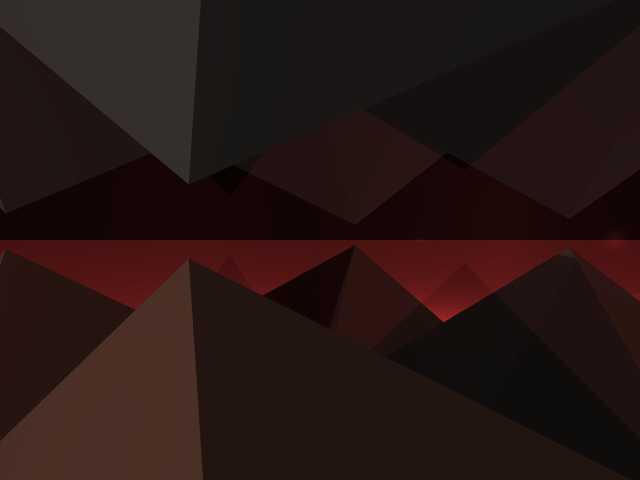
How many pyramids are in the scene? Two physical ones, the rest are reflections (the two closest to the foreground)! I liked how the use of reflections caused this one to turn out; I think it conveys a Mordor-esque feeling as well as looking really cool. From a technical/complexity perspective, this showcases my renderer's ability to successfully reflect multiple surfaces and objects multiple times.
Render 2 (Source .pov file)
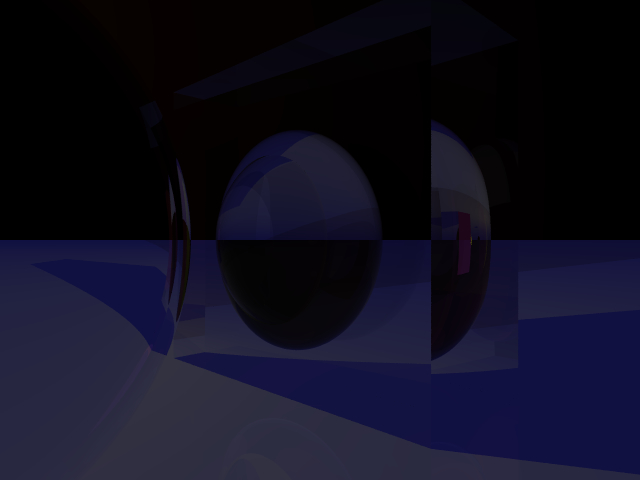
Originally my goal was to build some sort of physical camera in the scene (hence the sphere in the box). However, I ended up sticking with a more simple approach as I thought it looked cooler. Here, refraction also comes into play along with reflection. The left sphere has a cool morphing effect on the edge of the box as well as its shadow that shows off my renderer's ability to reflect and refract sphere shapes. I also really liked how the refractive sphere looked embedded into the box and how my renderer was able to handle that.
Render 3 (Source .pov file)

While I had issues getting my global illumination model fully working with some shapes, I was able to implement a simple depth of field effect as part of my ray tracer for Part 5. This showcases that effect as well as how reflection and refraction mix with it. I think the combination of the reflection of the middle sphere with the other blurred object creates a cool effect. I also wanted to create a "lighter" picture as my other renders had all turned out pretty dark! Finally, of the three renders, this one took the longest at 2.89 minutes. This was achieved using 256 sample rays for the anti-aliasing (which doesn't include any additional refractive or reflective rays), and showcases the BVH performance improvement; without the BVH, the render would have most likely taken much longer.
What I Learned From Making a Ray Tracer
Rendering is hard. To be more specific, while remaining brief (going over everything I learned would take a while), I learned a whole lot about the math that makes rendering go, from the goal of the rendering equation to the specifics of how to implement shape intersections. I also learned a lot about software development and design in C++ (and in general too). This has been by far my longest single project at school and I really started to feel the effect of "technical debt" during the end of it. Also just getting some real work done in C++ from scratch was awesome.
