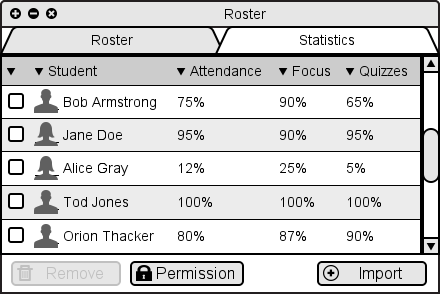
Figure 2.7.2.1: Roster window.
To change the permissions of students to perform various actions, the instructor first opens the class roster window, and then optionally checks the checkbox next to one or more students. The instructor then clicks the "Permissions" button at the bottom of the class roster window, as shown in Figure 2.7.2.1 below.
Figure 2.7.2.1: Roster window.
If students were selected, then the permissions set in this dialog will apply to the selected students only. Otherwise, the permissions set will become the defaults for the class.
This opens a permissions dialog with various options. Figure 2.7.2.2 below illustrates this dialog and some ideas for permissions that can be configured.
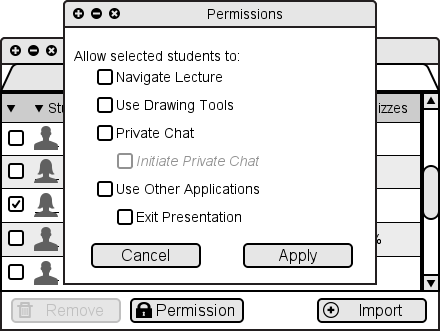
Figure 2.7.2.2: Permissions window.
When the dialog opens, the appropriate checkboxes will be checked for the permissions the selected student(s) currently have. The first time the dialog is opened for a particular course, all checkboxes are checked.
If more than one student was selected, then for any permission that only some of the selected students currently have, the corresponding checkbox will be displayed in an intermediate state (e.g. with a square or line inside). These checkboxes can be toggled between the checked, unchecked, and intermediate states; when applying the permissions, any checkboxes in the intermediate state will not cause any permissions to be changed.
The checkboxes in the Permissions Window toggles access to these actions for the selected users:
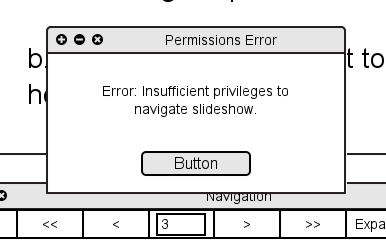
Figure 2.7.2.1.1: User attempts to navigate, but does not have correct permissions to do so.
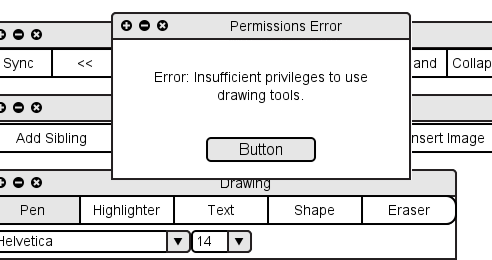
Figure 2.7.2.1.2: User attempts to draw, but does not have correct permissions to do so.
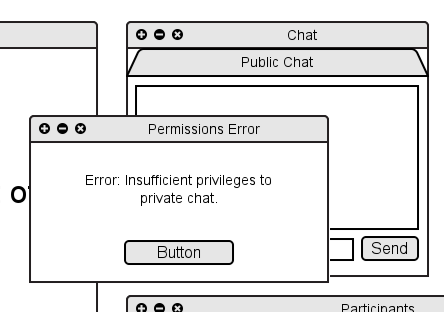
Figure 2.7.2.1.3: User attempts to private chat, but does not have correct permissions to do so.
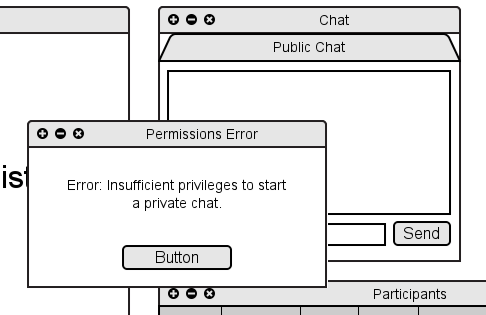
Figure 2.7.2.1.4: User attempts to start a private chat, but does not have correct permissions to do so.
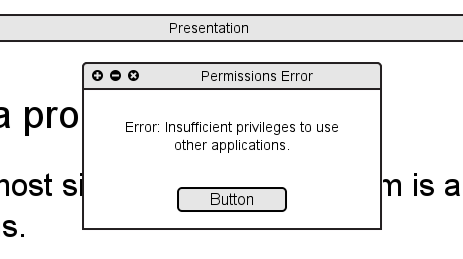
Figure 2.7.2.1.5: User attempts to navigate to other applications, but does not have correct permissions to do so.
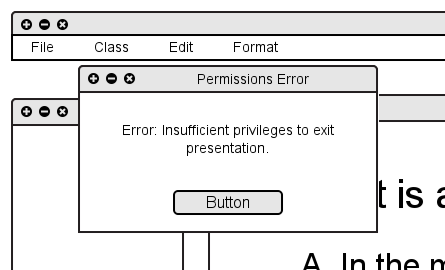
Figure 2.7.2.1.6: User attempts to exit presentation, but does not have correct permissions to do so.
The Permissions Window's Cancel button closes the dialog, making no changes to student permissions. The Apply button changes the permissions of the selected student(s) but does not close the dialog.
The figure below illustrates the dialog with options configured. Note that only some selected students have permission to use drawing tools, and that because no students have permission to use other applications, the Exit presentation checkbox is unavailable.
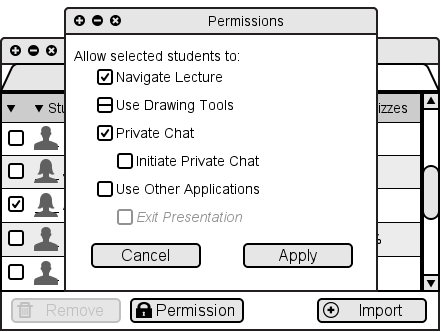
Figure 2.7.2.3: Permissions window.