The scenarios in this section show an administrative user performing some simple maintenance tasks. Such tasks include:
Lessons are saved and viewed in a heirarchy as seen in the expanded Lesson Explorer in Figure 1 of the section titled "Viewing a Lesson." This heirarchy has the following structure: Courses -> Instructors -> Sections -> Lessons -> Nodes. This heirarchy exists on every Host (Hosts are discussed in detail in sections 2.10.3 - 2.10.5) in a simple directory/folder structure. It is up to an administrator to set up such a structure with appropriate names so that when a user views the Lesson Explorer, it can be populated with useful information.
For example, in the figure mentioned above, a tree structure is displayed that contains levels for Courses, Instructors, Sections and lessons. These levels correspond to actual directories/folders on a host system.
Assume the user wants to duplicate the structure seen in the figure mentioned above. First the user accesses a host known to the CSTutor system whether locally or remotely. The user then locates the Data directory within the "CSTutor" directory. In the "Data" directory, the user creates 5 new directories named "101", "102", "103", "205" and "206". The user then creates a directory named "GFisher" within the "101" directory. Finally, the user creates two more directories in the "GFisher" directory named "Section 1" and "Section 2."
The user has now succesfully begun to define the data heirarchy that the CSTutor tool will use and can continue defining this heirarchy as need dictates. Now the CSTutor tool can search the Host for the data required to populate the Lesson Explorer and authors of Lessons can now save their lessons in their appropriate folders on the host.
There are several administrative functions available in the CSTutor Tool. However, these functions require a certain level of security. For example, we would not want just anyone adding Hosts that the application would look to for Lesson information. To avoid this type of situation, an "Administrator" is required to login to the system before they can perform the functions related to administration. Until the user has succesfully logged in as the administrator, all other items in the Admin menu are not available (e.g. Add Host, Remove Host, List Hosts, Change Password and Log Out are all grayed out).
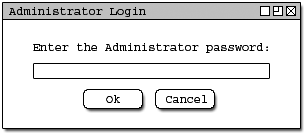
Lets assume that an administrator wants to access the admin functions. They must log in so they select the Log In option under the Admin menu ( Admin -> Login). The system responds by displaying the Login dialog as seen in Figure 1.

Figure 1: Administrator Login.
The Login dialog contains a prompt for the Administrator password. It also contains a text entry box where the user can type in a password. The user has the option to either enter a password and click OK or to click Cancel and abort logging in. The user wants to login and so they type in a password. The system displays only '*' characters so that onlookers will not see the password displayed to the screen. Figure 2 shows a filled in Login dialog.
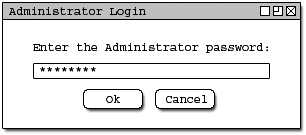
Figure 2: Administrator Login - Filled In.
To continue, the user clicks OK and the system responds by displaying one of two messages. The first possible outcome is that the user entered an incorrect password and so a dialog appears to inform them of this. The user must then try to login again if they still want to be able to access administrative functions. Figure 3 shows the Login Unsuccessful dialog.
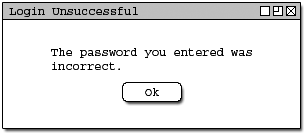
Figure 3: Unsuccessful Login.
The other possible outcome of the login operation is that the user entered a correct password and so they are now allowed to access administrative functions. The system displays a message informing the user that the login was successful. Figure 4 shows the Login Successful dialog.
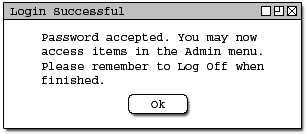
Figure 4: Successful Login.
Assume the user wants to add a host. A host is a location that the CSTutor tool will look to in order to retrieve available lesson information. The user selects Add Host from the Admin menu (Admin -> Add HostAdd Host dialog as seen in Figure 5.
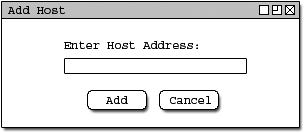
Figure 5: The Add Host dialog.
The Add Host dialog contains an entry box where the user can type in the address of the Host they wish to add. This address may be in the form of an I.P. address or it may be in the form of a full URL. For example, both 129.65.51.25 and http://waldorf.csc.calpoly.edu are valid entries. The system does not check if an entered address exists. The user is responsible for entering correct addresses.
Assume the user types in the I.P. address of the host they wish to add. For example, 129.65.51.28. The user may either press the Add button to complete the operation or they may hit the Cancel button to abort the operation. Figure 6 shows the filled in Add Host dialog.
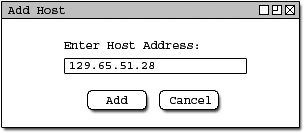
Figure 6: The Add Host dialog filled in.
Assume the user wants to view a list of hosts that the system will currently search for to retrieve Lesson information. The user selects List Hosts from the Admin menu (Admin -> List Hosts ). The system responds by displaying the Current Hosts dialog. Figure 7 shows an empty Current Hosts dialog. (Note: The CSTutor application will have one or more default hosts upon the initial install and so the Current Hosts dialog will only be blank if an administrator removes all of the hosts.)
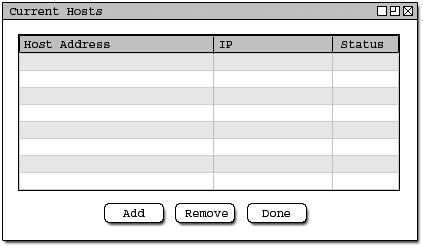
Figure 7: A blank Current Hosts dialog.
Assume the user continues to add 3 more hosts in addition to the one added above. Figure 8 shows the Current Hosts dialog now that these hosts have been added.
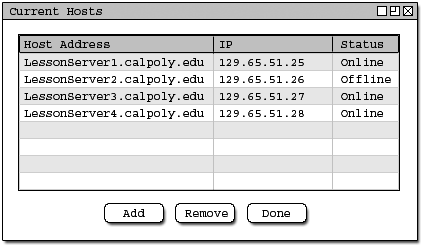
Figure 8: A Current Hosts dialog with a few hosts listed.
The Current Hosts dialog contains a table of information which displays a Hosts Address, it's I.P. address and it's status. The status field can display either Online or Offline depending on whether the server is accessible or not. In addition to the list of current Hosts, the Current Hosts dialog has an Add button and a Remove button which can be used to add a Host or remove a Host respectively. The Add button behaves identical to the Add Host menu item in the Admin menu (see Adding a Host). Removing a Host from the Current Hosts dialog is discussed in the next section (Removing a Host).
Assume the user wants to remove a host that has been previously added. There are a couple ways that an administrator may remove hosts. The first way is to use the menu. The user selects the Remove Host item from the Admin menu (Admin -> Remove Hosts). The system responds by displaying the Remove Host dialog as seen in Figure 9.
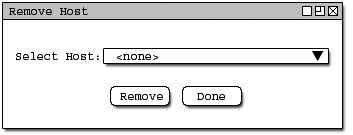
Figure 9: The Remove Host dialog.
The Remove Host dialog contains a pull down box which lists all current Hosts in their URL format (if no URL can be determined by the system, then the I.P. address is displayed instead). The user selects a host from the pull down list that they wish to remove. For example, LessonServer2.calpoly.edu. The user then clicks the Remove button. The system responds by diaplaying a confirmation dialog that asks the user if they are sure that they want to delete the selected Host. Figure 10 shows a selcted Host and Figure 11 shows the confirmation dialog.
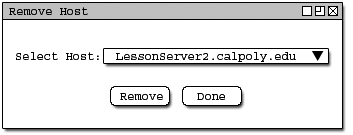
Figure 10: A Host Selected.
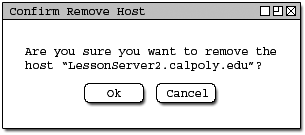
Figure 11: The Confirm Remove Host dialog.
The user clicks OK to confirm or Cancel to abort. Once the user has pressed either button, they return to the Remove Host dialog and may continue removing hosts or they may click the Done button which will close the Remove Hosts dialog.
There is another way that a user may remove a Host. Assume the user has opened the Current Hosts dialog (see Viewing a List of Current Hosts to learn how to access the Current Hosts dialog). In The Current Hosts dialog, the user selects a Host they wish to remove in the list by left-clicking on it. Figure 12 shows a selected Host in the Current Hosts dialog.
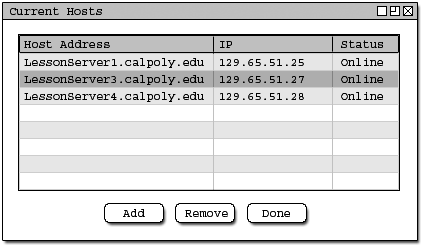
Figure 12: A selected Host.
The user clicks on the Remove Host button to remove the selected Host. The system then responds by displaying the Confirm Remove Host dialog (see Figure 11). The user clicks OK to confirm or Cancel to abort. When the user clicks OK they are returned to the Current Hosts Dialog and the Host that they removed is no longer in the list. Figure 13 shows the previously selected Host removed. The user may then repeat this process to remove more Hosts or click the Done button to close the Current Hosts dialog.
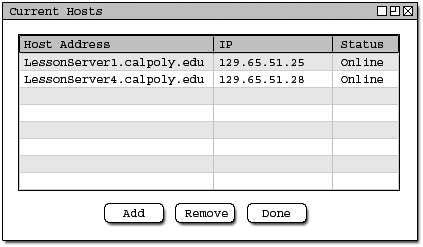
Figure 13: The previously selected Host has been removed.
Assume the user wants to change the administrator password. The user selects Change Password from the Admin menu (Admin -> Change Password). The system responds by displaying the Change Password dialog as seen in Figure 14.
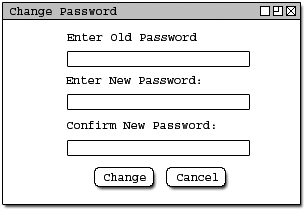
Figure 14: The Change Password dialog.
In the Change Password dialog, the user fills in three fields: their old password, their new password, and a confirmation of their new password. All fields display only '*' characters to hide password information from potential onlookers. Figure 15 shows an example of a filled in Change Password dialog.
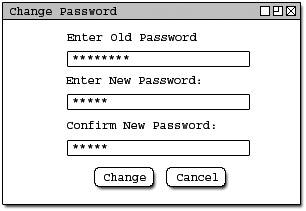
Figure 15: The Change Password dialog filled in.
The user clicks the Change button to apply the changes. The system repsonds by diaplaying one of three dialogs. If the user input an incorrect password into the Old Password field, then the user will see the Old Password Incorrect dialog. If the user did not type in identical entries for the New Password and Confirm New Password fields, the system will display the New Password Inconsistent dialog. For either of the previous two dialogs, the user will be redirected back to the Change Password dialog so that they can correct their error. If all three inputs are validated, then the user will see the Password Change Successful dialog. Alternately, if the user clicks the Cancel button, the user is returned to whatever they were doing before they selected the Change Password item from the Admin menu. Figures 16, 17 and 18 show the Old Password Incorrect, New Password Inconsistent and Password change Successful dialogs respectively.
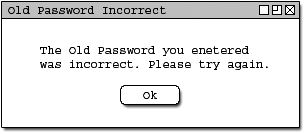
Figure 16: The Old Password Incorrect dialog.
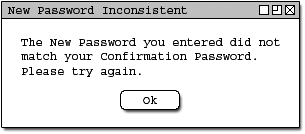
Figure 17: The New Password Inconsistent dialog.
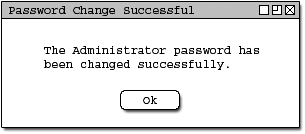
Figure 18: The Password Change Successful dialog.
Assume the user is done using the administrator functions and wishes to log out. (Logging out is HIGHLY recommended to prevent unauthorized access to the administrator functions.) The user selects Log Out from the Admin menu (Admin -> Log Out). The system responds by displaying the Logged Out dialog as seen in Figure 19.
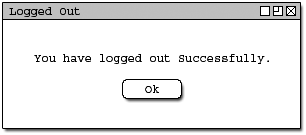
Figure 19: Logged Out Dialog.
The user is now logged out and cannot access any administrative functions without logging in again first.
This concludes the Administrative Functions.