In addition to text, tutorials can include additional content, including pictures, diagrams, code, example files, and an interactive programming shell.
To get to the tutorial page authoring screen, user first selects the 'Add a New Page' option from the tutorial creation page. This leads to the tutorial creation screen (Fig. 2.3.3.a), where the main text for the tutorial can be entered in html or plain text.
Figure 2.3.3.a: Tutorial Page Authoring Screen
To add an image to the tutorial, the user first selects the 'Add Picture' button to the right of the body text field. This leads to the add picture menu (Fig. 2.3.3.b).
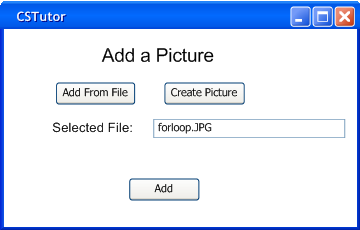
Figure 2.3.3.b: Add Picture Menu
In the add picture menu, the user can choose either to upload a picture from a file using the 'Add From File' button, which will bring up a file browser dialog, or the 'Create Picture' button can be selected in order to create a new picture from scratch using the drawing tool. (Fig. 2.3.3.c)
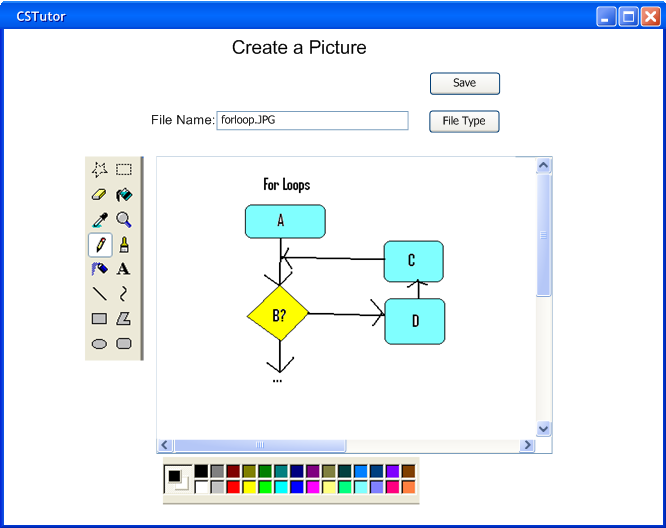
Figure 2.3.3.c: Picture Tools
The drawing screen functions like a simple paint program. On the left side is a sidebar containing simple drawing tools, and on the bottom of the screen is a color palette. The toolbar controls are similar to those found in simple drawing programs like MSPaint. At the top of the screen is a text box where the user can enter the name for the picture to be saved under, and there are buttons to save the picture and select the file type for it to be saved as. Once the picture is saved, it can be added into the tutorial using a regular html <img> tag with the value of the ‘src’ parameter being the file name the picture was saved under.
The user also has the option of including an interactive programming shell in the tutorial page. In order to include the interactive shell, the user must go to the 'Options' tab of the main tutorial creation screen (Fig. 2.3.3.a). This tab will open an options screen where options related to the shell can be set (Fig. 2.3.3.d).

Figure 2.3.3.d: Interactive Tutorial Options
The options screen contains a checkbox that selects whether or not to include the interactive shell in the tutorial. The user can use a drop-down box to select between the available languages for which interactive shells are available. There is also an edit box to type in the default code example that will be loaded into the shell’s edit control.