2.3.1. Creating a Tutorial
This introductory scenario shows an individual user creating a tutorial.
Creating a tutorial is a common activity when using the authoring side of the CSTutor.
In this scenario, we assume that the user has just registered to use the CSTutor and is
creating their first tutorial using the CSTutor.
To get the tutorial authoring screen, the user selects the 'Author Tutorial' button.
In response, the system displays the screen in Figure 2.3.1.a
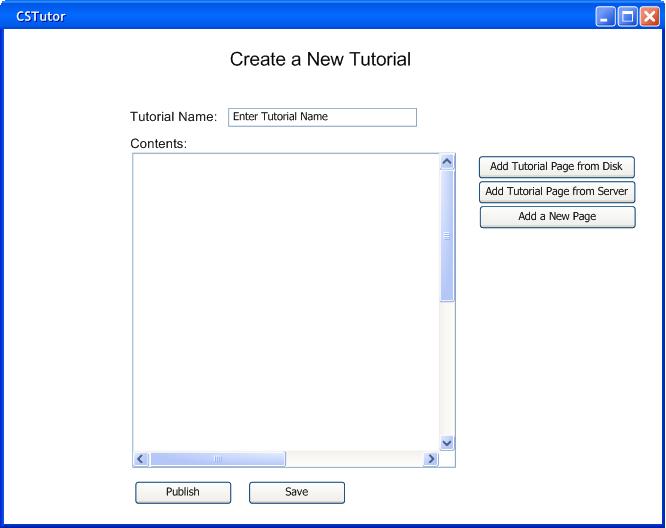
Figure 2.3.1.a: Tutorial Creation Screen.
The 'Tutorial Name' field is a one-line string that describes the tutorial.
Below this is the contents field.
The 'contents' field displays the pages that are associated with a tutorial.
The 'Add Tutorial Page from disk' button and the 'Add Tutorial Page from Server' button
allow the user to select a tutorial page from an external source and add it to the current tutorial.
The dialog that appears when the user presses 'Add Tutorial Page from Server' looks like Figure 2.5.1.j
The dialog that appears is the user selects the 'Add Tutorial Page from Disk' appears in Figure 2.3.1.b. This dialog lets the user
select where the page is to add from their hard drive.
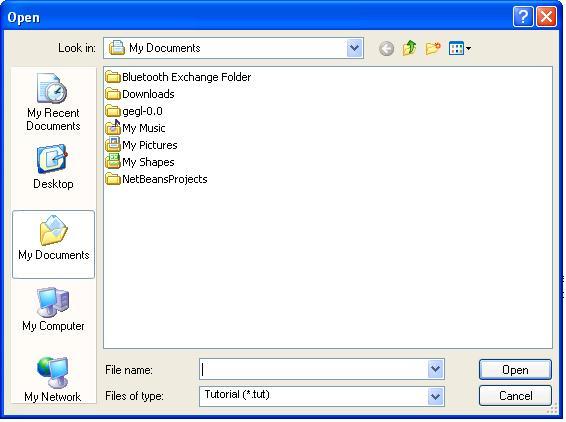
Figure 2.3.1.b: Adding a page from disk dialog
The 'Add a New Page' button, opens up the page editor so the user can create a new page for this tutorial.
The user can populate the 'contents' field by doing one of two things. First, the user can create a new page to add. The specifics of this process
are explained in section 2.3.2. Secondly, the user can add a saved page from disk or a server to the tutorial.
Figure 2.3.1.c, shows what a complete tutorial looks like.

Figure 2.3.1.c: A Completed Tutorial
The 'contents' field acts as the table of contents for the tutorial. What the users sees in the 'contents' field is how the pages will be
presented when the tutorial is viewed. To change the ordering of the pages, the user simply selects a page from the list and drags it to the new position.
By double clicking a page the system responds by displaying the tutorial page editor for the selected page. Figure 2.3.1.d, shows how the 'contents'
field looks like after a page has been moved.
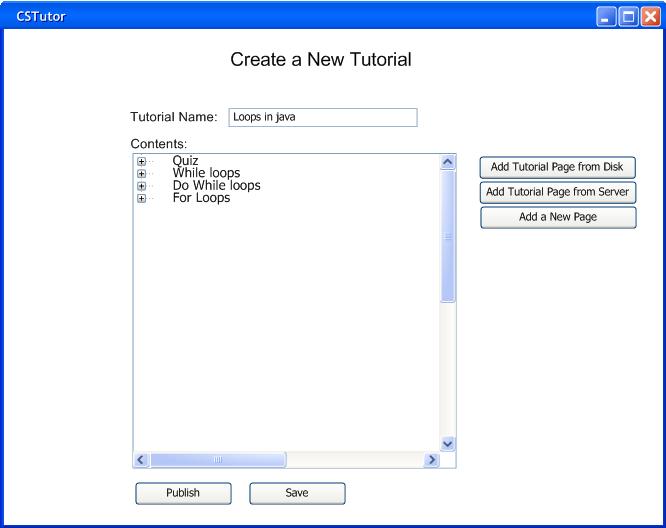
Figure 2.3.1.d: Completed Tutorial with pages rearranged
When the user is done completing the tutorial dialog, the user has the choice of uploading the tutorial to a sever using
the 'Publish' button or to save the tutorial on the local hard drive using the 'Save' button at sthe bottom of
the dialog screen. If it is the first time that that the tutorial has been saved then the system responses with the dialogs in
Section 2.3.5.1. For every other time that the user presses the 'Save' button, the dialog boxes in
Section 2.3.5.1 do not appear. For more information about publishing, see Section 2.3.5.2
The following confirmation screens in Figure 2.3.1.d are displayed by the system after the selected action is completed.
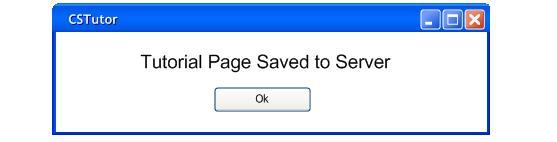
Figure 2.3.1.e: Confirmation Screens.
Prev: [none]
| Next: creating-basic_page
| Up: creating-tutorial
| Top: index