Instructors can give two types of access permissions to students through the Roster. Once permissions are given, students can utilize the feature under the supervision of the instructor. The two types of permissions are permission to access the system and permission to access the public Snapshot. Details of access permission for the public Snapshot are discussed in Section 2.6.2.3.
Access Permission to the System
The instructor can control student access to the system by adjusting different modes of student activities. The modes are 'Free', 'Restricted' and 'Lock'.
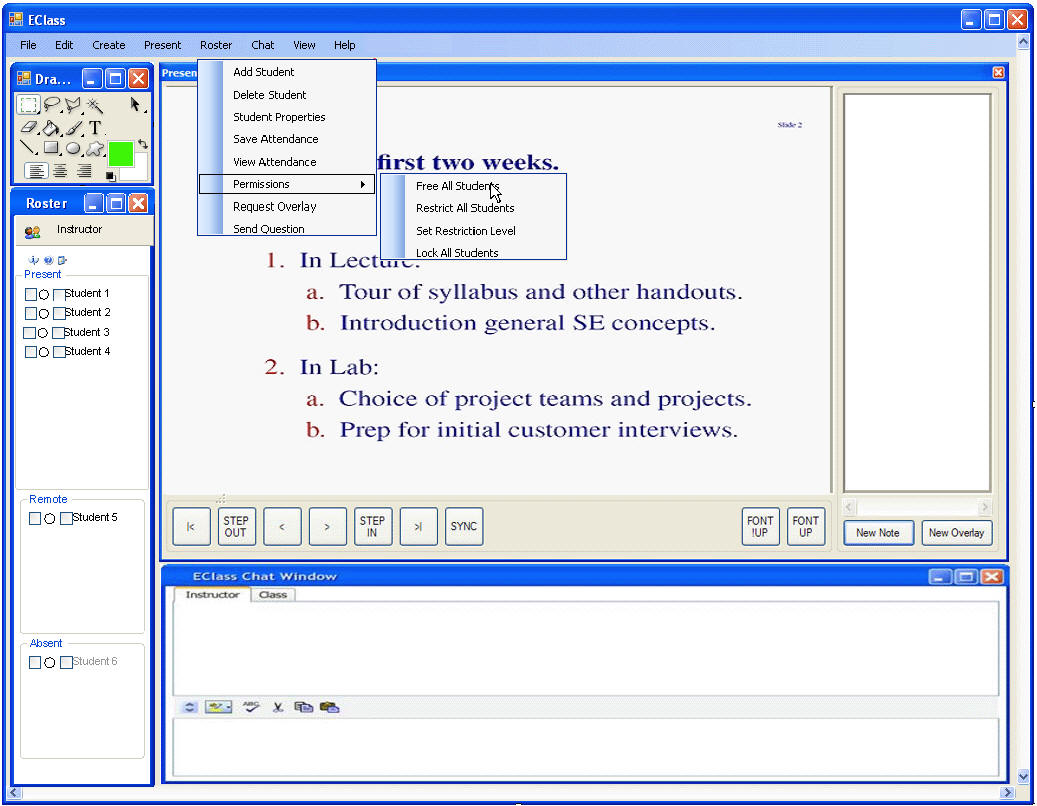
For the mode 'Free', students can access all the applications in the system. However, they still need to request permission from instructor to access a public Snapshot. This is the default mode of the system unless changed by the instructor. To apply the 'Free' mode, the instructor selects 'Roster --> Permissions --> Free All Students' from the main menu bar as shown in Figure 2.5.2a.
Figure 2.5.2a. Setting the permission mode as 'Free' during lecture
For the mode 'Restricted', students can only access applications that are approved by the instructor. The instructor can set up a list of approved applications before using this mode, otherwise EClass behaves as if it were set to the 'Free' mode. To set the list of approved applications, the instructor selects 'Roster --> Permissions --> Set Restricted Level' from the main menu bar. In response, a 'Restricted Level' dialog box will appear as shown in Figure 2.5.2b.
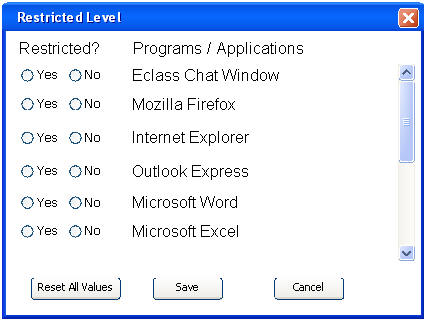
Figure 2.5.2b. 'Restricted Level' Dialog Box
The instructor clicks the radio buttons 'Yes' or 'No' in the dialog box to choose which programs and applications to be banned from student use as shown in Figure 2.5.2c. To reset all selections, click the 'Reset All Values' and all the selections made before will be cleared.
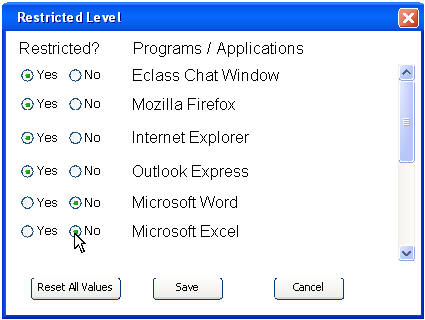
Figure 2.5.2c. Choosing programs and applications to be banned from student use.
To apply the 'Restricted' mode, the instructor selects 'Roster --> Permissions --> Restricted All Students' from the main menu bar. After applying the 'Restricted' mode, a warning message will appear to student if he tries to access a program or application that is banned by the instructor. As exampled in Figure 2.5.2c, the Internet Explorer is banned from students. Therefore, when a student tries to access the Internet Explorer (in Figure 2.5.2d), a warning message appears telling the student that the Internet Explorer is banned (in Figure 2.5.2e).
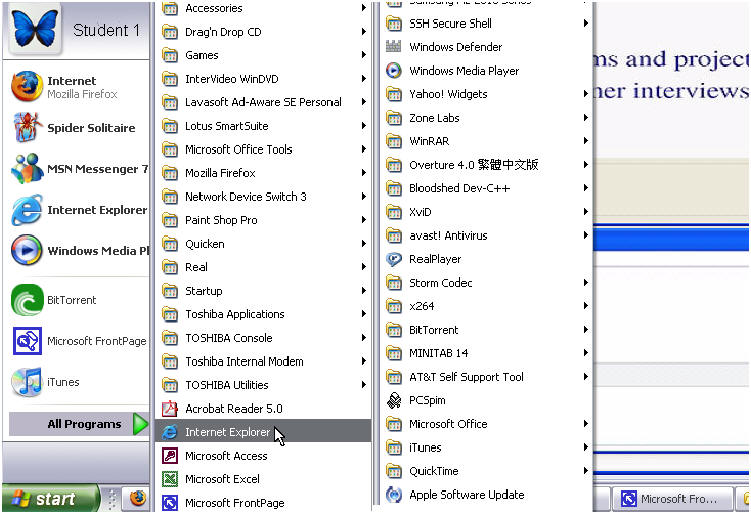
Figure 2.5.2d. A student trying to access the Internet Explorer
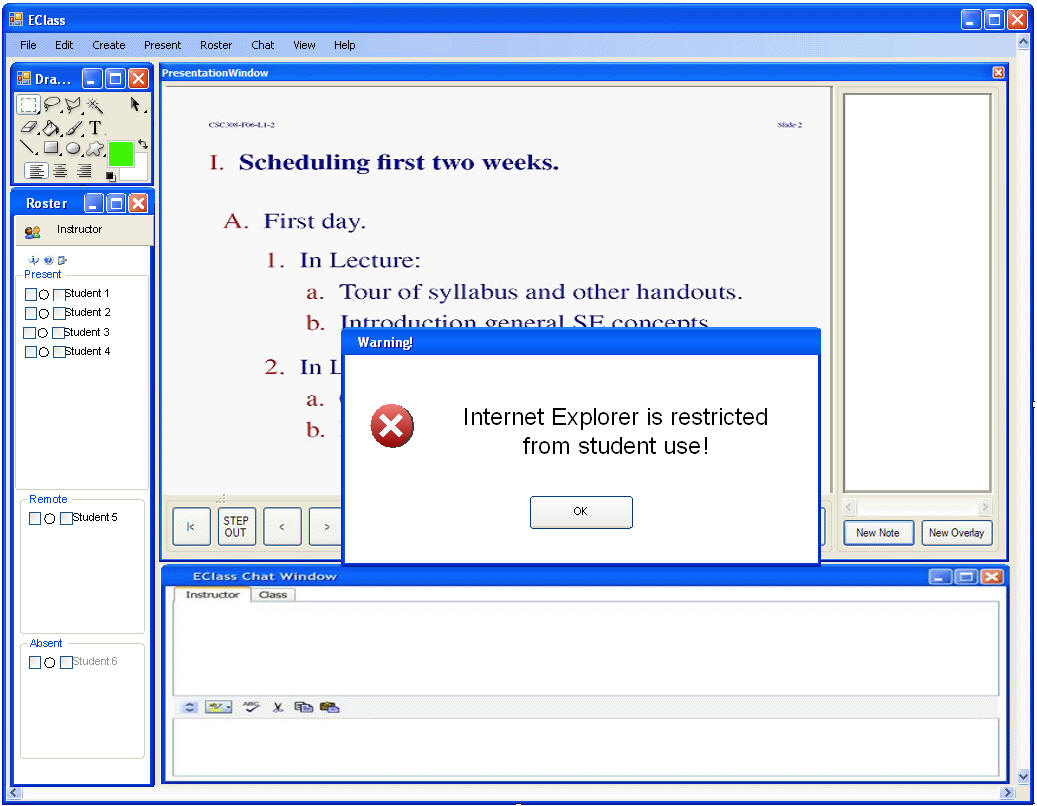
Figure 2.5.2e. Warning message to student for restricted use of Internet Explorer
For the mode 'Lock', students are not allowed to access any application in the system. The keyboard and mouse of all student computers are disabled as well. To apply the 'Lock' mode, the instructor selects 'Roster --> Permissions --> Lock All Students' from the main menu bar.
Prev: roster-overview | Next: manage | Up: roster-details | Top: index