In this example, the student is viewing an instructor's presentation slide:
|
|
Figure 26: Lecture slide
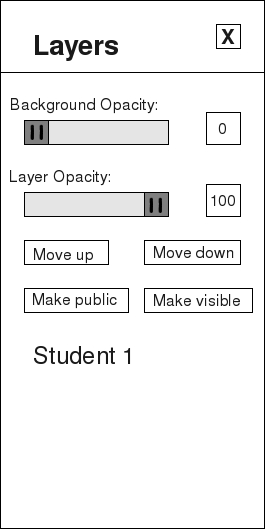
The Layer Window currently has one layer called: Student1.
|
|
Figure 27: Layer window showing a single layer: Student 1
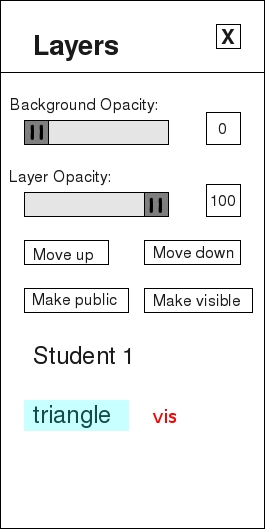
The student goes to the Layer tab and selects new layer. The cursor will appear in the Layer Window, and the student types in the name of the layer: triangle. When a new layer is created, the default property is visible. This is seen in the red letters “vis” after the highlighted layer name.
|
|
Figure 28: Layer window with new layer selected: triangle
Note how the background opacity is set to 0. This is like drawing on a clear plastic sheet, like an overhead projector cell. The layer opacity of 100 percent indicates the text and lines drawn by the student are solid.
Now the student types or draws over the instructor's slide on their own computer. This student has decided to type an answer in red text:
|
|
Figure 29: Student layer over slide
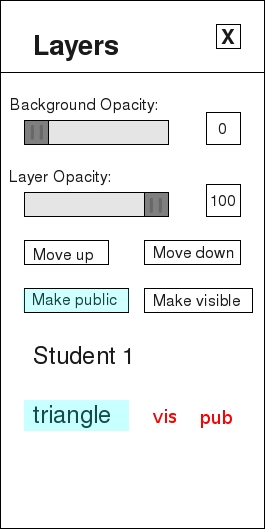
In order to make the current layer be the Public Layer, the layer name must be selected, then the user highlights Make Public. The letters “pub” will appear next to the layer name. Note: There can only be one public layer at a time. Selecting “make public” will change the previously public layer to the current one.
|
|
Figure 30: Select “Make Public”
Making a student layer public will not automatically make the layer display on everyone's system. The instructor must select a student in his interface, and give permission for the student's layer to be visible to all.
Prev: Layer Tool Window | Next: Adjusting Ink Opacity | Up: Drawing | Top: index