
Figure 2.7.3.1: Roster Right Click Options
Figure 2.7.3.1 shows the roster right click options.
Figure 2.7.3.1: Roster Right Click Options
Other functions of the roster are accessed through the right click menu, which
contains options pertaining to individual students:
Grant Sharing: Give a student
sharing priveleges.
Lock Computer: Lock the
student's computer, not allowing them to minimize the eClass application or
open other windows.
Edit: Edit student information.
records.
Figure 2.7.3.1.1 shows the roster right click options.
Figure 2.7.3.1.1: Roster Right Click Options
To grant a student sharing privileges (meaning the ability to show his or her slides to the entire class on the instructor's whiteboard), the instructor right clicks on the student's name in the roster and selects the option "Grant Sharing Privileges."
Figure 2.7.3.1.2 shows the student layer sharing dialog.
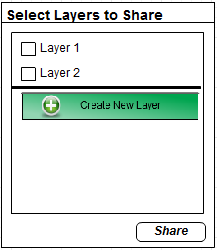
Figure 2.7.3.1.2: Student Layer Sharing Dailog
When the instructor has given a student sharing privileges, a popup window appears on the students screen as shown in figure 2.7.3.1.2. The
student may choose to check as many existing layers of theirs to share, as well as create new blank layers for sharing. Once all layers to
share have been selected, the student clicks the "share" button, and may draw on or edit his layers as normal, which will show on the instructor's
whiteboard and each student's screen. Having layers shared will not change the appearance of the student's screen or layers management widget. It
will however, change the instructor's view, as shown below in figure 2.7.3.1.3:
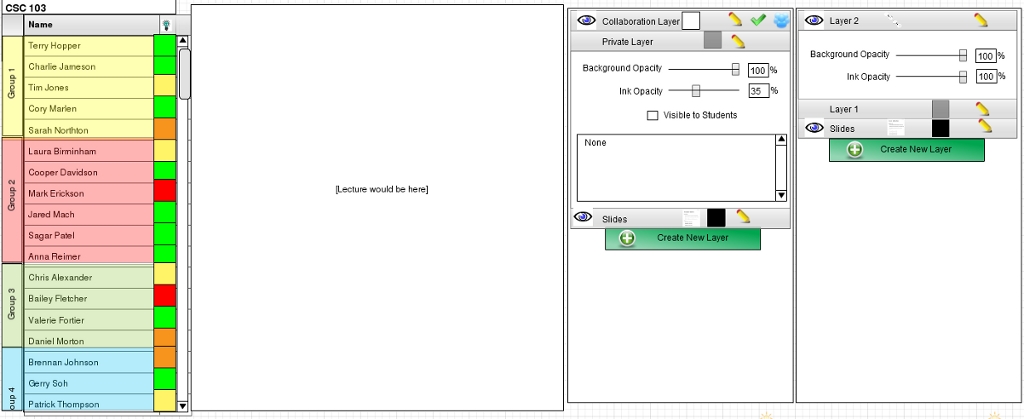
Figure 2.7.3.1.3: Instructor View with Shared Layers
The instructor's screen now has two layer management widgets. The left one is their own, while the right one is the student's. The instructor can remove the student's sharing priveleges simply by closing the widget that has the student's layers.
Figure 2.7.3.2.1 shows the lock computer option being selected
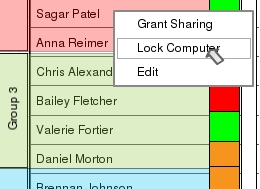
Figure 2.7.3.2.1: Right Click -> Lock Computer
If the instructor wishes for a student to only be able to view the eClass application and have no other open windows on their computer (if for example the student has a history of not paying attention and disrupting the class), they may click the 'Lock Computer' option on the right click menu. This will make the eClass application full screen on the student's computer, and will disable window switching controls such as alt+tab. The application will look and function the same as normal besides that.
Figure 2.7.3.3.1 shows the edit option being selected

Figure 2.7.3.3.1: Right Click -> Edit
The edit option allows the instructor to edit a student's name, in case there is a typo. Clicking it will make the cell editable, and hitting enter or clicking anywhere else will commit the change and save the updated class list.