
This scenario shows an individual user manually adding a new student to their class roster. The user must be allowed freedom in adding students manually to their class roster and not have to wait for an updated SIS roster. In this scenario, we assume that the user has added an SIS roster full of students to their class roster, with or without synchronization. The assumed roster comes from the previous scenario about synchronizing a class roster. The following scenario illustrates procedures extending beyond the initial assumption, allowing the user to add and edit students at any time.
To add new students, the user selects the New Student(s) item in
the Insert menu as shown in the toolbar in the ui-overview, causing the following window to appear as shown in Figure 18.
Figure 18: Add Students window. Note that the Edit Roster window is exactly the same as this window.
To add a new student, the user must enter data for a new student in the entry fields, checking the appropriate radio buttons and dropdown options as applicable for the student. An example of filled-out data for a new student follows in Figure 19.
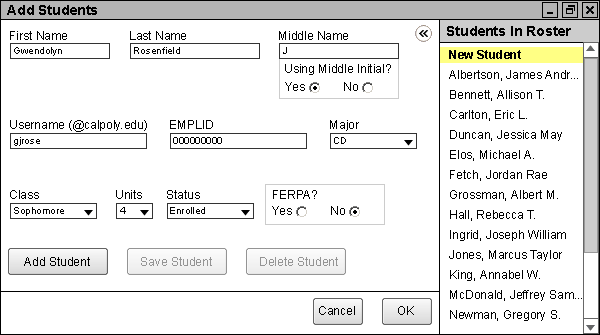
Figure 19: All data for a new student entered into the Add Students window.
All newly entered students not already in the class roster must be finalized before PolyGrade adds them as official students in the class roster. To confirm the newly entered student, the user clicks the Add Student button, causing the new student to appear in the Students In Roster window (note that in Figure 19, the student is further down the list and initially cannot be seen). The window is now in the state as shown in Figure 20, with all fields again blank.
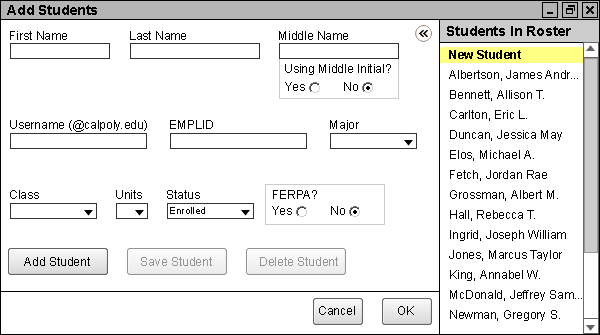
Figure 20: Adding a new student to the Students in Roster window by clicking the Add Student button.
Newly entered, unconfirmed students appear with orange text in the Students In Roster window.
The currently selected student is still the New Student, so the user scrolls down to the newly entered student and clicks on their name in the Students In Roster window, causing the previously entered information for the newly entered student to populate the entry fields in the Add Students main window. This selection and resulting field changes appear in Figure 21.
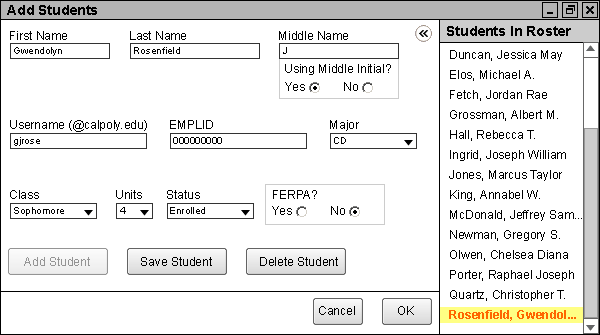
Figure 21: Selecting the newly entered student places their student information in the entry fields.
The user is now free to edit the data for this newly entered student or delete the student entirely, as described in the scenario about editing the student roster. Note that since the user now has more students than can fit in the Students In Roster window, the user may need to scroll up or down to reach the desired student. Clicking on the Save Student button applies all entry field data, old or new, to the newly entered student. The user may then select New Student in the Students In Roster window to add more students, further edit existing students, or click the OK button and confirm the newly entered students and changes to the class roster.
If the user wishes to cancel any possible changes to the roster, including all added students in this scenario, the user clicks the Cancel button or the Close button in the upper-right corner. PolyGrade prompts the user to save any changes made if the user has made changes to the original roster, and then the Add Students window closes.
The user is then brought back to the main gradesheet page. All options on this page are described in the gradesheet scenarios.
A similar command to Insert New Student(s)exists under the Edit toolbar entry, called Student Roster, as described in the next scenario about modifying a roster. If the user selects this toolbar entry, the Edit Roster window appears, which behaves the same way as the Add Students window.