This scenario shows an individual user making a modification to a student in their class roster. The user must be allowed freedom in editing students in their class roster manually and not have to wait for an updated SIS roster to fix those changes for them. In this scenario, we assume that the user has added an SIS roster full of students to their class roster, with or without synchronization, and added one new student, as described in the previous scenario about adding students manually. The following scenario illustrates procedures extending beyond the initial assumption, allowing the user to edit students at any time.
To edit a class roster, the user selects the Student Roster item in
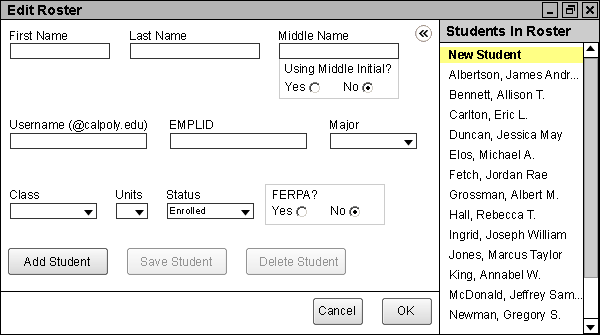
the Edit menu as shown in the toolbar in the ui-overview, causing the following window to appear as shown in Figure 22.
Figure 22: The Edit Roster window. Note that the Add Students window is exactly the same as this window.
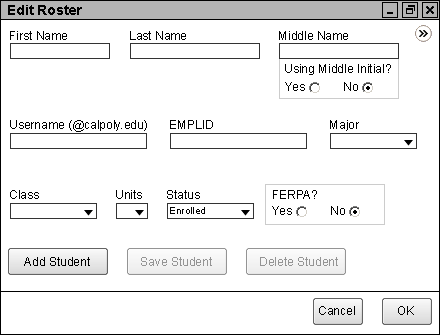
Figure 23: The Edit Roster window with the Students In Roster subwindow collapsed.
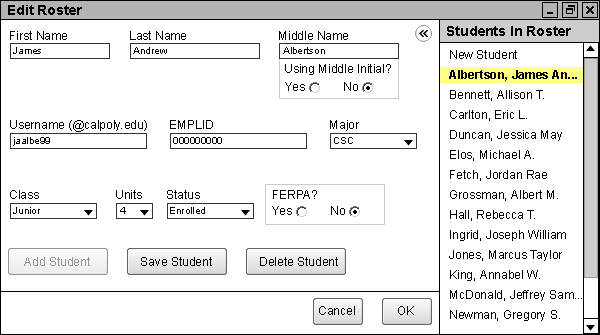
Figure 24: All data for a selected student appears in the entry fields.
To edit any data for a student, the user may click in entry fields that do not have a dropdown arrow next to them, and enter their desired input manually. For choices with radio buttons, the user selects the appropriate result from the two options. For choices with dropdown arrows, the user may select a choice from the resulting miniature menu. Clicking on the Save Student button applies all entry field data, old or new, to the newly entered student.
Note that the Middle Initial? selection depends on the Last name entry field above it. If the user chooses to enter a middle initial (in the form of Q. or Q), PolyGrade appends a period after the entered initial if one is not there initially for sorting purposes. If Yes is selected and the entered middle name is longer than two characters with a period
or one character without a period, PolyGrade prompts the user to enter a valid middle initial.
All pending changes the user makes to the original class roster show up in different colors and formats in the Students In Roster window, as follows:
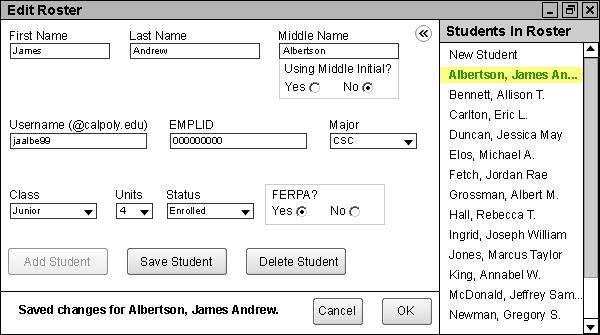
Figure 25: The Edit Roster window, after the user makes a pending change to a student's data and clicks the Save Student button.
Note that the user may choose to save multiple students at once. This can only be done if the user has made changes to more than one student. If the user wishes to save changes to multiple students at once, they may do so in two ways. If the user holds the CTRL key on their keyboard, clicking on a student selects a student if they are not yet selected and deselect a student if they are already selected. In doing so, the user can select any number of students to be saved and then click Save Students to save pending changes for them as shown in Figures 26 and 27 below.
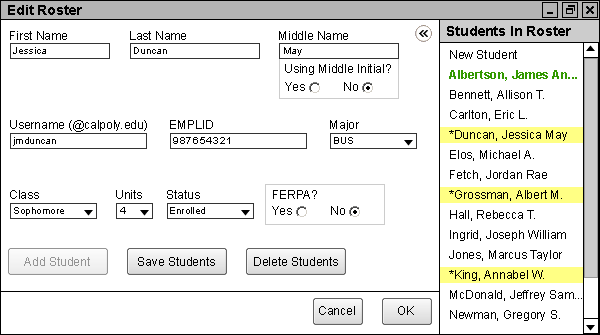
Figure 26: Holding CTRL, the user may select or deselect any number of students to save changes for.
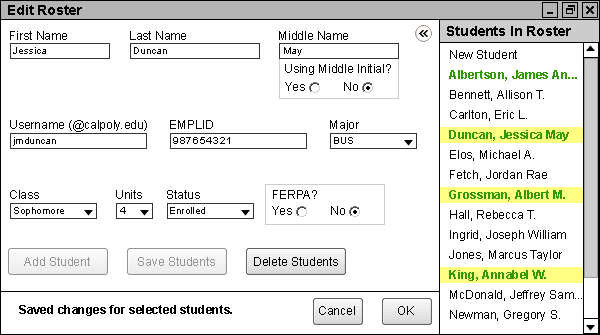
Figure 27: All selected students with changes have been saved by the user, via the Save Students button.
The other selection method, the use of SHIFT, is described more in detail in the following scenario about deleting students, only as deleting instead of adding students.
Note that using either selection method, the Delete Student button text changes to Delete Students and that only the initially selected student's data is shown in the Edit Roster window entry fields. Also, note the text change on the Save Student button to Save Students.
If the user wishes to cancel any possible changes to the roster, including all added students in this scenario, the user clicks the Cancel button or the Close button in the upper-right corner. PolyGrade prompts the user to save any changes made if the user has made changes to the original roster, and then the Edit Roster window closes.
The user is then brought back to the main gradesheet page. All options on this page are described in the gradesheet scenarios.
A similar command to Edit Student Roster exists under the Insert toolbar entry, called Add Student(s), as described in a previous scenario about adding students manually. If the user selects this toolbar entry, the Add Students window appears, which behaves the same way as the Edit Roster window.