
This scenario shows an individual user adding new students to their class roster from an existing roster. The process of adding students from a roster must exhibit simplicity and reliability and give PolyGrade users quick, efficient batch roster editing. In this scenario, we assume that the user
has a new class grade sheet and has no students in their roster.
PolyGrade reads an SIS (Student Information Services) roster when adding students from a roster. SIS provides instructors with class rosters for online grading programs such as Blackboard. Essentially, SIS is a particular name associated with the idea of a server from which an initial class roster can be downloaded. An example SIS roster format is provided in Figure 12.
Figure 12: Example SIS roster data format.
The EMPLID and FERPA fields require further explanation, as follows. The EMPLID field consists of nine digits, all between 0 and 9, unique to each student. FERPA, which stands for Family Educational Rights and Privacy Act, allows each student the right to inspect his or her educational records, the right to have these records amended and the right to some control over how much of this information in the records is disclosed. For more information on FERPA, please see the Cal Poly FERPA information page.
PolyGrade reads all data fields shown in Figure 12 for each student in the SIS roster. The user then gains control of the newly downloaded roster and can edit the roster themselves as described in the modifying roster scenario.
To add new students from a roster, the user first selects the Download Roster item in
the File menu as shown in the toolbar listed in the ui-overview, causing the following window to appear as shown in Figure 13.
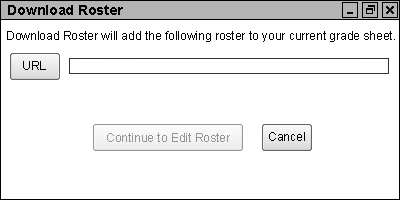
Figure 13: Download Roster window.
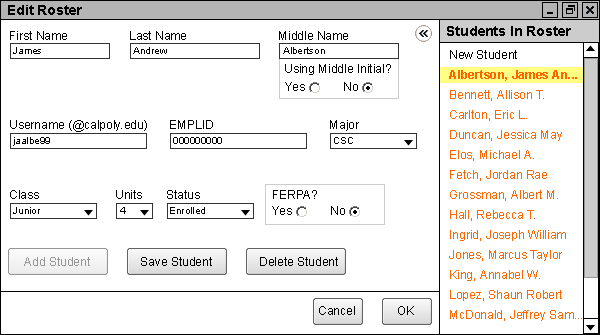
Figure 14: The Edit Roster window, with newly added students shown in orange text.
The user is now free to edit the data for these newly entered students as outlined in the roster modification scenario. Clicking on the Save Student button applies all entry field data, old or new, to the newly entered student. The user may then click on New Student in the Students In Roster window to add another student, or click the OK button and confirm the newly entered student, officially adding him or her to the class roster.
The user may cancel the process of adding this roster of students to their class roster by clicking the Cancel button or the Close button in the top right corner. This removes all newly added students from the roster and preserves the original roster instead. PolyGrade prompts the user to save any unsaved changes, then the Edit Students window closes.
The Edit Roster window is identical to the Add Students window. The manual student addition scenario offers a more in-depth description of this process.
Upon clicking the OK button (confirming the addition of these new students to the class roster) or the Close button in the upper right corner, the user is brought back to the main gradesheet page. All options on this page are described in the gradesheet scenarios.