2.3.2. Mid-Term Roster Synchronization
This scenario shows an individual user synchronizing their class roster with an updated existing roster. For certain add and drop periods, an instructor receives a new SIS roster containing the appropriate students and their status in the class. If students add or drop, or students on the waitlist get accepted as enrolled in the class, the professor is able to make all necessary changes to their class roster in one step. In this scenario, we assume that the user
has just imported an SIS roster full of students into their section, as outlined in the previous scenario, importing students from an SIS roster. The following scenario illustrates procedures that allow the user to synchronize their class roster at any time, not just during certain periods.
To begin the class roster synchronization process, the user first selects the Update Roster item in
the File menu as shown in the toolbar listed in the ui-overview, causing the following window to appear as shown in Figure 15.
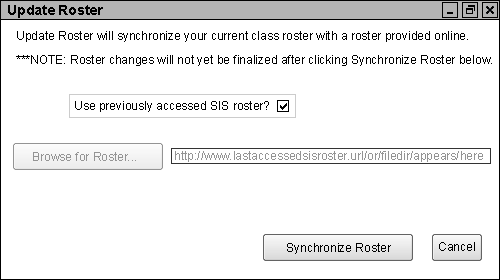
Figure 15: The Update Roster window.
The user is first given the option to use the previously accessed SIS roster, whether it exists on the online file server or locally on the user's computer. If this box is checked, the URL of the location (if the roster is online) or the path (if the roster is on the local machine) appears in the field next to the Browse for Roster... button. Otherwise, the user may click the Browse for Roster... button, which brings up a search directory window. The user may enter a URL or navigate to the SIS roster on their local machine. Clicking OK brings the user back to the Update Roster window with the appropriate path entered into the field.
If the user decides they do not want to synchronize, they then press the Cancel button or the Close button in the top right corner, closing the Update Roster window and bringing an end to this scenario.
Once the user has verified the correct SIS roster to use, the user then clicks Synchronize and PolyGrade brings up the Loading Roster window, as shown in Figure 16, to indicate that it is searching for the roster.
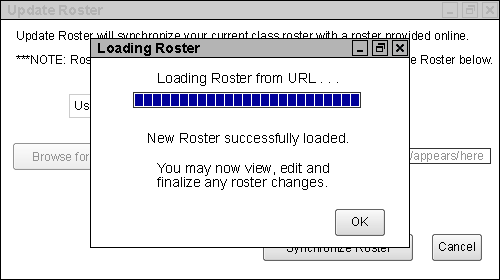
Figure 16: The Download Roster window.
After reading the roster of choice, the user may view, edit and finalize the differences spotted in the newer roster compared to the user's current roster. Such differences include dropped students, added students, or any changes in student information. For this scenario, the first two differences are displayed. The third is shown in the scenario about modifying a class roster.
The user then clicks the OK button, which brings up the Edit Roster menu with all changes to the roster indicated as shown in Figure 17.
The currently selected (highlighted) student is the first newly added student discovered in the synchronization, or the first student in the original list if no newly added students are detected.
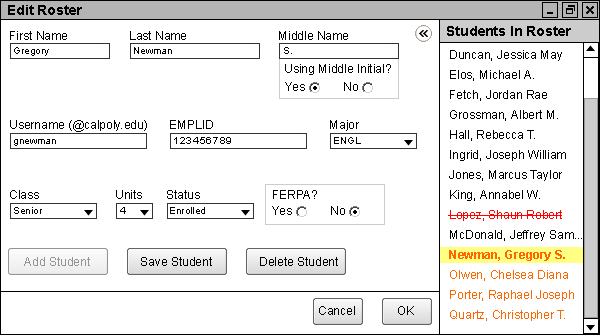
Figure 17: The Edit Roster window, with all synchronization abnormalities pointed out.
The following differences may be present between the user's local roster and the updated roster on the file server:
Updated roster list on the file server contains a student the user's local roster list does not contain,
User's local roster list contains a student the updated roster on the file server does not contain, and
Existing student information on one differs from student information on the other.
Note that equivalent users have the same EMPLIDs.
Now in the Edit Roster window, the user is now free to edit the data for all current and pending students as outlined in the roster modification scenario. The user may even add a new student from this screen manually, as indicated in the scenario about manually adding students. Newly entered students discovered in the newer class roster are shown as newly added students in orange text. Deleted students who have dropped the class are indicated by a red line through their name, which is displayed in red text. Students that had any of their information changed have their names highlighted in green. These color codes apply to modifications made by both the Update Roster command and the user.
Clicking on the Save Student button applies all entry field data, old or new, to the newly entered student. The process of deleting students via the Delete Student button is covered in the deleting students scenario. Once the user is satisfied with all changes, the user clicks the OK button and confirm all changes.
If the user decides they do not want to accept the changes made to the roster, they may press the Cancel button or the Close button in the top right corner. PolyGrade first asks the user to save any unsaved changes, then the Edit Students window then closes.
Upon clicking the OK button or the Close button in the upper right corner, the user is brought back to the main gradesheet page. All options on this page are described in the gradesheet scenarios.
Prev: add-students-roster
| Next: add-students-manual
| Up: managing-students
| Top: index