This scenario shows an individual user deleting students from their class roster. The user should be allowed freedom in deleting students in their class roster manually and not have to wait for an updated SIS roster to delete the students for them. In this scenario, we assume that the user has already added an SIS roster full of students to their class roster, with or without synchronization, and added one new student, as described in the previous scenario about adding students manually.
To begin the process of deleting students, the user selects the Student Roster item in
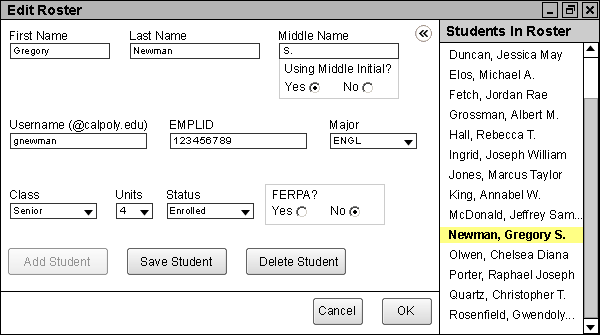
the Edit menu as shown in the toolbar, causing the Edit Roster window to appear. The user then selects a student for deletion, as shown in Figure 28 below.
Figure 28: The Edit Roster window, with a user selected for deletion.
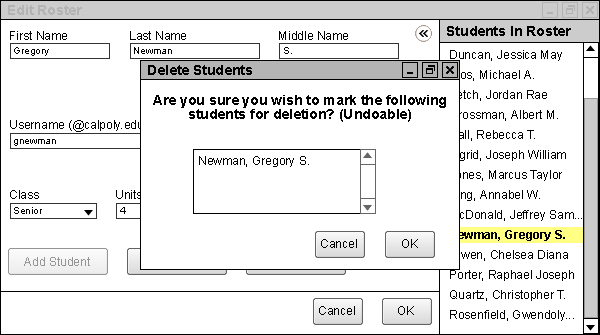
Figure 29: The Delete Students window pops up over the Edit Roster window for deletion confirmation.
In the Delete Students window, the user has two options. If the user clicks Cancel, the deletion will not take place, and the user will be returned to the Edit Roster window. If the use clicks OK, the user is brought back to the Edit Roster window, and the selected student's name will turn red in the Students In Roster inset window as shown in Figure 30 below.
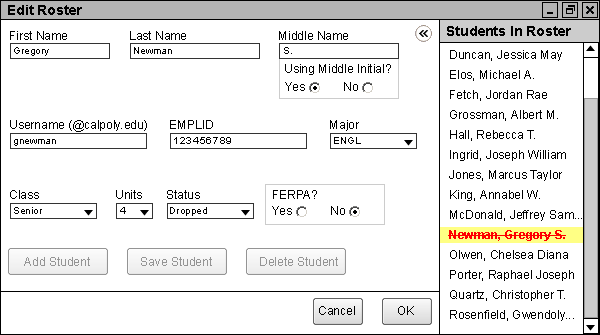
Figure 30: The Edit Roster window, after the user makes a pending change to a student's data and clicking the Save Student button.
Note that the newly deleted student's Status in the main window has changed to Dropped.
If the user wishes to remove multiple students at once, they may do so in two ways. If the user holds the CTRL key on their keyboard, clicking on a student will select a student if they are not yet selected and deselect a student if they are already selected. In doing so, the user can select any number of students for deletion and then delete them, as shown in Figure 31 and Figure 32 below.
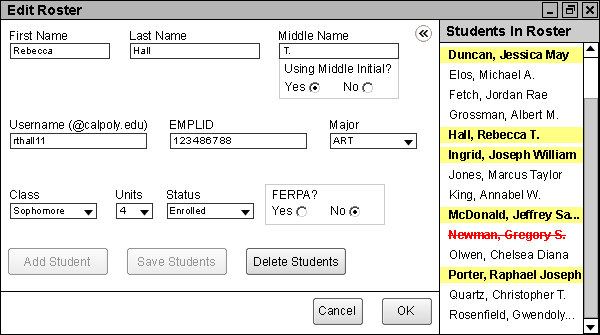
Figure 31: Holding CTRL, the user may select or deselect any number of students to delete.
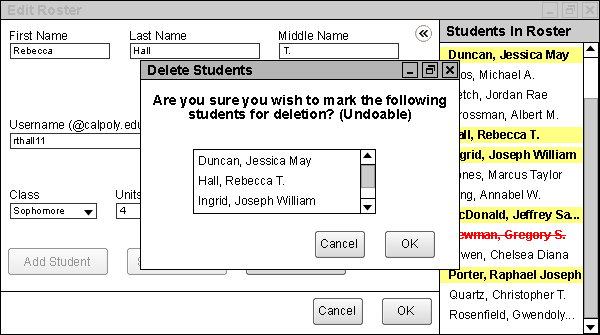
Figure 32: Verifying that the user does indeed wish to delete the selected students.
The other way is to hold the SHIFT key on their keyboard and select a deselected student in the Students In Roster subwindow. All students between the most recently selected student and the newly selected student will be selected. The deletion process for this method is the same as for the CTRL method, so it is not explicitly shown here.
Note that using either selection method, the Delete Student button text changes to Delete Students and that only the initially selected student's data is shown in the Edit Roster window entry fields. Also, note the text change on the Save Student button to Save Students; however, in these examples, no student data has been modified, thus the Save Students button is not clickable. Students may be edited and saved the same way they may be selected and deleted: in batches, not necessarily one at a time. Finally, note that the two selection methods may be used together, although selection behavior with the SHIFT key may be unwanted in this case.
If the user wishes to cancel any pending deletions in this scenario, the user clicks the Cancel button or the Close button in the upper-right corner. PolyGrade prompts the user to save any changes made if the user has made changes to the original roster, and then the Edit Roster window closes.
The user is then brought back to the main gradesheet page. All options on this page are described in the gradesheet usage scenarios.