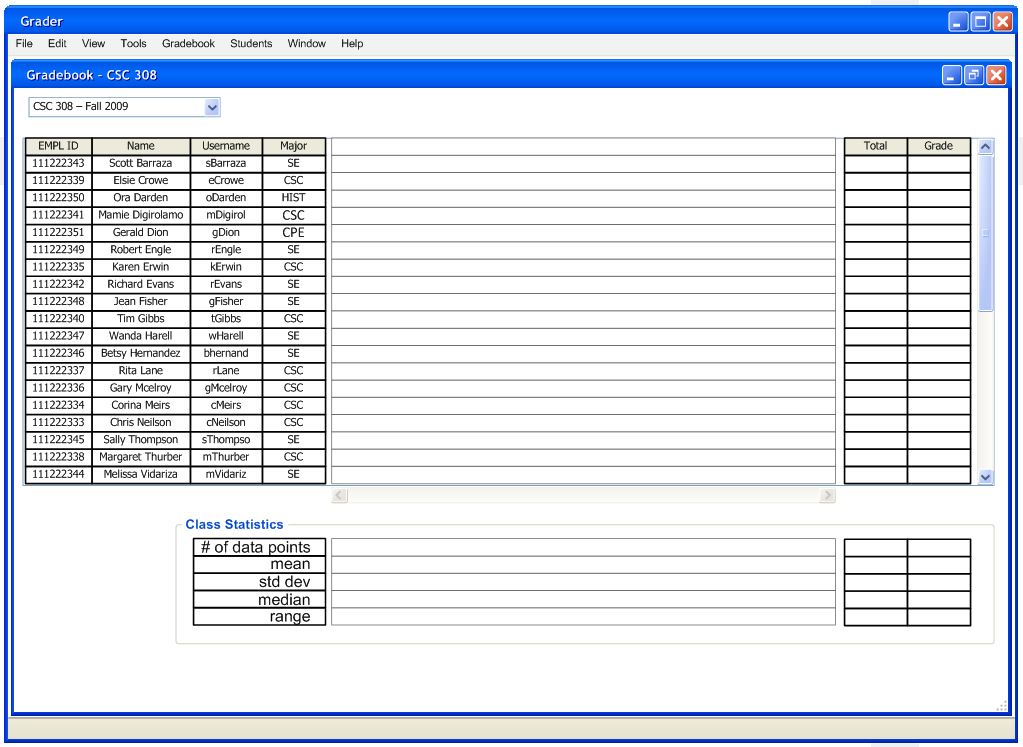
When the instructor opens the gradebook, the Grader displays an empty window with no categories or items, as shown in Figure 2.4.1.1.
Figure 2.4.1.1: Empty
To add a category to the gradebook, the user clicks the Category & Item Manager menu command under Gradebook. In response, the application displays a category and item manager window. The first time the manager window opens, it is empty, as shown in Figure 2.4.1.2.
![]()
Figure 2.4.1.2: Opening the Manager
After the manager opens, the user clicks the "New Category" button, and the Grader responds by displaying the window in Figure 2.4.1.3.
![]()
Figure 2.4.1.3: Adding a New Category
In this window, the instructor fills in multiple data fields as required.
The Name field is a character string.
The Description field is a "long" string that describes what this category is in more detail than the name can provide.
The "Grade By" area contains defaults for all items within this category. There are three grading styles available: Points, Mark, and Completion. If the user selects Points, the Points Possible box is enabled, allowing the instructor to set a default number of points for all items within this category. If the user selects Mark, the Mark Set field is enabled, allowing the instructor to use "marks" to grade this assignment. The marks in this list come from the "Grading Scheme" table (see section 2.4.7). If the user selects Completion, each assignment will be graded as complete or incomplete (100% or 0%). The Points Possible box is disabled if the user selects Mark or Completion, and the Mark Set box is disabled if the user selects Points or Completion.
The instructor uses the "Use Late Penalties" checkbox to set the default late penalty for all items within this category. If the user checks the box, all fields within this area are enabled. If the user unchecks the box, all fields are disabled. The first field, %, is a numeric value from 0 to 100. This is the percentage deducted from a student's score for a given time period. The second box is used to choose that time period. It contains a dropdown menu with two different intervals of time; day and hour. For example, "Decay 10% per Day", would deduct 10% of the student's score for each day they were late turning in an item. Additionally, there is a checkbox with the option to calculate these values continuously. For example, if the user selects the Calculate Continuously box and "day", and if the student was 1.5 days late, the student would lose 15% rather than the full 20% -- a "continuous" deduction.
Figure 2.4.1.4 shows this form filled in with sample data.
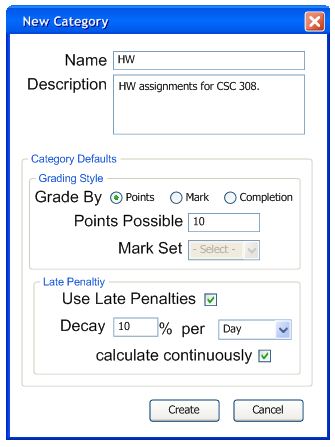
Figure 2.4.1.4: Adding a New Category (Filled)
After the data for the category are entered, the user clicks the Create button to add the category to the gradebook. Optionally, if the user no longer wants to create a category, the user clicks the Cancel button and the window disappears without creating a category.
When the instructor clicks the Create button, the "Add a Category" window closes, and the Grader displays the Category & Item Manager with this new entry, as seen in Figure 2.4.1.5.
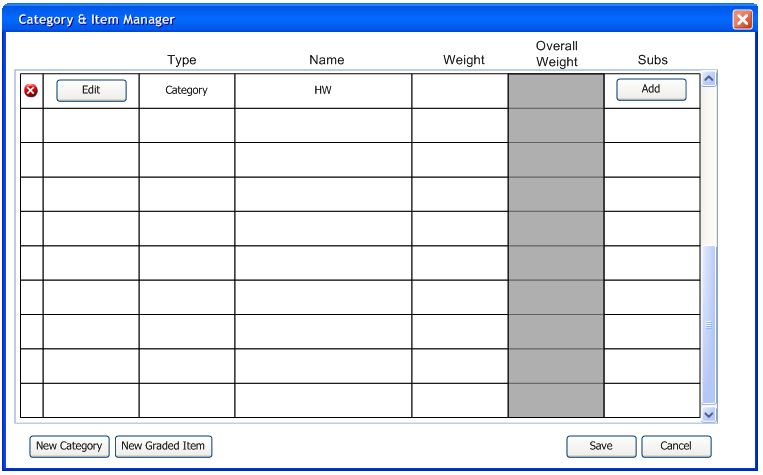
Figure 2.4.1.5: Manager With New Category
The instructor may add multiple categories as shown above. After the instructor adds multiple categories, the Category & Item Manager may have multiple entries, similar to Figure 2.4.1.6.
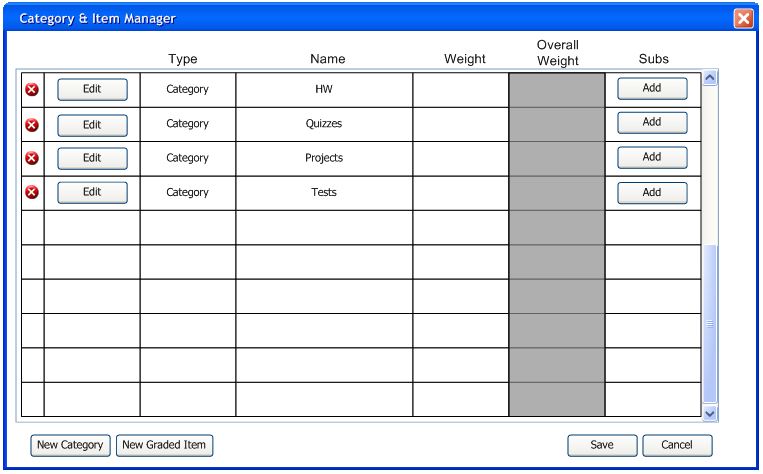
Figure 2.4.1.6: Manager With Multiple Categories
After the instructor adds all categories, the instructor must adjust all weights before saving. To adjust weights, please see Section 2.4.3 - Modifying Category and Item Weights.
After modifying weights, the instructor clicks "save" and is returned to the main gradebook window which includes all new categories, as shown in Figure 2.4.1.7.
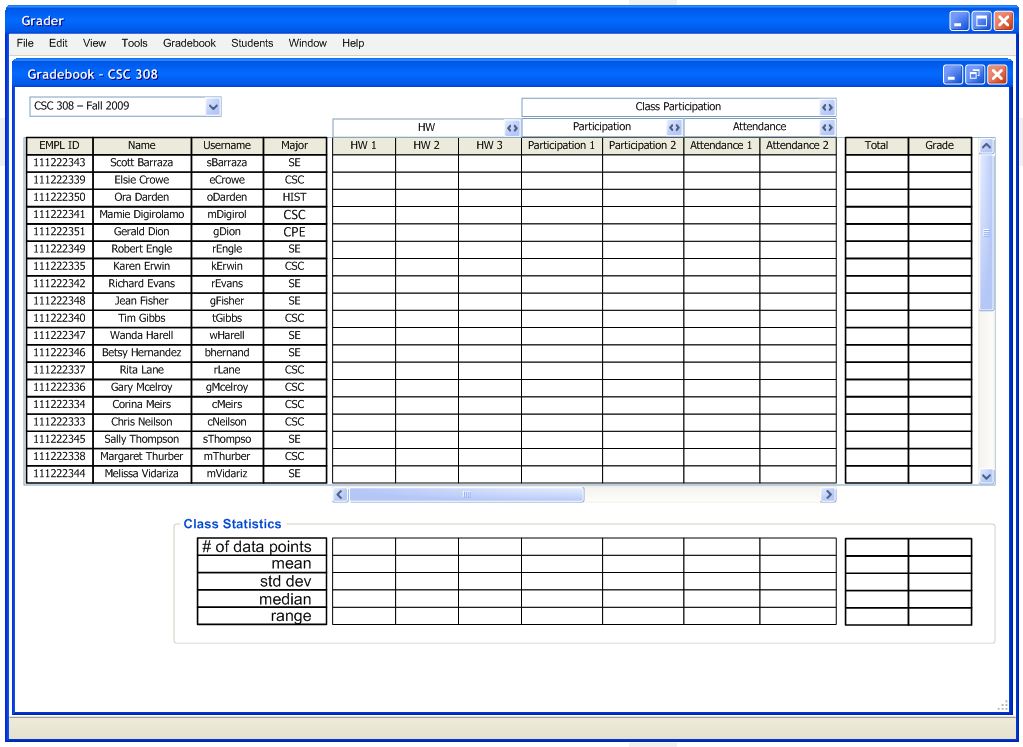
Figure 2.4.1.7: Gradebook With Categories