The project uses to 2 Course databases. There is a database of all the courses the department has offered and there is a database for the courses that are going to be offered in this particular quarter.
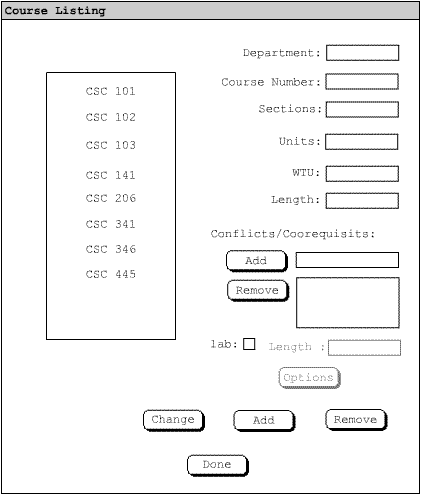
The user is able to add a new course to the Permanent Course Database by selecting 'Databases->Course'. The system will then respond by bringing up the Permanent Course Entry Dialog as shown in Figure 1.

Figure 1 Permanent Course Database Entry Dialog
The course number field is an integer or the letter x followed by an integer. The Sections field is an integer corresponding to the number of sections. The Size field is an integer representing the number of students allowed in the class. The Units field is an integer for the number of units for the class. The WTU is an integer representing the amount of WTU the professors get for teaching the class. The length fields will take two integers one in the hour field and one in the minute field corresponding to the length of the class. Not including lab. The user then adds the course CSC 205 with 3 sections, 4 units and Instructor WTU, 3 hours in length.
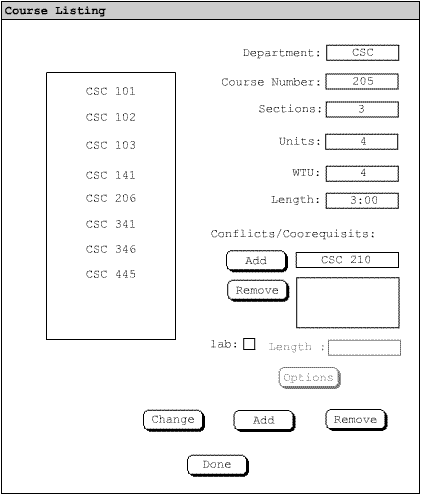
Figure 2 Permanent Course Database Dialog Partially Filled
The Conflicts/Co-requisits field is for entering the course numbers of the classes you would rather not have scheduled at the same time. For example csc 102 and 114 are co-requisits and would preferably not be scheduled at the same time. This process is accomplished by entering the course number in the field then pressing the Add button. The requirement for this field is the course must be previously entered in the course field on the left of the screen. In this scenario the user enters CSC 210 as a course that is not to be scheduled at the same time. The user presses the Add button and the system responds by adding the conflicting course to the list.
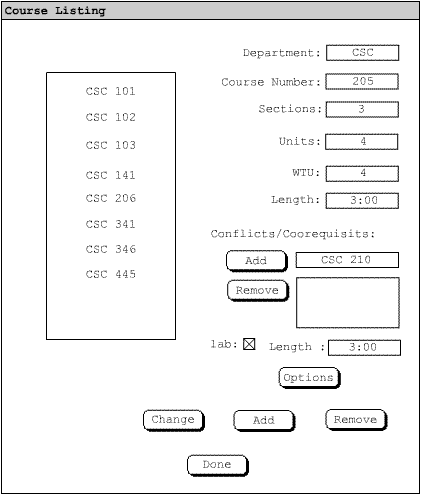
Figure 3 Permanent Course Database Dialog Filled
The Lab check box will be checked if there is an associated lab with the class then the Length text field and Options button become active. The Length field will take a time according. The user presses the Options button the system responds by opening the Course Listing Options dialog box. In this scenario the user adds a Lab requirement for the course and specifies the length to be 3 hours.
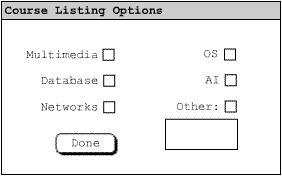
Figure 4 Course Database Options Dialog
All of these checkboxes correspond to software or hardware that must be in this particular lab. For example if the lab needs to be equipped for multimedia presentations the Multimedia button must be checked. The scheduler will then only put the lab into a room that a capacity for a multimedia presentation. In this scenario the user selects this lab to require the ability to show multimedia presentations.
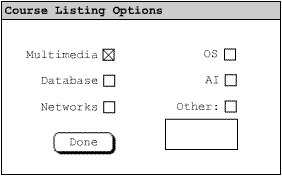
Figure 5 Course Database Options Dialog Filled
When the user presses the "Done" Button the system responds by bringing the user back to the previous dialog. The User then presses the "Add" button on the bottom of the screen and the system responds by adding the course to the list on the left and the Permanent Course Database as shown in Figure 6.
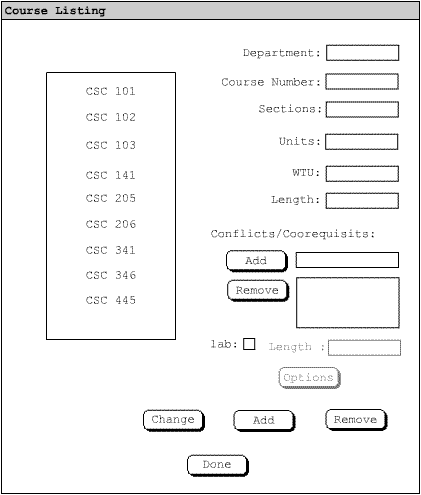
Figure 6 Course Database Options Dialog Added
To enter a new Course for the quarter the user selects 'Project->Courses '. The system responds by bringing up the Local Course Listing Dialog as shown in Figure 7. This dialog is identical to the Permanent Course Listing Dialog with the exception of the check box to determine if the course is in use for the current quarter. All the same operations apply so refer to the Permanent Course Database for information on adding, changing, and removing courses.
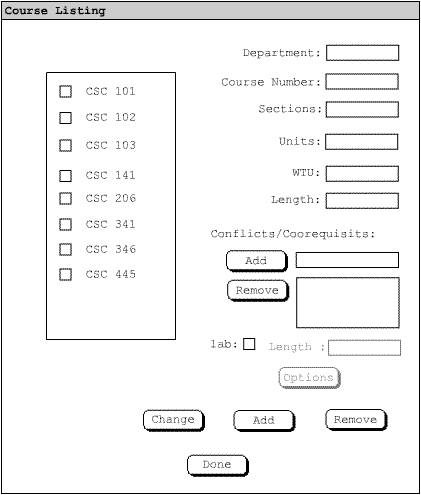
Figure 7 Local Course Listing Dialog